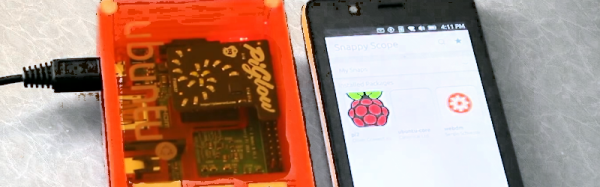
[Naran] was intrigued with the Amazon Echo’s ability to control home electronics, but decided to roll his own. By using a Raspberry Pi with the beta Prota OS, he managed to control some Phillips Hue bulbs and a homebrew smart outlet.
Prota has a speech application, which made the job simpler. He does point out though, that his project doesn’t replace the Echo’s ability to answer questions by searching the Internet. The advantage, though, is it is easily tailored to your specific application. Also, if you have a Raspberry Pi hanging around, you can’t beat the price. Continue reading “Voice Command With No Echo”→
Although it isn’t official, Ubuntu Core–the tiny Internet of Things version of Ubuntu–now runs on the Raspberry Pi 2. There are prebuilt binaries as well as instructions for how to roll your own, if you prefer. You can even access GPIO
Ubuntu Core abandons the old-style Debian packages, in favor of Snap, a new version of the Ubuntu phone’s Click package manager. Snap offers transactional updates. The idea is that all of these “things” on the IoT need to be updated to patch security holes or fix other issues.
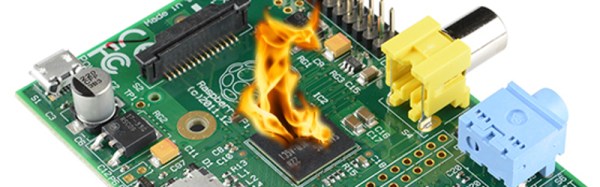
As far back as we can remember, there have always been hacks, exploits, and just curiosity about undocumented CPU instructions. The Z80 had them. Even the HP41C calculator had some undocumented codes. The HCF (Halt and Catch Fire) instruction was apocryphal, but we always heard the old video controller chips could be coaxed into blowing up certain monitors. You don’t hear too much about things like that lately, perhaps because fewer people are working in assembly language.
[Sergi Àlvarez i Capilla] not only works in assembly language, he was writing an ARM assembler when he noticed something funny. Instructions are built in a regular pattern and some of the patterns were missing. What to do? [Sergi] lost no time trying them out.
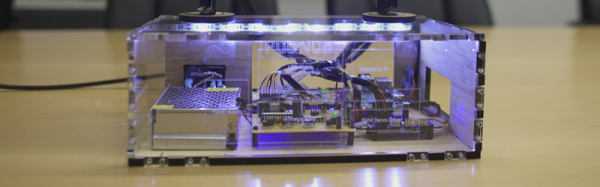
The Leap controller is one of those gadgets that is probably better for its cool factor rather than its practicality. The time of flight optical sensor reads gestures, but it is hardly a substitute for a mouse in many cases. It seems like the best uses for it we’ve seen are dedicated systems that need to know where your hands are. [Justin Platz] and [Kurt Clothier], for example, have an interesting demo that uses a Leap to control a Raspberry Pi. The Pi commands servo motors that move LED blocks to track your hand motion. Their code is available on GitHub.
Dogs are remarkable creatures. Anybody who has lived with one will know that they are very vocal beasts, with barks that range from noting the presence of a squirrel in the yard to the warning whine that says “I am about to pee on your shoes if you don’t take me outside.” [Henry Conklin] decided to computerize the analysis of these noises, putting his dog [Oliver Twitch] on Twitter so he could hear what he was saying while he was at work. [Henry] that is: [Oliver] stays at home.
He did this using a Raspberry Pi, which is set to record sound above a certain volume. With the system sitting by [Oliver’s] favorite window, this records his barks. The recordings are then analyzed using PyAudioAnalysis, a library that analyzes sounds, compares them to reference ones and classifies them. The Raspberry Pi then posts the results onto twitter using Python-twitter.
The setup used by [Oliver] to capture the barks: a USB microphone, Raspberry Pi and WiFi USB dongle.Or rather, it will when [Henry] fixes a few bugs: right now it just posts a random string that is based on the length of the bark, not the type. [Henry] says he is working on the dog translation at the moment. It’s still a neat project that shows you how simple it is to use a few small bits of code to gather info from your environment and share these over the Internet. [Henry] also says that the next step is creating a weekly podcast for [Oliver]. I, for one, will be subscribing to hear his thoughts on how annoying the postman is, and how vexing it is to see a squirrel and not be able to chase them.
[David Schneider] had trouble seeing his bike computer in the sunlight and wanted a navigation solution that would be both readable and not require a smart phone. In good hacker fashion, [David] married a Raspberry Pi and a Kindle Touch (the kind with the E-ink display). The Kindle provides a large and easy-to-read display.
[David] was worried about violating the DCMA by modifying the Kindle. Turns out, he didn’t have to. He simply used the book reader’s Web browser and set the Pi up as a wireless access point. One clever wrinkle: Apparently, the Kindle tries to phone home to Amazon when it connects to a wireless network. If it can’t find Amazon, it assumes there’s no valid network and treats the network as invalid. To solve this issue, [David] causes the Pi to spoof the Kindle into thinking it gets a valid response from Amazon.
The other work around was to change how the Python application on the Pi updates the screen. [David] found that without that optimization, the constant redrawing on the E-ink display was annoying. The Pi-related hardware includes a GPS, some reed switches, and a WiFi dongle.
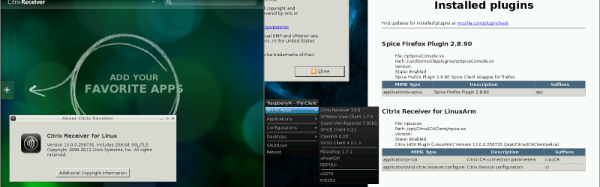
It is funny how many times you use your full-blown PC as a terminal to another computer (which is quite often not as capable as the terminal computer). If all you need is a remote display and keyboard, a Raspberry PI would be enough. One of the newer Pi 2 boards would be even better.
You could roll your own set of remote access software, but you don’t have to. [Gibbio] has already created a thin client image called RPiTC and recently released version 1.4. The build supports diverse remote protocols including Microsoft Remote Desktop, Citrix, VMWare, and even X3270.
It supports WiFi and VPN. We were a little disappointed that it didn’t seem to have any serial communication programs (in case we wanted to build one into an old TeleType case). Of course, it is just a Linux system so you can install anything you want or need.


![The setup used by [Oliver] to capture the barks: a USB microphone, Raspberry Pi and WiFi USB dongle.](https://hackaday.com/wp-content/uploads/2015/08/bark-details.jpg)