magicBlueSmoke-piStick-featured

How Do You Make A Raspberry Pi On A Stick?

We agree with [magic-blue-smoke] that one of the only things more fun than a standard Raspberry Pi 4 is the Compute Module form factor. If they are not destined to be embedded in a system, these need a breakout board to be useful. Each can be customized with a myriad board shapes and ports, and that’s where the real fun starts. We’ve already seen projects that include custom carrier boards in everything from a 3D Printer to a NAS and one that shows we can build a single-sided board at home complete with high-speed ports.

[magic blue smoke] used this ability to customize the breakout board as an opportunity to create a hackable media player “stick” with the Raspberry Pi built-in. We love that this Raspberry Pi CM4 TV Stick eliminates all the adapters and cables usually required to connect a Pi’s fiddly micro HDMI ports to a display and has heat sinks and an IR receiver to boot. Like a consumer media player HDMI stick, all you need to add is power. Continue reading “How Do You Make A Raspberry Pi On A Stick?”

Dedicated box to play new videos from a handful of content creators.

Dedicated Box Makes YouTube More TV-Like

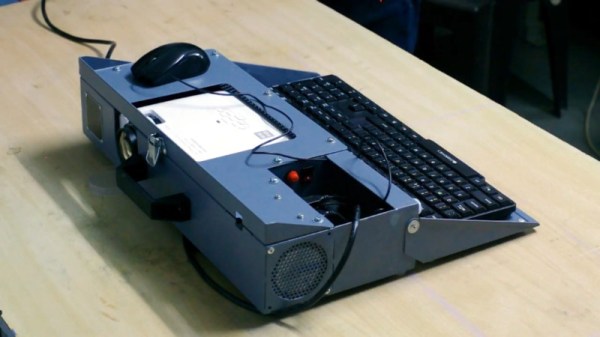
[Exposed Wire] is a huge fan of YouTube and consumes a lot of content. If that sounds familiar, maybe you should build a dedicated YouTube box, too. You get to push buttons, there’s LEDs, and you can take a break from other screens to look at this one for a while. [Exposed Wire] wanted to make it easier to watch the latest videos from their favorite creators, but we would argue that this is more fun, too.

The Rasberry Pi 4 inside checks every five minutes for new videos by keeping track of the creator’s total number of videos in a text file and doing a comparison. If one of the channels has a new video, then the corresponding LED lights up and the new video’s URL is linked to the button. Press the button and the Raspi opens the browser, goes the the URL, maximizes the video, turns off the LED, and updates the video count in the text file.

We like the construction job here. The 1/4″ MDF walls are connected by 3D-printed L-brackets in PETG. At first, [Exposed Wire] mounted the LEDs and buttons to a PCB, but that was really fiddly so they printed panels instead. Combined with the bracket around the screen, the finished build looks good. Check out the build montage after the break.

Regular old YouTube videos not doing it for you anymore? Try watching them at low resolution on an LED matrix.

Continue reading “Dedicated Box Makes YouTube More TV-Like”

Raspberry Pi Powered Standing Desk Rises To New Heights

Like many office workers, [David Kong] found himself the lucky recipient of a motorized sit-stand desk. Also like most office workers with such a desk, he found himself mostly sitting. Reminders on his phone did little to change habits and [David] resolved to automate his desk to rise on a schedule.

the control board for a poppin sit stand desk

Taking off the front panel of the control box required a few screws and [David] was delighted to find some testing pins right on the PCB.By connecting the right pins together, he could simulate any button being pressed. A Toshiba TLP222A solid-state relay made it simple to connect the pins together, the next step was triggering the relay on some sort of timer.

Speaking of timers, the oft-lauded 555 timer was considered. However, the length of time desired wasn’t as well suited for the 555, and the appeal of just tweaking a file to adjust the interval was tempting. Going to the other end of the spectrum, [David] had a Raspberry Pi zero laying around he had been meaning to play with.

After soldering the relay to pin 17 and writing a quick 10 line python script that is executed on startup, [David] had a working solution that could be taped to the underside of the desk, out of sight. Rather than being on a fixed timer, the desk raises every 45 to 60 minutes. The impact on his life has been wonderful, which was the goal of this particular project. It’s been a few months and he hasn’t had to tweak or fix anything. Is a whole 64-bit multicore processor a bit of an overkill for toggling a pin every hour or so? Yes. But we can’t really fault him for reaching for what was already lying around. The results speak for themselves.

Perhaps this would be something you would incorporate when you’re building your own standing desk?

Raspberry Pi Real-Time HAT

New Part Day: Raspberry Pi HAT For IEEE1588 Precision Time Protocol

The new Real-Time HAT by InnoRoute adds IEEE1588 PTP support in hardware to a Raspberry Pi 4 nestled beneath. Based around a Xilinx Artix-7 FPGA and a handful of gigabit Ethernet PHY devices, the HAT acts as network-passthrough, adding accurate time-stamps to egress (outgoing) packets and stripping time-stamps from the ingress (incoming) side.

This hardware time-stamping involves re-writing Ethernet packets on-the-fly using specialised network hardware which the Raspberry Pi does not have. Yes, there are software-only 1588 stacks, but they can only get down to 10s of microsecond resolutions, unlike a hardware approach which can get down to 10s of nanoseconds.

1588 is used heavily for applications such as telecoms infrastructure, factory equipment control and anything requiring synchronisation of data-consuming or data-producing devices. CERN makes very heavy use of 1588 for its enormous arrays of sensors and control equipment, for all the LHC experiments. This is the WhiteRabbit System, presumably named after the time-obsessed white rabbit of Alice In Wonderland fame. So, if you have a large installation and a need for precisely controlling when stuff happens across it, this may be just the thing you’re looking for.

IEEE1588 PTP Synchronisation

The PTP client and master device ping a few messages back and forth between themselves, with the network time-stamper recording the precise moment a packet crosses the interface. These time-stamps are recorded with the local clock. This is important. From these measurements, the time-of-flight of the packet and offset of the local clock from the remote clock may be calculated and corrected for. In this way each client node (the hat) in the network will have the same idea of current time, and hence all network packets flowing through the whole network can be synchronised.

The beauty of the system is that the network switches, wiring and all that common infrastructure don’t need to speak 1588 nor have any other special features, they just need to pass along the packets, ideally with a consistent delay.

The Real-Time HAT configures its FPGA via SPI, straight from Raspberry Pi OS, with multiple applications possible, just by a change on the command line. It is possible to upload custom bitstreams, allowing the HAT to be used as a general purpose FPGA dev board should you wish to do so. It even stacks with the official PoE HAT, which makes it even more useful for hanging sensors on the end of a single wire.

Of course, if your needs are somewhat simpler and smaller in scale than a Swiss city, you could just hack a GPS clock source into a Raspberry Pi with a little soldering and call it a day.

SBITX: Hackable HF SDR For The Raspberry Pi

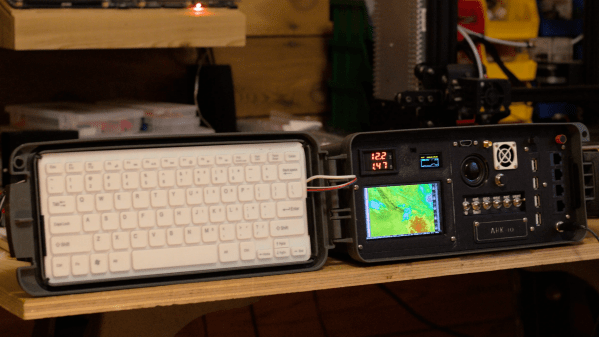
Cheap, easy to use SDR dongles are an immensely powerful tool for learning about radio technology. However, building your own SDR is not something too many hackers are confident to tackle. [Ashhar Farhan, VU2ESE] hopes to change this with the sBITX, a hackable HF SDR transceiver designed around the Raspberry Pi.

[Ashhar] introduced the project in talk at the virtual “Four Days In May” annual conference of the QRP Amateur Radio Club International. Watch the full talk in the video after the break. He first goes over the available open source SDR radios, and then delves into his design decisions for the sBITX. One of the primary goals of the project was to lower the barrier of entry. To do this, he chose the Raspberry Pi as base, and wrote C code that that anyone who has done a bit of Arduino programming should be able to understand and modify. The hardware is designed to be as simple as possible. On the receive side, a simple superheterodyne architecture is used to feed a 25 kHz wide slice of RF spectrum to an audio codec, which send the digitized audio to the Raspberry Pi. The signal is then demodulated in software using FFT. For transmit, the signal is generated in software, and then upconverted to the desired RF frequency. [Ashhar] also created a GUI for the 7″ Raspberry Pi screen.

At the moment the sBITX is still in the development stage, information is spread between the video after the break, it’s accompanying PDF, the GitHub repo, and a thread on the BITX20 group.

[Ashar Farhan] is well known in the ham radio community for low cost radio designs like the BITX, and it’s successor, the μBITX. He also created the Antuino, an Arduino based antenna tester. Continue reading “SBITX: Hackable HF SDR For The Raspberry Pi”

Raspberry Pi Crammed Into Old Film Camera

If you wanted an expensive film camera when you were a kid, you are in luck. Used film SLRs are super cheap now that everyone wants digital cameras. Of course, in reality, you want a digital camera, too. So do what [befinitiv] did. Make a film cartridge out of a Raspberry Pi that can convert your camera to digital. (Video, embedded below.)

In theory, this sounds like a genius idea. The practical aspect isn’t perfect, though. For one thing, the small image sensor used means that the camera is zoomed in quite a bit. Also, the shutter button isn’t integrated, so the shutter is open all the time. You may think that doesn’t matter, but don’t forget that the way an SLR works means if the shutter is open, there’s no viewfinder.

Continue reading “Raspberry Pi Crammed Into Old Film Camera”

New Video Series: Raspberry Pi Pico And RP2040 Deep Dive With Uri Shaked

In case you’ve been living under a rock that doesn’t have internet access, the Raspberry Pi Foundation got into the silicon sales and microcontroller game all at once this year with the Raspberry Pi Pico. It’s small, it’s capable, and it costs a measly $4. Surely you have one or two of them by now, right? But how much do you know about what it can do?

Or maybe you don’t have one yet, but it’s on your list. In either case, you can get started learning about them right away because [Uri Shaked]’s Raspberry Pi Pico and RP2040 Deep Dive course has recently been freed from the hallowed halls of HackadayU. He even built an emulator to go with it. [Uri] is a great instructor, and we’re sure that goes double if you ever need a salsa dance teacher, which he has also mastered.

This class was held for five weeks beginning in May 2021, with each session being roughly an hour long. The only prerequisite is a basic understanding of bitwise math, but there are resources for that on the class IO page linked above.

Each class is incredibly well-organized and informative. In the first class, [Uri] begins building a living document that includes the class agenda, links to all resources used and mentioned, code examples, and assembly instructions where applicable. It’s basically a syllabus plus a whole lot more. [Uri] also spends a lot of time in the incredibly thorough 649-page data sheet for the RP2040, and a little bit of time in the much shorter Getting Started guide. If you think the data sheet is inaccessible, you’ll likely change your tune by the end of the first class after you’ve seen [Uri] use and peruse it.

Continue reading “New Video Series: Raspberry Pi Pico And RP2040 Deep Dive With Uri Shaked”