PCB rework for the purpose of fixing unfortunate design problems tends to involve certain things: thin wires (probably blue) to taped or glued down components, and maybe some areas of scraped-off soldermask. What are not usually involved are flexible PCBs, but [Paul Bryson] shows us exactly how flex PCBs can be used to pull off tricky rework tasks.
 It all started when [Paul] had a run of expensive PCBs with a repeated error; a design mistake that occurred in several places in the board. Fixing with a bunch of flying wires leading to some glued-on components just wasn’t his idea of tidy. A more attractive fix would be to make a small PCB that could be soldered in place of several of the ICs on the board, but this idea had a few problems: the space available into which to cram a fix wasn’t always the same, and the footprints of the ICs to be replaced were too small to accommodate a PCB with castellated mounting holes as pads anyway.
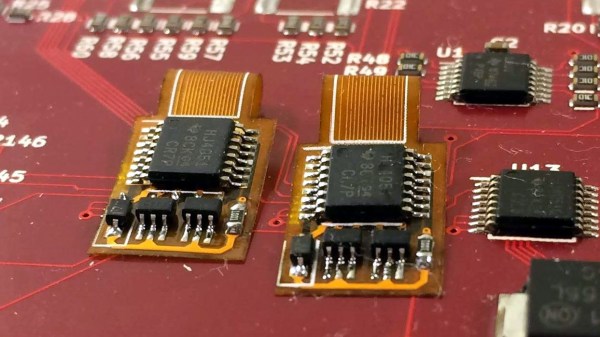
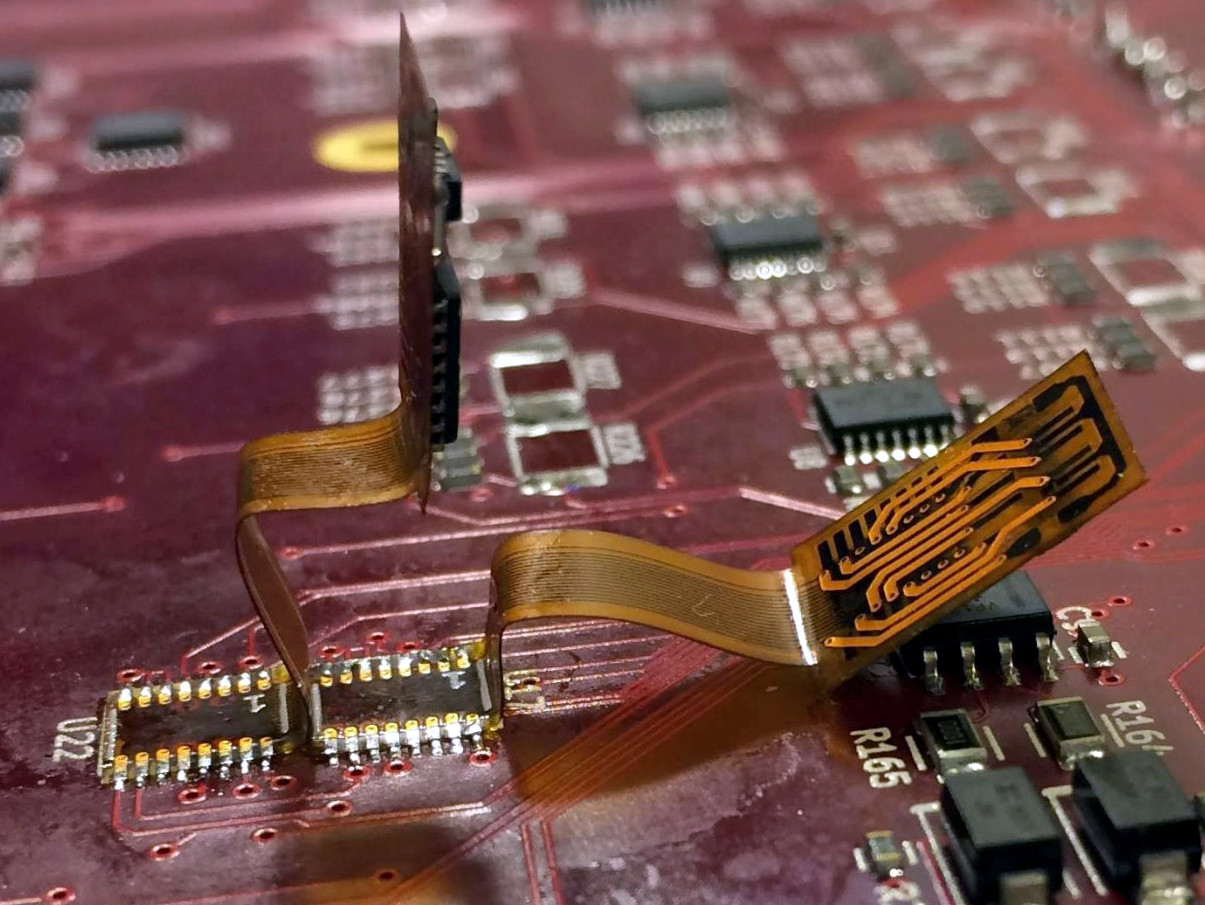
It’s about then that he got a visit from the Good Idea Fairy, recalling that fab houses have recently offered “flex” PCBs at a reasonable cost. By mounting the replacement parts on a flex PCB, the board-level connection could reside on the other end of an extension. Solder one end directly to the board, and the whole flexible thing could be bent around or under on a case-by-case basis, and secured in whatever way made sense. Soldering the pads of the flex board to the pads on the PCB was a bit tricky, but easy enough to pull off reliably with a bit of practice. A bonus was that the flex PCB is transparent, so solder bridges are easy to spot. He even mocked up a solution for QFP packages that allows easy pin access.
Flex PCBs being available to hobbyists and individuals brings out fresh ideas and new twists on old ones, which is why we held a Flexible PCB Design Contest earlier this year. Repairs were definitely represented as applications, but not to the extent that [Paul] has shown. Nice work!