Damaged Power Cord Repaired With Shop-Made Mold

We’ve likely all seen a power tool with a less-than-functional strain relief at one end of the power cord or the other. Fixing the plug end is easy, but at the tool end things are a little harder and often not worth the effort compared to the price of just replacing the tool. There’s no obsolescence like built-in obsolescence.

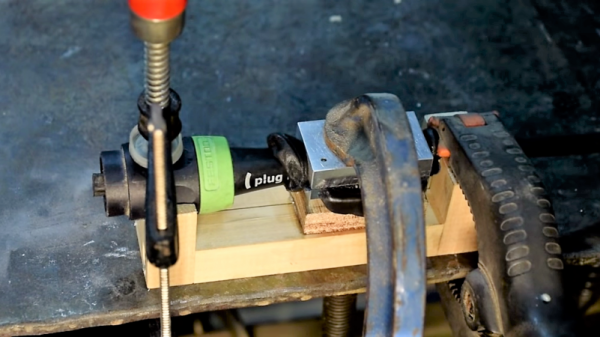
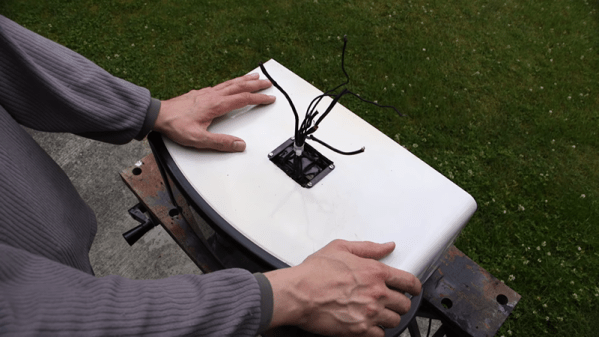
But in the land of Festo, that high-quality but exorbitantly priced brand of premium tools, the normal cost-benefit relationship of repairs is skewed. That’s what led [Mark Presling] to custom mold a new strain relief for a broken Festool cord. The dodgy tool is an orbital sander with Festool’s interchangeable “Plug It” type power cord, which could have been replaced for the princely sum of $65. Rather than suffer that disgrace, [Mark] built a mold for a new strain relief from two pieces of aluminum. The mold fits around the cord once it has been slathered with Sugru, a moldable adhesive compound. The video below shows the mold build, which has some interesting tips for the lathe, and the molding process itself. The Sugru was a little touchy about curing, but in the end the new strain relief looks almost like an original part.

Hats off to [Presser] for not taking the easy way out, and for showing off some techniques that could really help around the shop. We suppose the mold could have been 3D-printed rather than machined; after all, we’ve seen such molds before, and that 3D-printed dies can be robust enough to punch metal parts.

Continue reading “Damaged Power Cord Repaired With Shop-Made Mold”

A Stereo Tube Amp For Less Than $5

Many of us have aspirations of owning a tube amp. Regardless of the debate on whether or not tube audio is nicer to listen to, or even if you can hear the difference at all, they’re gorgeous to look at. However, the price of buying one to find out if it floats your boat is often too high to justify a purchase.

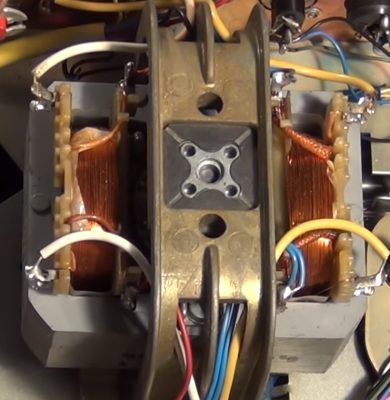
A motor transformer

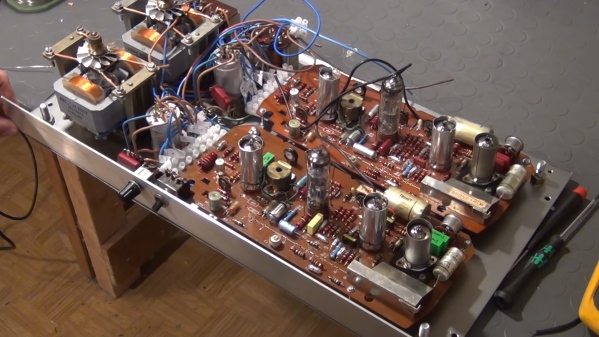
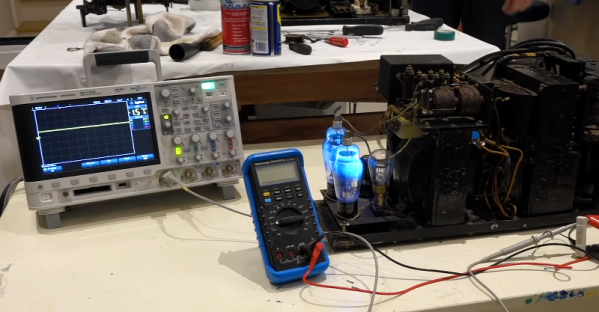
[The Post Apocalyptic Inventor] has built a stereo tube amplifier in the style of the Fallout video games. The idea came when he realised that the TK 125 tape recorder manufactured by Grundig was still using tube audio in the late 60s. What’s more, they frequently sell on eBay for 1-10€ in Germany. [TPAI] was able to salvage the main power amplifier from one of these models, and restore it so that it could be re-purposed and see use once more.

The teardown of the original cassette recorder yields some interesting parts. Firstly, an integrated motor transformer — an induction motor whose stator acts as the magnetic core of the transformer responsible for the tube electronics. There’s also an integrated capacitor which contains three separate electrolytics. The video after the break is well worth a watch (we always find [TPAI]’s videos entertaining).

A new chassis is created out of a steel base plate and aluminium angle, and some neat frames for the motor transformers are made from scrap copper wire bent and soldered together. It looks great, though there’s always the option to use a cake tin instead.

If you’re interested in the design of tube amps, we’ve covered heaps of cool builds: from this low-voltage design to this tiny guitar amp, or even ones using tubes which are flat.

Continue reading “A Stereo Tube Amp For Less Than $5”

Amiga Repairs Put One Tough Little Machine Back In Service

Returning a piece of retro hardware to factory condition is generally a labor of love for the restorationist. A repair, on the other hand, is more about getting a piece of equipment back into service. But the line between repair and restoration is sometimes a fine one, with the goals of one bleeding over into the other, like in this effort to save an otherwise like-new Amiga 2000 with a leaky backup battery.

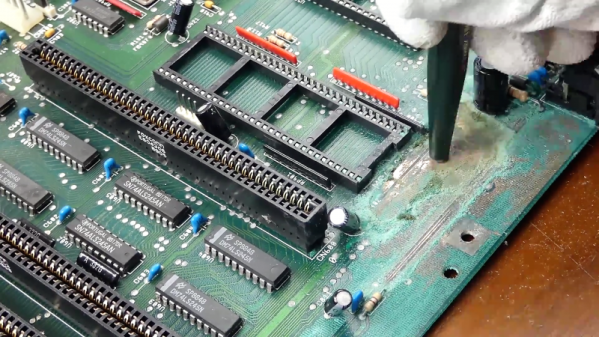
Having previously effected emergency repairs to staunch the flow of electrolyte from the old batteries and prevent further damage, [Retromat] entered the restoration phase of the project. The creeping ooze claimed several caps and the CPU socket as it spread across the PCB, but the main damage was to the solder resist film itself. In the video below you can clearly see flaky, bubbly areas in the mask where the schmoo did its damage.

Using a fiberglass eraser, some isopropyl alcohol, and far more patience than we have, [Retromat] was able to remove the damaged resist to reveal the true extent of the damage below. Thankfully, most of the traces were still intact; only a pair of lines under the CPU socket peeled off as he was removing it. After replacing them with fine pieces of wire, replacing the corroded caps and socket, and adding a coin-cell battery holder to replace the old battery, the exposed traces were coated with a varnish to protect them and the machine was almost as good as new.

Amigas were great machines in their day and launched more than one business. They’ve proved their staying power too, some even in mission-critical roles.

Continue reading “Amiga Repairs Put One Tough Little Machine Back In Service”

Repairing A Capacitor Inside A Potted Transformer

We always enjoy watching [Mr. Carlson’s] videos because he looks like he is taping in a rocket ship set from a 1950s drive-in movie. In a recent video, he identified an old oscilloscope that had a transformer assembly that is potted with a pair of capacitor inside. The capacitor failed so [Carlson] decided he would repair it. The problem? The transformer and capacitor are potted together with some sort of tar compound. You can see the result in the video below.

He actually didn’t know for sure the capacitor was really in the transformer, but they were in the schematic and by process of elimination, it had to be inside. Once he liberated the transformer, he did some tests to identify the capacitor before the depotting. The depotting takes a lot of heat and could damage the transformer, so he wanted to make sure it was really in there.

Continue reading “Repairing A Capacitor Inside A Potted Transformer”

Replace Old Electrolytics? Not So Fast… Maybe

[CuriousMarc] was restoring an old Model 19 TeleType. The design for these dates back to the 1930s, and they are built like tanks (well, except for the ones built during the war with parts using cheaper metals like zinc). Along the way, he restored a hefty tube-based power supply that had two very large electrolytic capacitors. These dated from the 1950s, and common wisdom says you should always replace old electrolytics because they don’t age well and could damage the assembly if powered up. [Marc] didn’t agree with common wisdom, and he made a video to defend his assertion which you can see below.

If you look at the construction of electrolytic capacitors, one plate of the capacitor is actually a thin layer that is formed electrically. In some cases, a capacitor with this plate is damaged can be reformed either by deliberate application of a constant current or possibly even just in normal operation.

Continue reading “Replace Old Electrolytics? Not So Fast… Maybe”

Incredible Atari 800XL Case Restoration

If you’ve been hanging around Hackaday for a while, you know that a large portion of the stuff we publish goes above and beyond what most people would consider a reasonable level of time and effort. One could argue that’s sort of the point: the easy way out is rarely the most exciting and interesting route you can take. We, and by extension our readers, are drawn to the projects that someone has really put their heart and soul into. If the person who created the thing wasn’t passionate about it, why should we be?

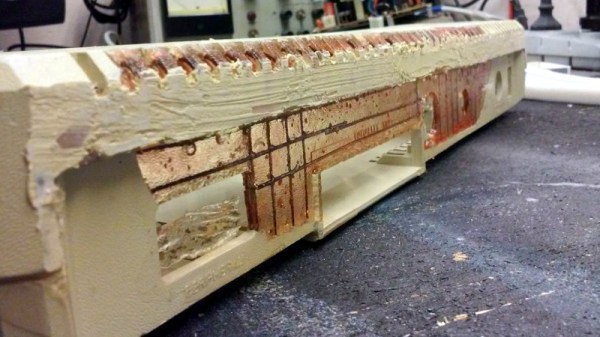
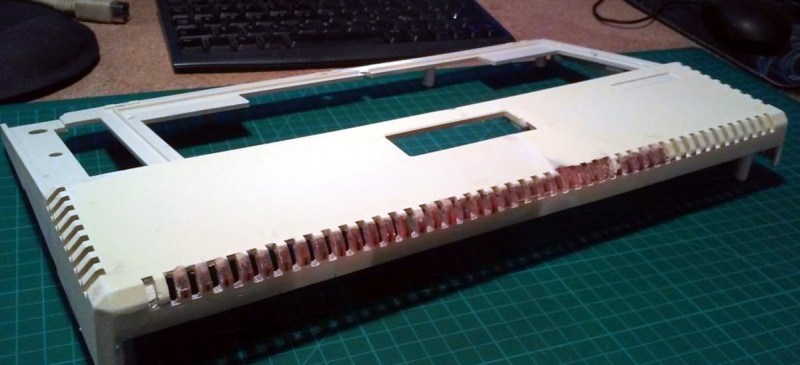
That being said, on occasion, even we are left in awe about the lengths some people will go to. A perfect example of this is the absolutely insane amount of time and effort [Drygol] has put into restoring an Atari 800XL that looked like it was run over by a truck. Through trial, error, and a bunch of polyester resin, he’s recreated whole sections of the Atari’s case that were missing.

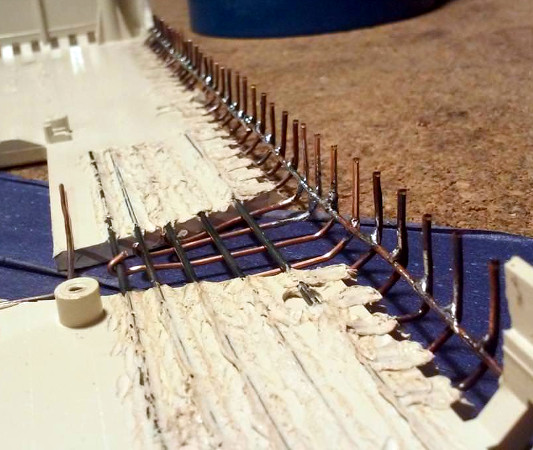
To start the process, [Drygol] used metal rods to bridge the areas where the plastic was completely gone. By heating the rods with a torch and pushing them into the Atari’s case, he was able to create a firm base to work from. Additional rods were then soldered to these and bent, recreating the shape of the original case. With the “skeleton” of the repair in palce, the next step was filling it in.

[Drygol] borrowed an intact Atari 800XL case from a friend, and used that to create a mold of the missing sections from his own case. Most of his rear panel was missing, so it took some experimentation to create such a large mold. In the end he used silicone and a custom built tray that the case could sit in vertically, but he does mention that he never quite solved the problem of degassing the silicone. The mold still worked, but bubbles caused imperfections which needed to be filled in manually during the finishing process.

Using his silicone mold and the same tray, he was then able to pour polyester resin over the wire frame. This got him most of the way to rebuilding the case, but there was still plenty of filler and sanding required before the surface finish started to look half-way decent. When he got towards the very end of the finishing process, he used a mold he created of the case surface texture to roughen up the smooth areas left over from the filling process. Add a bit of custom spray paint, and the end result looks absolutely phenomenal considering the condition it was in originally.

We were already impressed by the work he put in during the first stages of the restoration, but this case repair is really on a whole new level. Between this and the incredible instructional videos [Eric Strebel] has been putting out, we’re really gaining a whole new respect for the power of polyester.

Continue reading “Incredible Atari 800XL Case Restoration”

Mademoiselle Pinball Table Gets Rock ‘n Roll Makeover

Once upon a time, there was a music venue/artist collective/effects pedal company that helped redefine industry in Williamsburg, Brooklyn. That place was called Death By Audio. In 2014, it suffered a death by gentrification when Vice Media bought the building that DBA had worked so hard to transform. From the ashes rose the Death By Audio Arcade, which showcases DIY pinball cabinets made by indie artists.

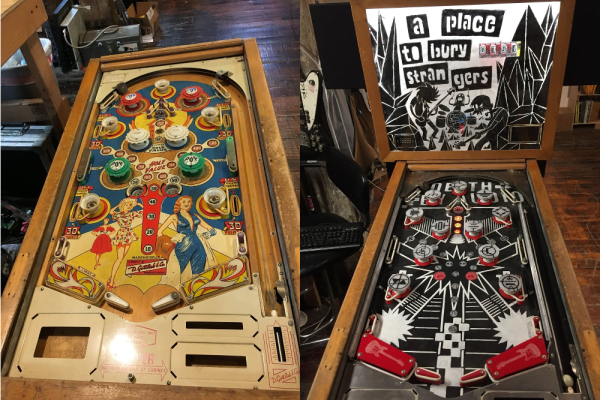
Their most recent creation is called A Place To Bury Strangers (APTBS). It’s built on a 1959 Gottlieb Mademoiselle table and themed around a local noise/shoegaze band of the same name that was deeply connected to Death By Audio. According to [Mark Kleeb], this table is an homage to APTBS’s whiz-bang pinball-like performance style of total sensory overload. Hardly a sense is spared when playing this table, which features strobe lights, black lights, video and audio clips of APTBS, and a fog machine. Yeah.

[Mark] picked up this project from a friend, who had already cut some wires and started hacking on it. Nearly every bit of the table’s guts had to be upgraded with OEM parts or else replaced entirely. Now there’s a Teensy running the bumpers, and another Teensy on the switches. An Arduino drives the NeoPixel strips that light up the playfield, and a second Uno displays the score on those sweet VFD tubes. All four micros are tied together with Python and a Raspi 3.

If you’re anywhere near NYC, you can play the glow-in-the-dark ball yourself on July 15th at Le Poisson Rouge. If not, don’t flip—just nudge that break to see her in action. Did we mention there’s a strobe light? Consider yourself warned.

Want to get into DIY pinball on a smaller scale? Build yourself a sandbox and start playing.

Continue reading “Mademoiselle Pinball Table Gets Rock ‘n Roll Makeover”