Modern In-Circuit Emulator For The 6809

The Motorola 6809, released in 1978, was the follow-up to their 6800 from four years earlier. It’s a powerful little chip with many 16-bit features, although it’s an 8-bit micro at heart. Despite its great improvements over the 6800, and even technical superiority over the Z80 and 6502 (hardware multiply, for example!), it never reached the same levels of success that those chips did. However, there are still some famous systems, such as the TRS-80 Colour Computer, which utilized the chip and are still being hacked on today. [Ted] is clearly a fan of the 6809, as he used a Teensy 4.1 to create a cycle-exact, drop-in 6809 emulator!

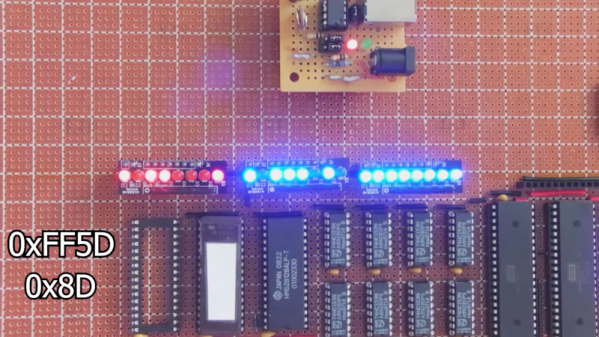
A small interposer board rearranges the Teensy pinout to match the 6809, as well as translating voltage levels from 3.3V to 5V. With careful design, the Teensy matches the cycle diagrams in the Motorola datasheet precisely, and so should be able to run any applications written for the chip! A great test was booting Extended Colour BASIC for the TRS-80 CoCo 2 and running some test BASIC programs. Any issues with opcode decoding or timing would certainly be exposed while running an interpreted language like BASIC. After this successful test, it was time to let the Teensy’s ARM Cortex-M7 rip and see what it could do.

Continue reading “Modern In-Circuit Emulator For The 6809”

Retro Calculator Panders To Trekkies… Or Trekkers

Back in 1976, when calculators were not common or cheap, a company named MEGO made the Star Trekulator: a calculator sporting a Star Trek theme. However, it was a bit odd since the calculator didn’t correspond to anything you ever saw on the TV show. It was essentially a very simple calculator with a Star Trek picture and some blinking LEDs. [Computer History Archives Project] has two examples of the rare calculator and shows them off, including the insides, in the video below. We’ve also included a vintage commercial for the device a little farther down.

Inside the 5-inch by 9.5-inch cabinet was an unremarkable printed circuit board. The main component was a TI calculator chip, but there were a surprising amount of other components, including three that [Computer History Archives Project] could not identify.

MEGO was known for making Star Trek toys, including a cassette player that (sorta) looked like a tricorder and communicator walkie-talkies. We wish they’d made the calculator look like some sort of prop from the show, although the beeping noises, we suppose, were supposed to sound like the Star Trek computers.

Honestly, we want to 3D print a case to replicate this with modern insides that can drive a display to put different Trek clips and sound effects out. Now, that would be something. Maybe [Michael Gardi] can take a look at it when he’s got a spare minute. If anything, the calculator looks too advanced to be on the original series. They should have gone VFD. Although Mr. Spock has been seen with a flight slide rule (an E6-B, if we recall). We prefer our props to look like the real ones, thank you.

Continue reading “Retro Calculator Panders To Trekkies… Or Trekkers”

A Look At The DEC VT220, A Proper Serial Terminal

If you’re reading Hackaday, we’re willing to bet that if somebody asked you about a serial terminal, you’d immediately think about a piece of software — a tool you run on the computer to communicate with some hardware gadget over UART. You might even have a favorite one, perhaps minicom or tio. You’d be technically correct (which we all know is the best kind of correct), but if you wind back the clock a bit, there’s a little more to the story.

You see, the programs we use these days to talk to microcontrollers and routers are more accurately referred to as serial terminal emulators, because they are doing in software what used to be the job of hardware. What kind of hardware? Why beauties like this DEC VT220 for example.

Continue reading “A Look At The DEC VT220, A Proper Serial Terminal”

Remembering Seymour Cray

If you think of supercomputers, it is hard not to think of Seymour Cray. He built giant computers at Control Data Corporation and went on to build the famous Cray supercomputers. While those computers aren’t especially amazing today, for their time, they were modern marvels. [Asianometry] has a great history of Cray, starting with his work at ERA, which would, of course, eventually produce the computer known as the Univac 1103.

ERA was bought up by Remington Rand, which eventually became Sperry Rand. Due to conflict, some of the ERA staff left to form Control Data Corporation, and Cray went with them. The new company decided to focus on computers to do simulations for things like nuclear test simulations.

Continue reading “Remembering Seymour Cray”

Wrap Your Keyboard With A Vacuum Former

Coloured keycaps are a common customisation when it comes to making your input device special. If you are working with modern tech it’s easy, there are plenty of vendors who can sell you keycaps for any purpose. With retro tech it’s never so simple, if a keycap hasn’t been made for decades you’re out of luck. This doesn’t faze [Drygol] though, who has solved the coloured retro keycap in a unique and non-destructive way. Wrap them in vinyl film using a vacuum former.

Vacuum formers are an often-underrated tool in the hardware arsenal, but as this project shows, they can produce startlingly good results. Original keycaps are placed on a 3D-printed scaffold before the vinyl is formed over them, then they are carefully cut out and a triangular edge on both sides is folded underneath, The result is an Amiga with a striking orange keyboard, and for us the best bit is that the original key is safely preserved under the vinyl.

[Drygol]’s exceptional work in the retrocomputing sphere has delighted us many times on these pages. There are too many examples to link here, but one we particularly liked was this nearly-all-new Amiga 2000.

Making SD Cards More Nostalgic With More Cartridge-ness

As practical SD cards are, they lack much of what made floppy disks and cartridges so awesome: room for art and a list of contents, as well as the ability to not be lost in shaggy carpet or down a pet’s gullet. In a fit of righteous nostalgia, [Abe] decided that he’d turn SD cards into cartridges in the best way possible, and amazingly managed to not only finish the project after two years, but also make it look snazzy enough to have come straight out of the 1980s. The resulting cartridges come both with fixed (256 MB) and removable micro SD card storage, which are mounted on a PCB that passively connects to pogo pins in the custom, 3D printed reader.

Front of an SD-card-turned-cartridge with adn without decal. (Credit: Abe's Projects, YouTube)
Front of an SD-card-turned-cartridge with and without decal. (Credit: Abe’s Projects, YouTube)

The inspiration for this project kicked in while [Abe] was working on a floppy drive conversion project called the Floppy8, which crammed an MCU into an external floppy drive along with a rough version of these SD card-based cartridges that used the physical card’s edge connector to connect with a micro SD slot inside the converted floppy drive. The problem with this setup was that alignment was terrible, and micro SD cards would break, along with a range of other quality of life issues.

Next, the SD card was put into a slot on the carrier PCB that featured its own edge connector. This improved matters, but the overly complicated (moving) read head in the reader turned out to be very unreliable, in addition to FDM printed parts having general tolerance and durability issues. Eventually a simplified design which takes these limitations in mind was created that so far seems to work just fine.

Although SD cards in cartridges are not a new idea, using them purely as a data carrier is far less common. One could argue about the practicality of turning a fingernail-sized micro SD card into something much larger, but in terms of aesthetics and handleability it definitely gets an A+.

Continue reading “Making SD Cards More Nostalgic With More Cartridge-ness”

Build Your Own 16 MB 30-Pin SIMMs For Vintage PCs

Today’s memory sticks have hundreds of pins and many gigabytes of RAM on board. Decades ago, though, the humble 30-pin SIMM was the state of the art where memory was concerned. If you’ve got vintage gear, you can try and hunt down old RAM, or you can copy [Bits und Bolts] and make your own.

Previously, [Bits und Bolts] built a 4 MB SIMM, but he’s now ramped up to building 16 MB RAM sticks — the largest size supported by the 30-pin standard. That’s a ton compared to most 30-pin sticks from the 1980s, which topped out at a feeble 1 MB.

We get to see four of his 16 MB sticks installed in a 386 motherboard, set up to operate in the appropriate Fast Page Mode. He was able to get the system operating with 64 MB of RAM, an amount still considered acceptable in the early Pentium 3 era. Hilariously, memtest took a full ten hours to complete a single pass with this configuration. [Bits and Bolts] also tried to push the motherboard further, but wasn’t able to get it to POST with over 64 MB of RAM.

As [Bits und Bolts] demonstrates, if you can read a schematic and design a PCB, it’s not that hard to design RAM sticks for many vintage computers. We’ve seen some other RAM hacks in this vein before, too.

Continue reading “Build Your Own 16 MB 30-Pin SIMMs For Vintage PCs”