Rex, The ARM-Powered Robot Board

REX

There are a million tutorials out there for building a robot with an Arduino or Raspberry Pi, but they all suffer from the same problem: neither the ‘duino nor the Raspi are fully integrated solutions that put all the hardware – battery connectors, I/O ports, and everything else on the same board. That’s the problem Rex, an ARM-powered robot controller, solves.

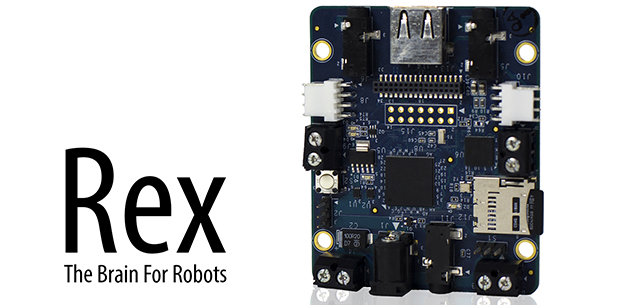
The specs for Rex include a 1GHz ARM Cortex-A8 with a Video SoC and DSP core, 512 MB of RAM, USB host port, support for a camera module, and 3.5mm jacks for stereo in and out. On top of that, there’s I2C expansion ports for a servo adapter and an input and output for a 6-12 V battery. Basically, the Rex is something akin to the Beaglebone Black with the hardware optimized for a robotic control system.

Because shipping an ARM board without any software would be rather dull, the guys behind Rex came up with Alphalem OS, a Linux distro that includes scripts, sample programs, and an API for interaction with I2C devices. Of course Rex will also run other robotics operating systems and the usual Debian/Ubuntu/Whathaveu distros.

It’s an impressive bit of hardware, capable of speech recognition, and machine vision tasks with OpenCV. Combine this with a whole bunch of servos, and Rex can easily become the brains of a nightmarish hexapod robot that responds to your voice and follows you around the room.

You can pick up a Rex over on the Kickstarter with delivery due sometime this summer.

Self-Balancing Robots Wobble, But They Don’t Fall Down

[Trandi] can check ‘build a self-balancing robot’ off of his to-do list. Over a couple of weekends, he built said robot, and, in his own words, managed not to over-design it. It even kept the attention of his 2-year-old son for several minutes, and that’s always a plus.
He was originally going to re-purpose one of his son’s RC cars, but didn’t want to risk breaking it. Instead, he designed a triangular 3-D printed chassis to hold a motor and some cogs to fit both the motor shaft and some re-used Meccano wheels. [Trandi]’s design employs an MPU 6050 6-DOF IMU for the balancing act and is built on an Arduino Nano clone.

[Trandi] is controlling the motor with an L293D, which has built-in flyback diodes to minimize spikes. He found that the Nano clone was not powerful enough to handle everything, so he added an L7805CV voltage regulator. After the break, watch [Trandi]’s cute bot tool around on various types of terrain, with and without a payload.

Don’t have an IMU lying around? You don’t really need one to build a self-balancing bot, as this IR-based lilliputian bot will demonstrate.

Continue reading “Self-Balancing Robots Wobble, But They Don’t Fall Down”

Mustachioed Rover Simultaneously Manly, Adorable

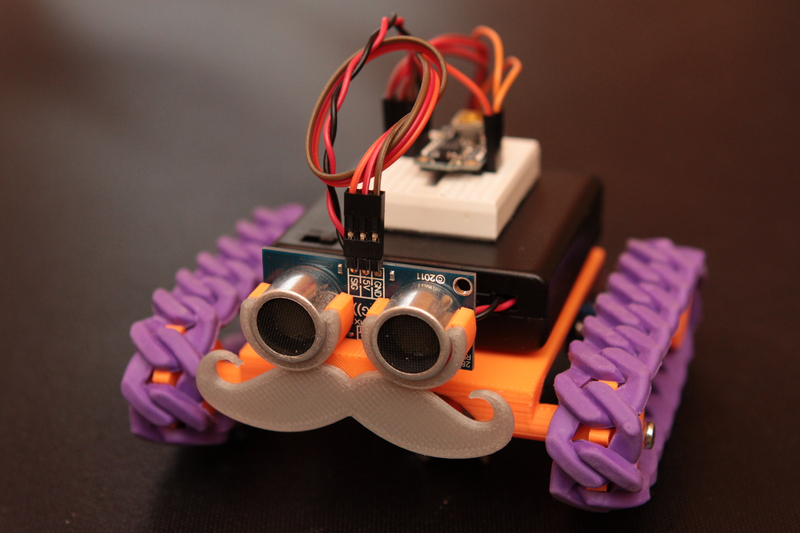
[Rick], an Adafruit learning system contributor, is excited by the implications of STEM’s reach into K-12 education. He was inspired to design Red Rover, a low-cost robot that can be easily replicated by anyone with access to a 3-D printer.
This adorable autonomous rover is based on the adafruit Trinket microcontroller, but will also rove under the power of an Arduino micro. It really is quite simple—the Trinket drives two continuous rotation micro servos and pretty much any flavor of rangefinder you like. [Rick] tested it with Parallax PING))), Maxbotix, and Grove sensors, and they all worked just fine.

What’s truly awesome about Red Rover are the track treads. [Rick] initially experimented with flexible filament. While he had good results, it was not a cost-effective solution. What you see in the picture and the short video after the break are actually rubber bracelets from Oriental Trading.

The plastic part count comes in at seven, all of which can be printed together at once. [Rick]’s gallery includes both small and large chassis and three different servo mounts. The Red Rover guide builds on other adafruit guides for Trinket general use, servo modification, and Trinket-specific servo control.

Update: Added [Rick]’s demo video after the break!

Continue reading “Mustachioed Rover Simultaneously Manly, Adorable”

Barbot Mixes Drinks Perfectly With Web Interface

barbot-with-laptop

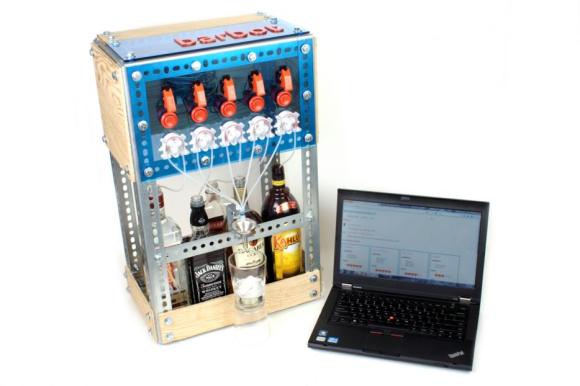
Are you good at mixing drinks? We think this Barbot might give you a run for your money!

Not only does this Barbot have room for 5 different liquors, but you can combine them any way you want with an extremely slick web interface that you can check out for yourself.

During initial setup, you add your chosen liquors to the machine and then using the configure mode in the web interface, you tell Barbot what it has to work with. Once these fields are populated, Barbot will list various drinks that it is capable of mixing with the provided ingredients. It also has a cleaning mode, which allows you to prime the pumps and set administrative access for your parties.

The hardware behind this build is a BeagleBone Black running Ubuntu 13.04 with Apache2, MySQL, and PHP to host the web interface — bind and DHCP are used to create the web portal using a USB WiFi dongle. The online interface directly controls the pumps using PHP via the GPIOs.

To see a full demonstration stick around after the break for the included video.

Continue reading “Barbot Mixes Drinks Perfectly With Web Interface”

Roving Hexapod Poops Out 3D Prints

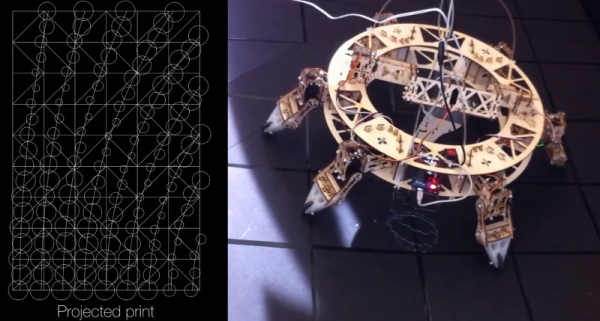
[Jia Wu, Mary Sek, and Jeff Maeshiro], students  at the California College of the Arts (CCA) in San Francisco, took on the task of developing a walking 3D printer. The result is Geoweaver, a hexapod robot with a glue gun extruder system. Hackaday has seen walking CNC machines before, but not a 3D printer. Geoweaver uses two servos on each of its six legs to traverse the land. The team was able to program several gaits into the robot, allowing it to traverse uneven terrain. Walking is hard enough on its own, but Geoweaver also uses a glue gun based extruder to make 3D prints. The extruder head uses two servos to swing in a hemispherical arc. The arc is mapped in software to a flat plain plane, allowing the robot to drop a dollop of glue exactly where it is programmed to. Geoweaver doesn’t include much in the way of on board processing – an Arduino Uno is used to drive the 15 servos. Those servos coupled with a glue gun style heater pull quite a bit of power, which has earned Geoweaver nicknames such as Servo Killer, Eater of Shields, Melter of Wires, and Destroyer of Regulators.

Geoweaver’s prints may not be much to look at yet, however the important thing to remember is that one of the future visions for this robot is to print on a planetary scale. Geoweaver currently uses reacTIVision to provide computer control via an “eye in the sky”. ReacTIVision tracks a fiducial marker on the robot, and applies it to a topographical map of the terrain. This allows Geoweaver to change its height and print parameters depending on the flatness of the ground it is printing on. On a scaled up Geoweaver, reacTIVision would be replaced by GPS or a similar satellite based navigation system.  Most of the software used in Geoweaver is opensource, including Grasshopper and Firefly, written by the team’s professor, [Jason Kelly Johnson]. The exception is Rhino 5. We would love to see an option for a free or open source alternative to laying out ~$1000 USD in software for our own Geoweaver.

Continue reading “Roving Hexapod Poops Out 3D Prints”

I Am NXT 3-Point Bend Tester. Please Insert Girder.

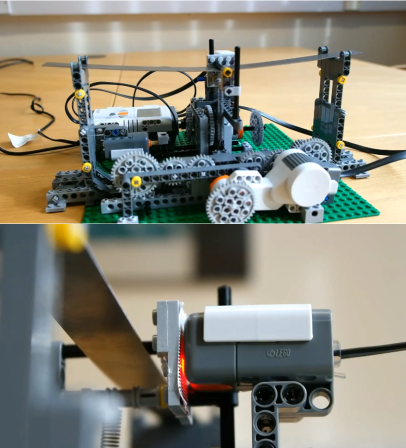
Learning with visuals can be very helpful.  Learning with models made from NXT Mindstorms is just plain awesome, as [Rdsprm] demonstrates with this LEGO NXT 3-point bend tester that he built to introduce freshmen to flexural deflection and material properties. Specifically, it calculates Young’s modulus using the applied force of a spring and the beam’s deflection. [Rdsprm] provides a thorough explanation in the About section of the YouTube video linked above, but the reddit comments are definitely a value-add.

[Rdsprm] built this from the Mindstorms education base set (9797) and the education resource set (9648). Each contestant endures a 5-test battery and should produce the same result each time. The motor in the foreground sets the testing length of the beam, and the second motor pulls the spring down using a gearbox and chain.

This method of deflection testing is unconventional, as [Rdsprm] explains. Usually, the beam is loaded incrementally, with deflection measured at each loading state. Here, the beam is loaded continuously. Vertical deflection is measured with a light sensor that reads a bar code scale on the beam as it passes by. The spring position is calculated and used to determine the applied force.

[Rdsprm] analysed the fluctuation in GNU Octave and has graphs of the light sensor readings and force-deflection. No beams to bend with your Mindstorms? You could make this Ruzzle player instead.

Continue reading “I Am NXT 3-Point Bend Tester. Please Insert Girder.”

DARPA Robotics Challenge Trials Wrap Up

schaft-drive

The DARPA robotics challenge trials 2013 are have finished up. The big winner is Team Schaft, seen above preparing to drive in the vehicle trial. This isn’t the end of the line for DARPA’s robotics challenge – there is still one more major event ahead. The DARPA robotics finals will be held at the end of 2014. The tasks will be similar to what we saw today, however this time the team and robot’s communications will be intentionally degraded to simulate real world disaster situations. The teams today were competing for DARPA funding. Each of the top eight teams is eligible for, up to $1 million USD from DARPA. The teams not making the cut are still welcome to compete in the finals using other sources of funding.

The trials were broken up into 8 events. Door, Debris, Valve, Wall, Hose, Terrain, Ladder, and Vehicle. Each trial was further divided into 3 parts, each with one point available. If a robot completed the entire task with no human intervention it would earn a bonus point. With all bonuses, 32 points were available. Team Schaft won the event with an incredible total of 27 points. In second place was Team IHMC (Institute for Human Machine Cognition) with 20 points. Team IMHC deserves special praise as they were using a DARPA provided Boston Dynamics Atlas Robot. Teams using Atlas only had a few short weeks to go from a completely software simulation to interacting with a real world robot. In third place was Carnegie Mellon University’s Team Tartan Rescue and their Chimp robot with 18 points.

The expo portion of the challenge was also exciting, with first responders and robotics researchers working together to understand the problems robots will face in real world disaster situations. Google’s recent acquisition — Boston Dynamics — was also on hand, running their WildCat and LS3 robots. The only real downside to the competition was the coverage provided by DARPA. The live stream left quite a bit to be desired. The majority of videos on DARPA’s YouTube channel currently consist of 9-10 hour recordings of some of the event cameras. The wrap-up videos also contain very little information on how the robots actually performed during the trials. Hopefully as the days progress, more information and video will come out. For now, please share the timestamp and a description of your favorite part with your comments.

Continue reading “DARPA Robotics Challenge Trials Wrap Up”