“So Long,” Said All The Tank-Driving Fish

Though some of us are heavily assisted by smart phone apps and delivery, humans don’t need GPS to find food. We know where the fridge is. The grocery store. The drive-thru. And we don’t really need a map to find shelter, in the sense that shelter is easily identifiable in a storm. You might say that our most important navigation skills are innate, at least when we’re within our normal environment. Drop us in another city and we can probably still identify viable overhangs, cafes, and food stalls.

The question is, do these navigational skills vary by species or environment? Or are the tools necessary to forage for food, meet mates, and seek shelter more universal? To test the waters of this question, Israeli researchers built a robot car and taught six fish to navigate successfully toward a target with a food reward. This experiment is one of domain transfer methodology, which is the exploration of whether a species can perform tasks outside its natural environment. Think of all the preparation that went into Vostok and Project Mercury.

Continue reading ““So Long,” Said All The Tank-Driving Fish”

Maybe The Simplest Cloud Chamber

Have you ever seen a Wilson cloud chamber — a science experiment that lets you visualize ionizing radiation? How hard would it be to build one? If you follow [stoppi’s] example, not hard at all (German, Google Translate link). A plastic bottle. some tape, a flashlight, some water, hot glue, and — the only exotic part — a bit of americium 241. You can see the design in the video below and the page also has some more sophisticated designs including one that uses a CPU cooler. Even if you don’t speak German, the video will be very helpful.

You need to temper your expectations if you build the simple version, but it appears to work. The plastic bottle is a must because you have to squeeze it to get a pressure change in the vessel.

Continue reading “Maybe The Simplest Cloud Chamber”

Making Light Of Superconductors

Once upon a time, making a superconductor required extremely cold temperatures. Scientists understood why superconducting materials could move electrons without loss, but the super cold temperatures were a problem. Then in 1986, a high-temperature superconductor was found. High temperature, of course, is a relative term. The new material works when cooled to a frosty temperature, just not a few degrees off of absolute zero like a conventional superconductor. Since then, the race has been on to find a room-temperature superconductor that doesn’t require other exotic conditions, such as extreme pressure. Department of Energy scientists may have found a different path to get there: X-ray light.

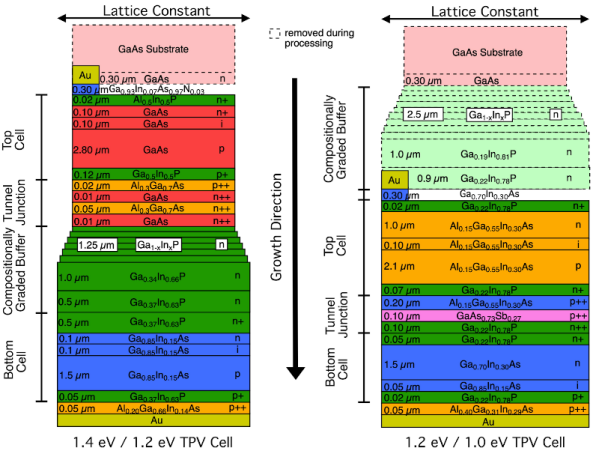
The problem is that scientists don’t fully understand why these high-temperature superconductors work. To study the material, YBCO, scientists chill a sample to it superconducting state and then use a magnetic field to disrupt the superconductivity to study the material’s normal state. The new research has shown that a pulse of light can also disrupt the superconductivty, although the resulting state is unstable.

The research shows that charge density waves, which can serve as markers for superconductivity, occur when the samples are exposed to a magnetic field or to high-energy light pulses. While this is a far cry from creating room temperature superconductors, further study of the mechanism that allows light and magnetic fields to cause similar changes in the material could lead to a better understanding of the physics and maybe — one day — room-temperature superconductors.

Want to make your own YBCO? Go for it! Of course, you can already get room-temperature superconductors if you can stand the pressure.

As Light As Plastic; As Strong As Steel

Chemical engineers at MIT have pulled off something that was once thought impossible. By polymerizing material in two different directions at once, they have created a polymer that is very strong. You can read a pre-print version of the paper over on Arxiv.

Polymers owe many of their useful properties to the fact that they make long chains. Molecules known as monomers join together in strings held together by covalent bonds. Polymer chains may be cross-linked which changes its properties, but it has long been thought that material that had chains going through the X and Y axis would have desirable properties, but making these reliably is a challenge.

Part of the problem is that it is hard to line up molecules, even large monomers. If one monomer in the chain rotates a bit, it will create a defect in the 2D structure and that defect will grow rapidly as you add more monomers. The new technique is relatively easy to do and is irreversible which is good because reversible chains tend to have undesirable characteristics like low chemical stability. Synthesis does require a few chemicals like melamine, calcium chloride, pyridine, and trimesic acid. Along with N-Methyl-2-pyrrolidone, the mixture eventually forms a gel. The team took pieces of gel and soaked it in ethanol. With some filtering, ultrasonics, centrifuging, and washing with water and acetone, the material was ready for vacuum drying and was made into a powder.

The powder is dissolved in acid and placed on a spinning silicon wafer to form a polymerized nanofilm. Other 2D films have been produced, of course, such as graphene, but polymer films may have a number of applications. In particular, in contrast to conventional polymers, sheets of this material are impermeable to gas and liquid, which could make it very useful as a coating.

According to the MIT press release, the film’s elastic modulus is about four and six times greater than that of bulletproof glass. The amount of force required to break the material is about twice that of steel. It doesn’t sound like this material will be oozing out of our 3D printers anytime soon. But maybe one day you’ll be able to get 2D super-strong resin.

For all their faults, conventional polymers changed the world as we know it. Some polymers occur naturally, and some use natural ingredients, too.

Integrating sphere test setup

Cannonball Mold Makes A Dandy Integrating Sphere For Laser Measurements

It’s an age-old riddle: if you have a perfect sphere with a perfectly reflective inner surface, will light bounce around inside it forever? The answer is pretty obvious when you think it through, but that doesn’t mean that you can’t put the principle to use, as we see with this homemade Ulbricht sphere for optical measurements.

If you’ve never heard of an Ulbricht sphere, don’t worry — it’s also known as an integrating sphere, and that makes its function a little more apparent. As [Les Wright] explains, an integrating sphere is an optical element with a hollow spherical cavity that’s coated with a diffusely reflective coating. There are two ports in the sphere, one for admitting light — usually from a laser — and one for light to exit. The light bounces around inside the sphere and becomes perfectly diffuse, and creates a uniform beam at the exit port.

[Les]’ need for an integrating sphere comes from the desire to measure the output of some of his lasers with his Raspberry Pi-based PySpectrometer. Rather than shell out for an expensive commercial integrating sphere, or turn one on a lathe, [Les] turned to an unlikely source: cannonball molds. The inside of the mold was painted with an equally unlikely ultra-white paint concocted from barium sulfate and PVA glue. With a few ports machined into the mold, it works perfectly to diffuse the light from his dye lasers for proper measurements.

Lasers can be an expensive hobby, but [Les] always seems to find a way to make things more affordable and just as good. Whether it’s homemade doorknob caps for high-voltage power supplies or blasting the Bayer filter off a cheap CCD camera, he always seems to find a way.

Continue reading “Cannonball Mold Makes A Dandy Integrating Sphere For Laser Measurements”

Two shots of the dispenser in question next to each other, showing it from different sides. One is showing the front panel, and the other shot gives us a better look at the top part, with a rotating disk that has openings for treats to be placed in.

Open-Hardware Dog Treat Dispenser Is A Stepping Stone For Behavioral Research

The principles of open-source hardware are starting to make great strides in scientific research fields. [Walker Arce] tells us about his paper co-authored with [Jeffrey R. Stevens], about a dog treat dispenser designed with scientific researchers in mind – indispensable for behavior research purposes, and easily reproducible so that our science can be, too. Use of Raspberry Pi, NEMA steppers and a whole lot of 3D printed parts make this build cheap (< $200 USD) and easy to repeat for any experiments involving dogs or other treat-loving animals.

Even if you’re not a scientist, you could always build one for your own pet training purposes – this design is that simple and easy to reproduce! The majority of the parts are hobbyist-grade, and chances are, you can find most of the parts for this around your workshop. Wondering how this dispenser works, and most importantly, if the dogs are satisfied with it? Check out a short demonstration video after the break.

Despite such dispensers being commercially available, having a new kind of dispenser designed and verified is more valuable than you’d expect – authors report that, in their experience, off-the-shelf dispensers have 20-30% error rate while theirs can boast just 4%, and they have test results to back that up. We can’t help but be happy that the better-performing one is available for any of us to build. The GitHub repository has everything you could want – from STLs and PCB files, to a Raspberry Pi SD card image and a 14-page assembly and setup guide PDF.

Open hardware and science are a match made in heaven, even if the relationship is still developing. The Hackaday community has come together to discuss open hardware in science before, and every now and then, open-source scientific equipment graces our pages, just like this recent assortment of biosensing hacks using repurposed consumer-grade equipment.

Continue reading “Open-Hardware Dog Treat Dispenser Is A Stepping Stone For Behavioral Research”

3D Printed Radiation Shields Get Put To The Test

Don’t get too excited, a 3D printed radiation shield won’t keep you from getting irradiated during WWIII. But until the Doomsday Clock starts clanging its midnight bell, you can use one to improve the accuracy of your homebrew weather monitoring station by keeping the sun from heating up your temperature sensor. But how much does it help, and what material should you load up in your extruder to make one? Those questions, and more, are the topic of a fascinating whitepaper included in the upcoming volume of HardwareX.

Design and Implementation of 3-D Printed Radiation Shields for Environmental Sensors not only tests how effective these low-cost shields are when compared to an uncovered sensor, but addresses specific concerns in regards to leaving 3D printed parts out in the elements. Readers who’ve squirted out a few rolls worth of the stuff will know that common polylactic acid (PLA) filament, while easy to work with and affordable, isn’t known for its resilience. In fact, one of the advertised properties of the renewable plastic is that it’s biodegradable (theoretically, at least), so leaving it outside for any length of time sounds like it’s bound to go poorly.

PLA’s mechanical strength dropped rapidly.

To make a long story short, it does. While the team demonstrated that the PLA printed radiation shield absolutely helped preserve the accuracy of the temperature and humidity sensors mounted inside of it, the structure itself began to deform rapidly from UV exposure. Further tests determined that the mechanical strength of the PLA showed a notable reduction in as little as 30 days, and a sharp decline after 90 days.

Luckily, there was more than one plastic horse in the race. In addition to the PLA printed shield, the team also tested a version printed in acrylonitrile styrene acrylate (ASA) which fared far better. There was no visible deformation of the shield, and after 90 days, the reduction in mechanical strength was negligible. It even performed a bit better when it came to shielding the temperature sensor, which the team believes may be due to the material’s optical transmission properties.

So there you have it: a 3D printed radiation shield will absolutely improve the accuracy of your weather sensors, but if you want it to last outside, PLA just isn’t going to cut it. On the other hand, you could also save yourself a whole lot of time by just using a stack of plant saucers. Whatever works.

Thanks to [tahnok] for the tip.