A Wireless Controller For The Mostly Printed CNC

The Mostly Printed CNC (MPCNC) is an impressive project in its own right, allowing anyone with a 3D printer and some electrical conduit to build their own fairly heavy-duty CNC platform perfect for routing. Customization is the name of the game with the MPCNC, and few machines will look the same when they’re done. But even fewer will feature a control interface nearly as slick as the wireless handset that [Steve Croot] has put together for his.

On the hardware side, the project is fairly straightforward. Inside the 3D printed enclosure is a 4.3″ Nextion touchscreen, a Mega 2560 PRO microcontroller, a nRF24L01 2.4 GHz transceiver, and a 4000 mAh 3.7 V LiPo battery with appropriate charging circuit. Besides the physical toggle switch to turn the handheld on and off, all of the device’s functions are touch controlled. For the receiver side, [Steve] is using another nRF24L01 radio and microcontroller pair to toggle relays and shuffle the appropriate G-code commands around.

But what really makes this project shine is the software. As you can see in the video after the break, [Steve] has done an absolutely phenomenal job with the user interface on this controller. The themed boot screen and concise iconography give the controller a very professional look, and the ability to jog the machine around using taps on a virtual workspace helps keep the touch interface from being a gimmick.

We’ve seen some impressive custom-built CNC controllers over the years, but between the mostly off-the-shelf hardware used and impressive UI, we think [Steve] has created something unique. It looks like he’s keeping the source code to himself for the time being, but hopefully he sees fit to release it in the future; a project of this caliber deserves to become more than a one-off creation.

Continue reading “A Wireless Controller For The Mostly Printed CNC”

Debugging Electronics: To Know Why It Didn’t Work, First Find What It Is Actually Doing

Congratulations, you have just finished assembling your electronics project. After checking for obvious problems you apply power and… it didn’t do what you wanted. They almost never work on the first try, and thus we step into the world of electronics debugging with Daniel Samarin as our guide at Hackaday Superconference 2019. The newly published talk video embedded below.

Beginners venturing just beyond blinking LEDs and premade kits would benefit the most from information here, but there are tidbits useful for more experienced veterans as well. The emphasis is on understanding what is actually happening inside the circuit, which explains the title of the talk: Debugging Electronics: You Can’t Handle the Ground Truth! So we can compare observed behavior against designed intent. Without an accurate understanding, any attempted fix is doomed to failure.

To be come really good at this, you need to embrace the tools that are often found on a well stocked electronics bench. Daniel dives into the tricks of the trade that transcend printf and blinking LED to form a plan to approach any debugging task.

Continue reading “Debugging Electronics: To Know Why It Didn’t Work, First Find What It Is Actually Doing”

DIY Large Format Book Press Puts On The Pressure

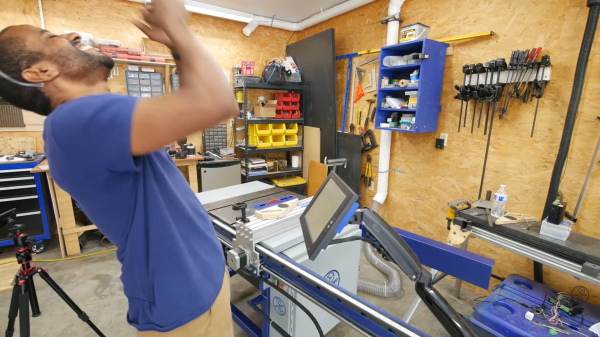
For those in the audience who aren’t well versed in wrangling dead trees, a large press with a lot of clamping pressure can be used for binding books or printing. It can even be used to squeeze the water out of homemade paper. It’s an important tool for anyone looking to make or repair books, but they also tend to be fairly expensive. Which is why [Paul] decided to make his own.

Despite the preconceived notions you might have about the type of guy who binds his own books, it seems like [Paul] is a rather modern fellow. He actually designed the press in CAD and made many of the parts for it on his CNC router. That’s not strictly required, though we do think cutting out the hole for the monstrous lead screw nut would be a bit tricky if you had to do it by hand. But beyond that, the design is pretty straightforward and the video after the break provides a very clear step-by-step guide on how to build your own.

In the past we’ve seen how a similar, if much smaller, book press can be used to make bound books of all those PDFs littering your computer. These sort of projects are getting more rare in an increasingly paperless world, but we always like to see people keeping the old ways alive. If the revolution comes and we end up needing to publish Hackaday on hand-pressed paper, we’ll know who to call.

Continue reading “DIY Large Format Book Press Puts On The Pressure”

A Honeycomb Patching Robot Powered By Arduino

No, it’s not the kind of honeycomb you’re probably thinking of. We’re talking about the lightweight panels commonly used in aerospace applications. Apparently they’re rather prone to dents and other damage during handling, so Boeing teamed up with students from the California State University to come up with a way to automate the time-consuming repair process.

The resulting machine, which you can see in action after the break, is a phenomenal piece of engineering. But more than that, it’s an impressive use of off-the-shelf components. The only thing more fascinating than seeing this robotic machine perform its artful repairs is counting how many of its core components you’ve got laying around the shop.

Built from aluminum extrusion, powered by an Arduino Due, and spinning a Dewalt cut-off tool that looks like it was just picked it up from Home Depot, you could easily source most of the hardware yourself. Assuming you needed to automatically repair aerospace-grade honeycomb panels, anyway.

At the heart of this project is a rotating “turret” that holds all the tools required for the repair. After the turret is homed and the condition of all the cutting tools is verified, a hole is drilled into the top of the damaged cell. A small tool is then carefully angled into the hole (a little trick that is mechanical poetry in motion) to deburr the hole, and a vacuum is used to suck out any of the filings created by the previous operations. Finally a nozzle is moved into position and the void is filled with expanding foam.

Boeing says it takes up to four hours for a human to perform this same repair. Frankly, that seems a little crazy to us. But then again if we were the ones tasked with repairing a structural panel for a communications satellite or aircraft worth hundreds of millions of dollars, we’d probably take our time too. The video is obviously sped up so it’s hard to say exactly how long this automated process takes, but it doesn’t seem like it could be much more than a few minutes from start to finish.

Continue reading “A Honeycomb Patching Robot Powered By Arduino”

This DIY Dynamometer Shows Just What A Motor Can Do

Back in high school, all the serious gearheads used to brag about two things: their drag strip tickets, and their dynamometer reports. The former showed how fast their muscle car could cover a quarter-mile, while the latter was documentation on how much power their carefully crafted machine could deliver. What can I say; gas was cheap and we didn’t have the Internet to distract us.

Bragging rights are not exactly what [Jeremy Fielding] has in mind for his DIY dynamometer, nor is getting the particulars on a big Detroit V8 engine. Rather, he wants to characterize small- to medium-sized electric motors, with an eye toward repurposing them for different projects. To do this, he built a simple jig to measure the two parameters needed to calculate the power output of a motor: speed and torque. A magnetic tachometer does the job of measuring the motor’s speed, but torque proved a bit more challenging. The motor under test is coupled to a separate electric braking motor, which spins free when it’s not powered. A lever arm of known length connects to the braking motor on one end while bearing on a digital scale on the other. With the motor under test spun up, the braking motor is gradually powered, which rotates its housing and produces a force on the scale through the lever arm. A little math is all it takes for the mystery motor to reveal its secrets.

[Jeremy]’s videos are always instructional, and the joy he obviously feels at discovery is infectious, so we’re surprised to see that we haven’t featured any of his stuff before. We’ve seen our share of dynos before, though, from the tiny to the computerized to the kind that sometimes blows up.

Continue reading “This DIY Dynamometer Shows Just What A Motor Can Do”

The Last Scientific Calculator?

There was a time when being an engineering student meant you had a sword. Well, really it was a slide rule hanging from your belt, but it sounds cooler to call it a sword. The slide rule sword gave way to calculators hanging from your belt loop, and for many engineers that calculator was from HP. Today’s students are more likely to have a TI or Casio calculator, but HP is still in there with the HP Prime. It is hard to call it a calculator since the latest variant has a 528 MHz ARM Cortex A7, 256 MB of RAM, and 512 MB of ROM. But if you can’t justify a $150 calculator, there are some cheap and even free options out there to get the experience. To start with, HP has a free app that runs on Windows or Mac that works just like the calculator. Of course, that’s free as in no charge, not free as in open source. But still, it will run under Wine with no more than the usual amount of coaxing.

You might wonder why you need a calculator on your computer, and perhaps you don’t. However, the HP Prime isn’t just your 1980s vintage calculator. It also has an amazing number of applications including a complete symbolic math system based on xCAS/Giac. It is also programmable using a special HP language that is sort of like Basic or Pascal. Other applications include plotting, statistics, solvers, and even a spreadsheet that can hold up to 10,000 rows and 676 columns.

Portability

It is easy to think that HP provides the free PC software so you’ll go out and buy the real calculator, and that may be part of it. However, you can also get official apps for Android and iOS. They aren’t free, but they are relatively inexpensive. On iOS the cost right now is $25 and on Android it is $20. There are also “lite” versions that are free.

Continue reading “The Last Scientific Calculator?”

Desktop PCB Mill Review

[Carl] wanted to prototype his circuits quickly using printed circuit boards. He picked up a Bantam Tools Desktop PCB Mill and made a video about the results. His first attempt wasn’t perfect, as you could notice under the microscope. A few adjustments, though, and the result was pretty good.

Be warned, this mill is pretty expensive — anywhere from $2,500 to $3,000. The company claims it is a better choice than a conventional cheap mill because it uses a 26,000 RPM spindle and has high-resolution steppers. Because of its low backlash and high accuracy and repeatability, the company claims it can easily mill boards with 6 mil traces.

Continue reading “Desktop PCB Mill Review”