A 3D-Printed Bowl Feeder For Tiny SMD Parts

[Andrzej Laczewski] has something big in mind for small parts, specifically SMD resistors and capacitors. He’s not talking much about that project, but from the prototype 3D-printed bowl feeder he built as part of it, we can guess that it’s going to be a pretty cool automation project.

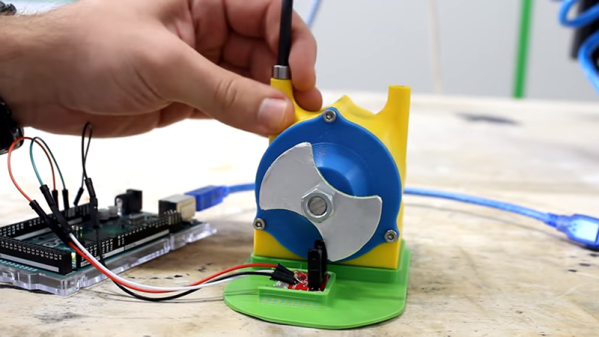
Bowl feeders are common devices in industrial automation, used to take a big pile of parts like nuts and bolts and present them to a process one at a time, often with some sort of orientation step so that all the parts are the right way around. They accomplish this with a vibratory action through two axes, which [Andrzej] accomplishes with the 3D-printed ABS link arms supporting the bowl. The spring moment of the arms acts to twist the bowl slightly when it’s pulled down by a custom-wound electromagnet, such that the parts land in a slightly different place every time the bowl shifts. For the parts on the shallow ramp spiraling up the inside of the bowl, that means a single-file ride to the top. It’s interesting to see how changing the frequency of the signal sent to the coil impacts the feed; [Andrzej] used a function generator to find the sweet spot before settling on a dedicated circuit. Watch it in action below.

We’re really impressed with the engineering that went into this, even if we wonder what the vibration will do to the SMD components. Still, we can’t wait to see this in a finished project – perhaps it’ll be integrated like this Arduino-fied bowl feeder.

Continue reading “A 3D-Printed Bowl Feeder For Tiny SMD Parts”

Open Source Laboratory Rocker Is Super Smooth

Lab equipment is often expensive, but budgets can be tight and not always up to getting small labs or researchers what they need. That’s why [akshay_d21] designed an Open Source Lab Rocker with a modular tray that uses commonly available hardware and 3D printed parts. The device generates precisely controlled, smooth motion to perform automated mild to moderately aggressive mixing of samples by tilting the attached tray in a see-saw motion. It can accommodate either a beaker or test tubes, but since the tray is modular, different trays can be designed to fit specific needs.

Source code and schematics are available from [akshay_d21]’s Google Drive and the 3D models are also available from the National Institute of Health’s 3D Print Exchange. A demonstration video is embedded below, in which you can see how smooth and controlled the motions are.

Continue reading “Open Source Laboratory Rocker Is Super Smooth”

DIY Tube Oven Brings The Heat To Homebrew Semiconductor Fab

Specialized processes require specialized tools and instruments, and processes don’t get much more specialized than the making of semiconductors. There’s a huge industry devoted to making the equipment needed for semiconductor fabrication plants, but most of it is fabulously expensive and out of reach to the home gamer. Besides, where’s the fun in buying when you can build your own fab lab stuff, like this DIY tube oven?

A tube oven isn’t much more complicated than it sounds — it’s just a tube that gets hot. Really, really hot — [Nixie] is shooting for 1,200 °C. Not just any materials will do for such an oven, of course, and this one is built out of blocks of fused alumina ceramic. The cavity for the tube was machined with a hole saw and a homebrew jig that keeps everything aligned; at first we wondered why he didn’t use his lathe, but then we realized that chucking a brittle block of ceramic would probably not end well. A smaller hole saw was used to make trenches for the Kanthal heating element and the whole thing was put in a custom stainless enclosure. A second post covers the control electronics and test runs up to 1,000°C, which ends up looking a little like the Eye of Sauron.

We’ve been following [Nixie]’s home semiconductor fab buildout for a while now, starting with a sputtering rig for thin-film deposition. It’s been interesting to watch the progress, and we’re eager to see where this all leads.

Review: SMD Tweezer Meter Or Tweezer Probes For Your Multimeter?

It’s remarkable how tiny electronics have become. Heaven knows what an old-timer whose experience started with tubes must think, to go from solder tags to SMD in a lifetime is some journey. Even  the generation that started with discrete transistors has lived through an incredible shift. But it’s true, SMD components are tiny, and that presents a challenge aside from the one you’ll face when soldering them. Identifying and measuring the value of a chip component too small to have any writing upon it becomes almost impossible with a pair of standard test probes.

Happily the test equipment manufacturers have risen to the challenge, and produced all sorts of meters designed for SMD work that have a pair of tweezers instead of test prods. When I was looking for one I did my usual thing when it comes to Hackaday reviews. I looked at the budget end of the market, and bought an inexpensive Chinese model for about £16($21). And since I was browsing tweezers I couldn’t resist adding another purchase to my order. I found a pair of tweezer test probes for my multimeter which cost me just over a pound ($1.30) and would provide a useful comparison. For working with SMD components in situ, do you even need the special meter?

Continue reading “Review: SMD Tweezer Meter Or Tweezer Probes For Your Multimeter?”

Acrylic Stencils Help With Component Placement For SMD Assembly

Surface mount is where the action is in the world of DIY PCBs, and deservedly so. SMDs are so much smaller than through-hole components, and fewer holes to drill make surface-mount PCBs easier to manufacture. Reflow soldering is even a snap now thanks to DIY ovens and solder stencils you can get when you order your boards.

So what’s the point of adding another stencil to the surface-mount process? These component placement stencils are [James Bowman]’s solution for speeding up assembly of boards in production runs too small to justify a pick and place robot. [James] finds that placing small components like discrete resistors and caps easy, but struggles with the placement of the larger components, like QFN packaged microcontrollers. Getting such packages lined up exactly is hard when the leads are underneath, and he found repositioning led to smeared solder paste. His acrylic stencils, which are laser-cut from SVGs derived directly from the Eagle files with a script he provides, sandwich the prepped board and let him just drop the big packages into their holes. The acrylic pops off after placement, leaving the components stuck to the solder paste and ready for their trip to the Easy Bake.

[James] claims it really speeds up hand placement in his biggish runs, and it’s a whole lot cheaper than a dedicated robot. But as slick as we think this idea is, a DIY pick and place is still really sweet.

Do You Need A Solder Fume Extractor?

We’ll admit it. Most of us have been soldering since we were kids and we don’t think of it as a particularly dangerous activity. Just keep the hot and cold end of the iron straight and remember not to flick solder off the tip on your leg and you are fine. We sometimes roll our eyes a bit at the people with the soldering fume extractors unless you are soldering 8 hours a day, although we’ve occasionally used a small fan nearby just to get some circulation. [Tanner Tech’s] video on soldering fumes might make us rethink that, though (see below).

[Tanner] rigs up a fan with some plastic bottles, fans, and some cotton balls. But that didn’t do very much. Instead, he replaced his fan assembly with a shop vac. Then he examined what was on the cotton balls.

Continue reading “Do You Need A Solder Fume Extractor?”

Hackaday guide to Lathes

The Machinists’ Mantra: Level Thy Lathe

Let’s say you’ve gone and bought yourself a sweet sweet metal lathe. Maybe it’s one of the new price-conscious Asian models, or maybe it’s a lovely old cast iron beast that you found behind a foreclosed machine shop. You followed all the advice for setting it up, and now you’re ready to make chips, right? Well, not so fast. Unlike other big power tools, such as band saws or whatever people use to modify dead trees, machine tools need to be properly level. Not, “Hurr hurr my carpenter’s level says the bubble is in the middle”, but like really level.

This is especially true for lathes, but leveling is actually a proxy for something else. What you’re really doing is getting the entire machine in one plane. Leveling is a primitive way of removing twist from the structure. It may not seem like a huge piece of cast iron could possibly twist, but at very small scales it does! Everything is a spring, and imperceptible twist in the machine will show up as your lathe turning a couple thousandths of taper (cone) when it should be making perfect cylinders. All this is to say, before making chips, level your lathe. Let me show you the way. Continue reading “The Machinists’ Mantra: Level Thy Lathe”