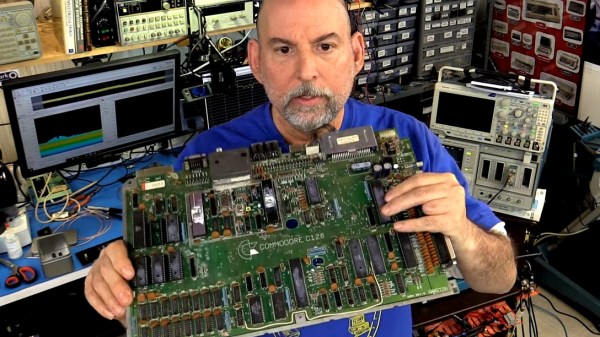
DIY CNC Sandblaster Writes Large

CNC machinery, once a piece of workshop exotica, has become such a staple of projects within our sphere as to have become relatively unremarkable. A decent 3D printer can be had without mortgaging a small country, and the honor roll of CNC router builders is long and distinguished. But there is still plenty to surprise us in CNC, and [Fabien Chouteau]’s project shows us this with surprising simplicity. He’s eschewed a router or extruder, and instead fit an off-the-shelf CNC machine kit with a sandblaster.

If you are used to a sandblaster as a means for removing rust from pieces of your motor vehicle, then it’s fair to say that this one isn’t of that ilk. Instead, it’s used in the manner of an engraver, to sandblast a pattern or text onto a surface. This is something he shows us in the video below the break, with a piece of metal and a sheet of glass.The sandblaster itself features a 1.5-litre soda bottle and is driven by an airline.

On the electronic side, he replaced the controller that came with the kit with an STM32F469 discovery board and an Arduino CNC shield. He has a G-code controller from a previous project, to which he’s added a board with a touch screen to create a simple control interface.

This is by no means the only sandblaster we’ve featured, if your interests lie in that direction we can show you everything from the simple to the extreme.

Continue reading “DIY CNC Sandblaster Writes Large”

Retrofit Temperature Control To A Soldering Station

We’ve probably all seen USB soldering irons advertised for very little money, and concluded that they might not necessarily be the most useful of tools. The cheapest of these lack any real temperature regulation. Enter [Paulo Bruckmann], who has attached a thermistor to his iron with Kapton tape, added an Arduino Uno clone with rotary encoder and Nokia LCD, and put the result in a 3D printed case for a tiny and low powered temperature controlled soldering station. The claimed cost is only $10, which seems credible given the low price of Arduino clones.

The software provides the expected PID control, with the advantage of very quick warm-up due to the tip’s tiny size. The power source is 9 V rather than a USB 5 V, so the combination gives an iron capable of working on much larger joints than when unmodified. He therefore seems to have created what appears to be a significantly more capable iron from this unpromising start, something we find quite impressive. Take a look at his video below the break.

We reviewed one of these little irons last year, and found it to be a toy, but not a joke. Meanwhile we’ve seen some other mods for them, including a pair of desoldering tweezers.

Continue reading “Retrofit Temperature Control To A Soldering Station”

From Plastic Bottle To Plastic Brush

We first saw someone turn a plastic bottle into plastic ribbon about four years ago. Since then, we’ve wondered what this abundant, sturdy material could be used for besides just tying things together.

[Waldemar Sha] has answered that question with his excellent brush made from scrap wood and plastic bottle rope. Turning seven 1-litre bottles into curly bristle fodder was easy enough, but they have to be straight to brush effectively. No problem for [Waldemar]. He wound it all up on a  spinning homemade jig that’s anchored in a bench vise. The jig is designed to slide into a small electric sandwich grill he had lying around, and he just flips it after a while so the rope straightens evenly.

We really like the way he secured the bristles into the brush base. After drilling the holes, he sawed lengthwise channels that are deep enough for a bamboo skewer. Each group of bristles is hung over the skewer and down through the hole, and everything is glued in place before the handle is added. Sweep past the break to watch him tidy his workbench, and then learn how to make your own plastic rope.

Is there a better use of recycled plastic than making tools? Check out this joiner’s mallet made from milk jugs. Continue reading “From Plastic Bottle To Plastic Brush”

Sharpening With Bluetooth

Few things are as frustrating in the kitchen as a dull knife. [Becky] and her chef friend collaborated to build a Bluetooth module to tell you when you are sharpening a knife at the optimum angle. That might sound a little specialized, but the problem boils down to one that is common enough in a lot of situations: how do you tell your exact orientation while in motion? That is, with the knife moving rapidly back and forth over the sharpening stone, how can you measure the angle of the blade reliably?

Looking for a challenge, [Becky’s] first attempt was to just use an accelerometer. It worked, but it wasn’t very precise. Her final answer turned out to be a full inertial measurement unit — the BNO055 — that combines an accelerometer, a magnetometer, and a gyroscope along with enough smarts to fuse the data into actual position data.

Continue reading “Sharpening With Bluetooth”

Putting A Poor Man’s Vector Analyzer Through Its Paces

If anything about electronics approaches the level of black magic, it’s antenna theory. Entire books dedicated to the subject often merely scratch the surface, and unless you’re a pro with all the expensive test gear needed to visualize what’s happening, the chances are pretty good that your antenna game is more practical than theoretical. Not that there’s anything wrong with that — hams and other RF enthusiasts have been getting by with antennas that work without really understanding why for generations.

But we’re living in the future, and the tools to properly analyze antenna designs are actually now within the means of almost everyone. [Andreas Spiess] recently reviewed one such instrument, the N1201SA vector impedance analyzer, available from the usual overseas sources for less than $150. [Andreas]’s review does not seem to be sponsored, so it seems like we’re getting his unvarnished opinion; spoiler alert, he loves it. And with good reason; while not a full vector network analyzer (VNA) that will blow a multi-thousand dollar hole in your wallet, this instrument looks like an incredible addition to your test suite. The tested unit works from 137 MHz to 2.4 GHz, so it covers the VHF and UHF ham bands as well as LoRa, WiFi, cell, ISM, and more. But of course, [Andreas] doesn’t just review the unit, he also gives us a healthy dose of theory in his approachable style.

[The guy with the Swiss accent] has been doing a lot of great work these days, covering everything from how not to forget your chores to reverse engineering an IoT Geiger counter. Check out his channel — almost everything he does is worth a watch.

Continue reading “Putting A Poor Man’s Vector Analyzer Through Its Paces”

Super-Blue CNC Part Fixturing

Simple clamps are great if you need to keep the pressure on two parallel surfaces, but if you have an irregular plane, or you need to cut through it, clamps are not the correct tool. The folks at [NYC CNC] feature a video with a clever hack borrowing from other disciplines. Painters tape is applied to the top of a level mounting surface in the machine and then burnished. The same is done to the bottom of the workpiece. Superglue is drizzled between the tape layers and pressed together so now the stock is held firmly below the toolhead.

Some parts are machined in the video, which can be seen below, and the adhesion holds without any trouble. One of the examples they cut would be difficult to hold without damage or stopping the machine. The accepted wisdom is that superglue holds well to a slightly porous surface like tape, but it doesn’t like do as well with smooth surfaces like metal. Removing residue-free tape at the end of a cut is also cleaner and faster than glue any day.

If you have yet to cut your teeth, you can watch our very own Elliot Williams getting introduced to CNC machines or a portable machine even a child can use.

Continue reading “Super-Blue CNC Part Fixturing”

3D Printed ESP8266 Programming Jig

The various development boards such as the NodeMCU or Wemos D1 make working with the ESP8266 an absolute breeze. If they have a downside, it is that they are larger than the bare ESP2866, and of course cost a bit more. Just as with the Arduino, once you have the wiring sorted out and the code more or less finalized, your best bet is to ditch the unnecessary support hardware and use the bare module to save space and money in your final design.

The design took a few revisions to get right

Unfortunately, the ESP8266 form factor isn’t terribly forgiving when it comes time for hooking up a programmer. Rather than having to solder a serial adapter to the chip to flash it, [Ryan] came up with a slick 3D printed programming jig that uses pogo pins. If you have to program these boards in bulk, a jig like this can save a massive amount of time and aggravation.

Beyond the 3D printed holder for the pogo pins, this programmer uses a FTDI USB-to-serial adapter, a couple passive components to smooth out the power going into the chip, and a couple buttons.

In the video after the break, [Ryan] walks through the many iterations it took to get the 3D printed aspect of the jig worked out. The design went through a few rather large revisions, including one that fundamentally changed the whole form factor. Even with the jig now working, he mentions that he might circle back around and try it from a different angle.

Programming jigs are a staple of electronics manufacturing, and we’ve covered quite a few that have helped transformed a proof of concept into a small scale production runs.

Continue reading “3D Printed ESP8266 Programming Jig”