Two-Part Primer In A Can Is A DIY Dream Come True

When putting together a home workshop, available floor space is often the deciding factor when it comes time to pick tools and equipment. This ultimately leads to some very difficult decisions, and we’d wager there isn’t a hacker or maker reading this that hasn’t had to pass on a new piece of gear because they didn’t have anywhere to put it.

For example, the average home gamer isn’t going to have a paint booth and spraying equipment, so they have to settle for a rattle can in the backyard. Traditionally this has limited the kinds of products you can realistically apply, but as [Eric Strebel] shows off in his latest video, it seems like spray can technology is starting to catch up.

3D printed part with two coats of spray primer applied
The finish after two coats of primer.

Specifically, he’s been working with a canned two-part primer that doesn’t require any complicated mixing or special equipment to apply. After hitting a plunger on the bottom, a small compartment containing the activator is ruptured and the reaction begins. From that point, you’ve only got 24 hours to use the contents of the can before it cures. But since you only need to wait about 10 minutes between coats, that should give you plenty of time to complete the project.

In the video, [Eric] demonstrates how quickly this high-build primer can smooth out the layer lines on a 3D print. While you’ll still need to sand and potentially break out the spot filler to achieve that perfect finish, it’s clear that the primer works much better than anything we’re used to seeing come out of a can. Even after just two coats, the results are truly remarkable.

If there’s a downside, it’s that a can of this primer will run you about $25 USD. That’s about five times the cost of the Rust-Oleum Filler Primer that usually gets recommended in DIY circles, but the results really do seem to speak for themselves. We wouldn’t necessarily use this on every project, but if you’ve got something that needs an especially fine finish, you’ve at least got an option that doesn’t involve borrowing somebody’s compressor and spray gun.

If you need help shaking your paint before spraying – definitely give this 3D printed paint shaker a look!

Continue reading “Two-Part Primer In A Can Is A DIY Dream Come True”

Beginning The Machine Shop Journey With A DIY CNC

Building a good quality machine shop may seem to present a chicken-and-egg problem, at least for anyone not willing to mortgage their home for the money needed to buy all of these tools new. Namely, that building good tools often requires good tools. To help solve this problem, [Ryan] designed and built this CNC machine which can be built with nothing other than common tools, hardware store supplies, and some readily available parts from the internet.

Since it’s being built from consumer-grade material, [Ryan] has the design philosophy of “buying precision” which means that most of the parts needed for this build are precise enough for their purpose without needing to be worked in any way before incorporation into the mill. For example, he uses a granite plate because it’s hard, flat, heavy, and sturdy enough at the time of purchase to be placed into the machine right away. Similarly, his linear guides do not need to be modified before being put to work with a high degree of precision and minimal calibration. From there, he applies the KISS principle and uses the simplest parts available. With this design process he is able to “bootstrap” a high quality mill for around $1500 USD without needing any extra tools than the ones you likely already have.

The RIG-CNC as it is known has also been made completely open source which further cements its bootstrapability, and there is a lot more detail on the project page and in the video linked below. This project is unique not simply for the mill build from common parts and tools, but because this design philosophy is so robust. Good design goes a lot farther in our builds than a lot of us might realize, and good design often results in more maintainable, hackable things that work for more uses than the original creators may have even thought about.

Continue reading “Beginning The Machine Shop Journey With A DIY CNC”

A 3D-Printed Block And Tackle For Those Annoying Lifts

Perhaps the humble block and tackle — multiple parallel pulleys to reduce the effort of lifting — is not such a common sight as it once was in this age of hydraulic loaders, but it remains a useful mechanism for whenever there is a lifting task. To that end [semi] has produced a 3D-printed block and tackle system, which as can be seen in the video below the break, makes lifting moderately heavy loads a breeze.

It’s a simple enough mechanism, with the 3D printer supplying pulleys, chocks, and attachment points, and steel bolts holding everything together. It’s demonstrated with a maximum weight of 20 kilograms (44 pounds), and though perhaps some hesitation might be in order before trusting it with 200 Kg of engine, we’re guessing it would be capable of much more that what we’re shown. Should you wish to give it a try, the files can be found on Thingiverse.

The block and tackle should hold a special place in the hearts of engineers everywhere, as the first product manufactured using mass-production techniques. It shouldn’t be a surprise that this early-19th century factory came from the work of Marc Brunel, father of Isambard Kingdom Brunel who we’ve made the subject of a previous Hackaday piece.

Continue reading “A 3D-Printed Block And Tackle For Those Annoying Lifts”

Custom Isolated Variac Is Truly One Of A Kind

It’s no surprise that many hardware hackers avoid working with AC, and frankly, we can’t blame them. The potential consequences of making a mistake when working with mains voltages are far greater than anything that can happen when you’re fiddling with a 3.3 V circuit. But if you do ever find yourself leaning towards the sparky side, you’d be wise to outfit your bench with the appropriate equipment.

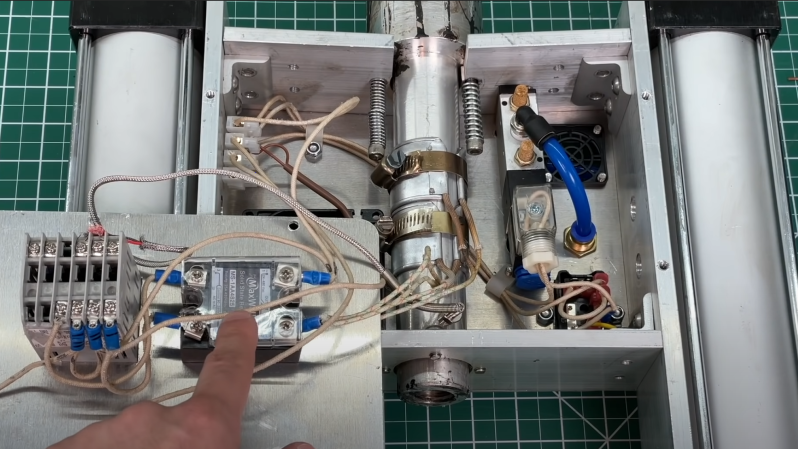
Take for example this absolutely gorgeous variable isolation transformer built by [Lajt]. It might look like a  high-end piece of professional test equipment, but as the extensive write-up and build photographs can attest, this is a completely custom job. The downside is that this particular machine will probably never be duplicated, especially given the fact its isolation transformer was built on commission by a local company, but at least we can look at it and dream.

This device combines two functions which are particularly useful when repairing or testing AC hardware. As a variable transformer, often referred to as a variac, it lets [Lajt] select how much voltage is passed through to the output side. There’s a school of thought that says slowly ramping up the voltage when testing an older or potentially damaged device is better than simply plugging it into the wall and hoping for the best. Or if you’re like Eddie Van Halen, you can use it to control the volume of your over-sized Marshall amplifiers when playing in bars.

Image of the device's internal components.Secondly, the unit isolates the output side. That way if you manage to cross the wrong wire, you’re not going to pop a breaker and plunge your workshop into darkness. It also prevents you from accidentally blowing up any AC powered test equipment you might employ while poking around, such as that expensive oscilloscope, since the devices won’t share a common ground.

Additional safety features have been implemented using an Arduino Uno R3 clone, a current sensor, and several relays. The system will automatically cut off power to the device under test should the current hit a predetermined threshold, and will refuse to re-enable the main relay until the issue has been resolved. The code has been written in such a way that whenever the user makes a configuration change, power will be cut and must be reestablished manually; giving the user ample time to decide if its really what they want to do.

[Lajt] makes it clear that the write-up isn’t meant as a tutorial for building your own, but that shouldn’t stop you from reading through it and getting some ideas. Whether you’re in the market for custom variac tips or just want to get inspired by an impeccably well engineered piece of equipment, this project is a high-water mark for sure.

ThunderScope datapath

Why Buy A New Scope When You Can ‘Just’ Build One?

Hackaday Prize 2021 Finalist ThunderScope is doing exactly that. [Aleska] is building a modular open source PC-connected oscilloscope aiming at four channels and a cool 100 MHz bandwidth with a low budget. The detailed project logs, showing how he is learning about ‘scope technology on-the-fly is a fascinating look into the mind of an engineer as he navigates the ups and downs of a reasonably complicated build.

We like how [Aleska] has realised early on, that keeping the project private and only releasing it when “I’m done” actually impedes progress, when you could open source from the beginning, log progress and get great feedback right from the start. All those obvious mistakes and poor design choices get caught and fixed before committing to hardware. Just think of all the time saved. Now this is an attitude to cultivate!

Continue reading “Why Buy A New Scope When You Can ‘Just’ Build One?”

Packing Heat With A Homemade Portable Soldering Iron

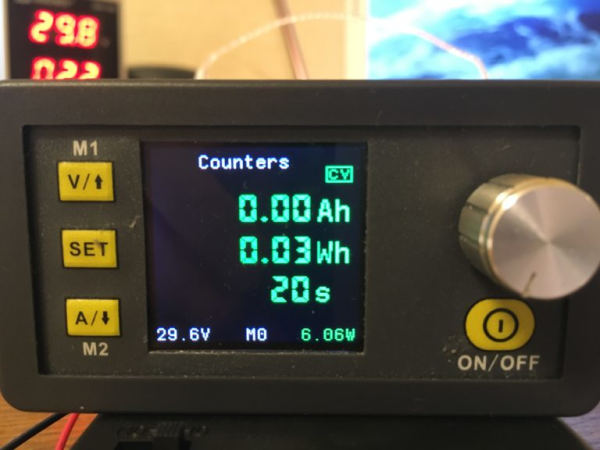
Small portable soldering irons are all the rage so [electronoobs] decided to build one on his own. While the design isn’t quite as sleek as a commercial unit, considering it holds its own batteries, it looks pretty good.

Of course, the question is: does it work? You can see in the video below that it does, melting solder in about ten seconds. The weight is about 100 g, so it should be very comfortable to use.

Continue reading “Packing Heat With A Homemade Portable Soldering Iron”

Practical Print Makes IPad A Magnificent Eye Piece

Be it the ever shrinking size of components, the miniscule size of the printing on such pieces, or the steady march of time that makes visits to the optometrist an annual ritual, many of us could use some assistance when things start getting fuzzy at the workbench. Arm-mounted LED magnifying lenses can be a handy helper. Zooming in on a macro photo on a smartphone is also a common option that we’ve used many times.

[Timo Birnschein] started down a similar path when he realized that his iPad Pro comes with an app called simply “Magnifier”. A 12” iPad isn’t exactly the most convenient device to hold while trying to solder small parts, so he spent some time designing and 3D printing a specialty iPad stand that he calls a “Quick and Dirty High Performance EE Microscope.” We call it a magnificent tool hack!

Rotating the iPad diagonally so that the camera is closest to the subject leaves plenty of room to work and makes great use of the available screen space. [Timo] reports that at 50% magnification the 12” screen makes even 0603 SMD parts easy to read. Now he rejoices to have more to do with his iPad than watching YouTube and reading Hackaday- although we don’t know why you couldn’t do both.

The STL files have been released on Thingverse for your experimentation. [Timo] notes that he’d like to add an LED ring to brighten things up, and a fume extractor to protect the delicate lens on the iPad. We have to wonder if some plastic wrap over the lens might produce the same effect at almost no cost. Whatever [Timo] decides to do, we’re sure it’ll be brilliant.

If you don’t have an iPad and a 3D printer, you might enjoy an earlier post that shows how you can use your phone as a microscope. If Lego and Raspberry Pi are your go-to parts, you can set your sights on this Lego/Pi/Arduino microscope.

Do you have your own preferred solution for seeing yourself through a hazy situation? Be sure to write it up, and then drop it in the Tip Line!