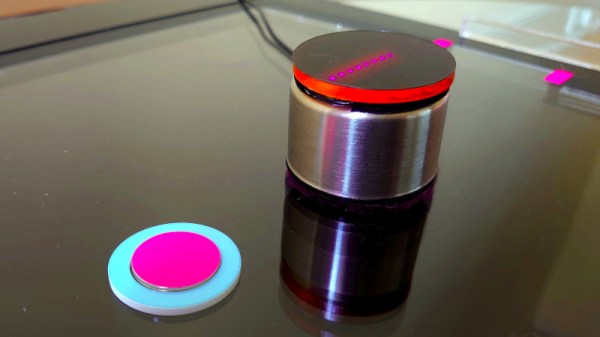
We love a good project here at Hackaday, particularly one that makes us want to pick it up and have a go at whatever it does for ourselves. And when we see such a project and find that it contains the One Chip To Rule Them All (otherwise known as the NE555 timer), our collective cup runneth over with joy. So [Andrew Fentem]’s magnetic hockey project certainly pushes all our buttons, as it’s a game superficially similar to an air hockey table in which a magnetic puck is accelerated by a handheld electronic bat.
The bats look extremely high-tech but are in fact surprisingly simple. Each one contains a Hall effect sensor which triggers the 555 which we’d expect is wired as a monostable, this in turn fires a MOSFET which energises an electromagnet for a set period of time. The puck is a magnet, and thus when it is detected by the Hall sensor it is shot away at high speed by the electromagnet. the result is a fast-paced game which has an extra edge over conventional air hockey, and which being honest, we’d love to have a go at. You can see it in the video below the break.
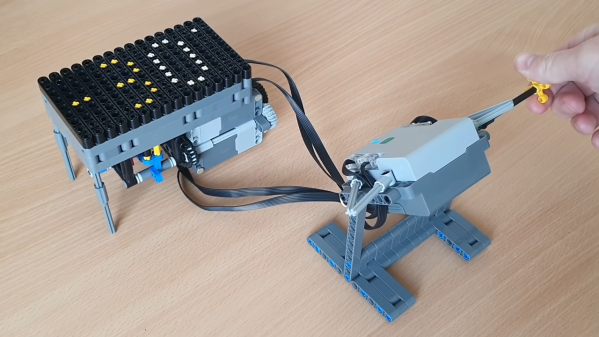
Utter the words “7-segment display” amongst hackers and you’ll typically get people envisaging the usual LED and LCD versions that we all come across in our daily lives. However, mechanical versions do exist, and [ord] has assembled a couple of designs of their very own.
The first uses what appears to be two LEGO motors to drive individual segments of the display. Each segment consists of a pair of yellow axles thrust up through a black grid to represent parts of the number, as well as a minus sign as needed. [ord] demonstrates it by using it to display angle data from a tilt sensor inside a LEGO Powered Up controller brick. Further photos on Flickr show the drive system from underneath.
The second design relies upon a drum-like mechanism that seems to only be capable of displaying numbers sequentially. It works in a manner not dissimilar to that of a player piano. The required movements to display each number are programmed into sequences with Technic pins sticking out of beams in a drum assembly driven by either a hand crank or motor. It’s again demonstrated by [ord] using it to display angular data.
While it’s unlikely we’ll see LEGO displays used as angle of attack meters in light aircraft, you could do so if you wanted a cheap and unreliable device that is likely to fall to pieces if unduly jostled. In any case, it’s not the first time we’ve seen LEGO 7-segment displays, but it’s always great to see a new creative take on an existing concept. We’d love to see such a design implemented into a fancy clock, or perhaps even a news ticker running on a 16-segment version. Video after the break.
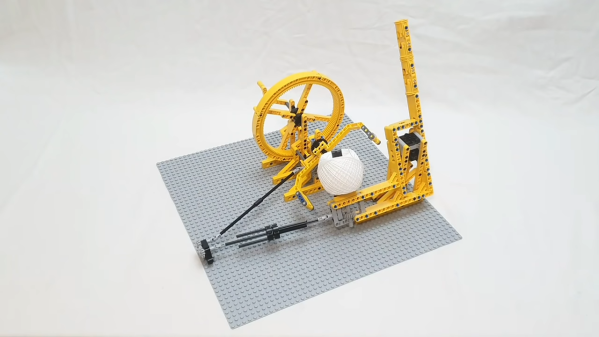
Unless you’re an avid fan of 1997’s box office hit Mouse Hunt, or actively working in the string industry, you probably don’t spend a lot of time thinking about how those balls of string are made. [ord] has, however, and built a tidy little winding machine that has us contemplating the possibilities of how useful LEGO machines can really be.
The design uses a large and imposing-looking ring gear to drive a spinning arm which carries the string onto the bobbin. The bobbin itself is rotated along with the spinning arm as the hand crank that operates the machine is mechanically linked to both. As the arm and bobbin turn, string is deposited onto the bobbin, building up into a pleasing ball of string that looks just like the ones you buy at the store.
We suspect that, unless [ord] is doing some very interesting things that we haven’t seen yet, the string was probably sourced off a reel or ball anyway, and this machine just serves to demonstrate how the process works.
However, it does go to show how LEGO machines can do real work. We’d love to see LEGO put to more practical uses like winding pickups or transformers, or other jobs that are maddeningly tedious when done by hand. Video after the break.
As you might expect, the release of last year’s Ghostbusters: Afterlife has not only lead to renewed interest in the old 1980s toys and tie-in merchandise, but has spawned a whole new generation of blinking plastic gadgets to delight children of all ages. Of course, for folks like us, that means more hardware to hack on.
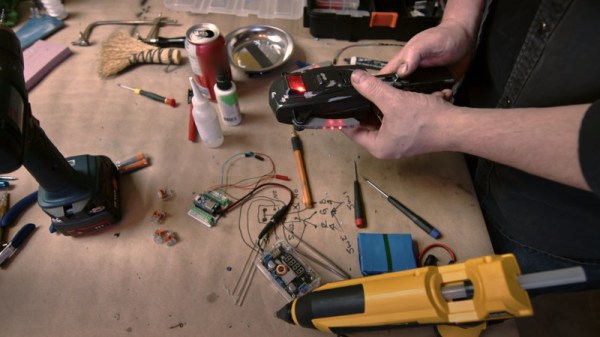
In a recent post to the official Ghostbusters YouTube channel, professional prop maker [Ben Eadie] shows off some of the tricks of the trade when he takes a $15 USD “PKE Meter” toy from Hasbro and turns it into a screen-quality prop. Even if you’re not looking to get an early start on your Halloween costume, the techniques demonstrated in this video could be easily adapted to other projects. For those whose next ideal home improvement is a fireman’s pole and an ectoplasmic laser-confinement grid, you might want to grab a couple of these toys while they’re still cheap for eventual conversion.
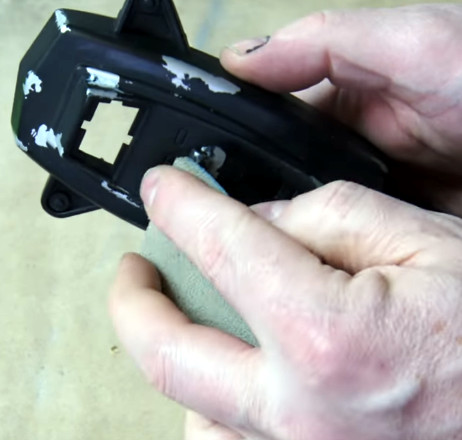
Uncovering the silver makes the piece look worn down.
The biggest takeaway from the video is probably the finishing techniques, as they could be used on any sort of realistic prop build. [Ben] starts by using a cabinet scraper to smooth out the lines on the plastic toy, and any holes are filled with the familiar baking soda and cyanoacrylate glue trick. Once the surfaces have been prepped, all the principle parts are sprayed with an adhesion promoter, followed by a coat of silver, and then the final black color.
This allows him to create a convincing “chipped paint” effect by strategically sanding or scraping through the top coat. Dabbing some toothpaste where you want the device to look worn down before spraying the final coat makes the process even faster, as it will prevent the top coat from sticking to the silver in the first place.
Unfortunately [Ben] doesn’t spend a whole lot of time explaining the electronics side of things, but it doesn’t look like there’s anything too complex going on. All the original gear is stripped, and it gets replaced with a microcontroller which we believe is an Adafruit ItsyBitsy nRF52840 Express. This is connected to two strings of tiny APA102 addressable LEDs which are run down the “wings” (we especially like the 3D printed lenses used to replace the original solid pips), and one that’s used to provide the iconic sine-wave display.
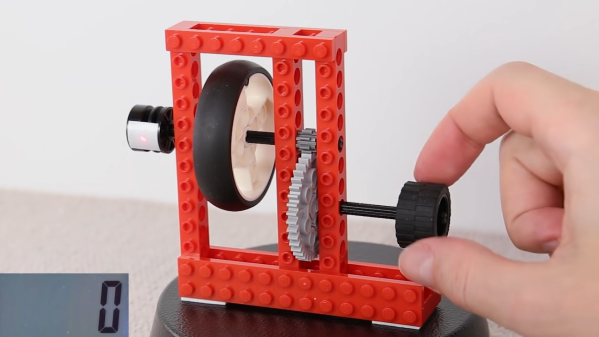
It’s not a question you ask yourself every day, but it’s one that the [Brick Experiment Channel] set out to answer: how fast can you spin a LEGO wheel by hand? In their typical way, they set about building an increasingly complex contraption to optimize for the very specific case of maximum RPM.
The build starts with a LEGO wheel fitted to an axle, supported in two LEGO Technic beams. A white flash mark is also attached onto a part of the axle for measuring the rotational speed with a photo-tachometer. A first attempt gets as fast as 1,700 RPM. Upgrades come thick and fast , and with a three-stage compound geartrain, the handcranked wheel reaches 6,300 RPM. Adding a further stage introduces the problem that the plastic Technic axle begins to twist under the torque input by the hand.
Taking a new approach of pulling on a string to turn the wheel, the first attempt nets 8,300 RPM. Gearing pushes this further to 12,900 revs, but adding more gears again leads to the problem of axles bending under the strain. A bidirectional rope pull design helps, though, and the system reaches 13,100 RPM.
Some of the parts have been damaged thus far, but a rebuild with fresh parts that are nicely lubricated provides a huge boost. The now-slippery shafts run smoother and the wheel hits a blistering 19,300 RPM as the mechanism disassembles itself.
Sometimes a kid wakes up on Christmas morning and runs downstairs, only hoping to see one thing: a shiny new wind tunnel. This past December, that’s exactly what [SparksAndCode]’s son found under beside the tree, complete with a bag of scarves, ping-pong balls, and other fun things to launch through it (in the name of physics, of course).
The real story here starts about a week before Christmas, when [SparksAndCode]’s son was enthralled by a similar device at a science museum. At his wife’s suggestion, [SparksAndCode] got to work designing a and building a wind tunnel with hardware-store parts, his deadline looming ahead. The basic structure of the tunnel is three rods which support plywood collars. The walls are formed by plastic sheets rolled inside the collars to make a tube. Underneath, a Harbor Freight fan supplies a nice, steady stream of air for endless entertainment.
After finding a few bugs during his son’s initial beta testing on Christmas morning, [SparksAndCode] brought the wind tunnel back into the shop for a few tweaks and upgrades, including a mesh cover on the air intake to stop things from getting sucked into the fan. The final result was a very functional (and fun!) column of air. Looking for even more function (but not necessarily less fun)? We’ve got you covered too with this home-built research wind tunnel from a few years back.
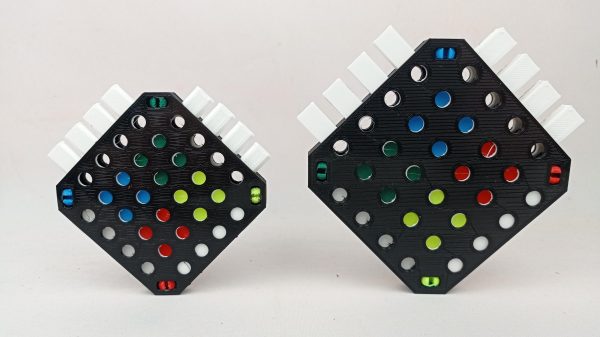
2022 is a good year for puzzles, and if you’re getting tired of Wordle, you might be after a new challenge. This color puzzle from [Sebastian Coddington] could be just what you’re looking for.
[Sebastian] describes the 4×4 Color Dot Puzzle as a sort of combination of the ideas behind the Rubik’s Cube and the 15 puzzle. The aim is to arrange the 16 colored tiles on the board to form four single-colored 2×2 squares in the overall 4×4 board. The puzzle is 3D printed, using 6 colors of filament – black for the body of the puzzle, white for the control sticks, and yellow, green, red, and blue for the individual tiles.
We haven’t seen any mathematical proofs of how to beat the game, but we’re sure [Sebastian] has gotten good at beating the puzzle having designed it himself. According to tipster [Michael Gardi], who knows a thing or two about 3D printing games himself, the puzzle makes for a fun little mind teaser.