It’s something of an unwritten rule at this point that you can’t hold a hacking conference without providing a badge with at least a few LEDs on it. Not only can they be a great way to learn electronics for the attendees that tinker with them, but they’re a keepsake to commemorate the event. As a perfect example, [Matt Agius] recently wrote in to tell us about the badge he’s made for the upcoming CarolinaCon 16.
As [Matt] explains, the idea with this badge was to make it as easy as possible for attendees to assemble. In the final version there are only going to be three components that need to be soldered, so even if they’ve never touched SMD components before, they should still be able to get their badge lit up.
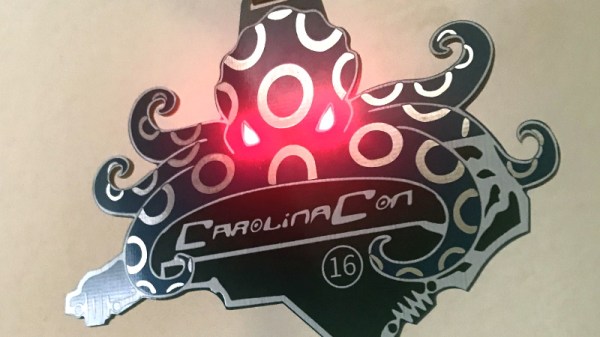
The badge largely makes up for its simplistic electronics with some fantastic board art on the flip side. The two red LEDs illuminate the eyes of a rather sinister looking octopus that’s ensnaring the unsuspecting state of North Carolina in its tentacled grip. The art was originally done by [Katie Dorn], with [Matt] spearheading its conversion into something that could be sent out for PCB fabrication.
Anyone looking to add this latest entry to their growing collection of badges will need to attend CarolinaCon on April 10th and 11th, where you’ll be able to catch a talk [Matt] is giving on the subject called “How to design Printed Circuit Boards for Hacking and for Art”.