[David]’s family acquired a swimming pool. While it’s not his favorite activity in the world, every now and then he’ll indulge in the blue plastic bin full of water occupying previously pristine land in his backyard.
As he says, cool beer is pleasant, but cool water tends to put a damper on the experience. Rather than do something pedestrian like touch the water himself to discover its temperature; he saw an opportunity for a fun little project in a wireless temperature monitor.
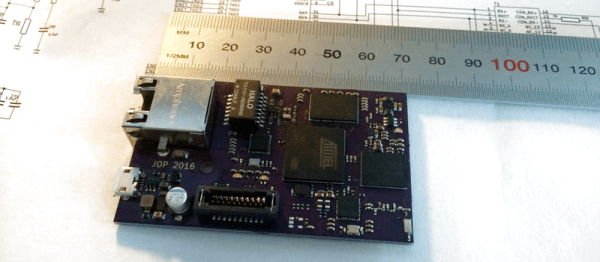
The heart of the device is a Telecom Design TD1208 which runs on the French SigFox network. For a small fee any device on the network can send up to 140 12byte packets of data a day. Not a lot, but certainly acceptable for the Microchip MCP9700 temperature sensor it uses. He got the board up and running, and even made his own custom helical coil antenna.
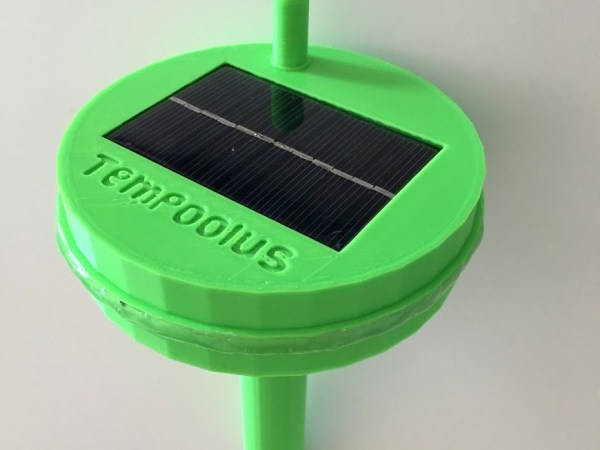
The case was 3D printed out of PLA. It’s a tiered cylindrical bobber. The wider top section floats on the water and the base acts as a ballast, holding the battery and sensor. The bobber is powered by a combination of a questionable Chinese lithium battery, charging circuit, and solar panel. [Dave] was keen to point out that the battery is, technically, water cooled.
He wrapped up the code for the bobber and used SigFox’s SDK to build a nice web interface. Now, when the rare mood strikes him, he can remain inside if the conditions aren’t right for a swim.