The development of cheaper, more powerful lasers has always been a cause for excitement among hackers, and fiber lasers are no exception. One of the newer tools they’ve enabled is the laser welder, which can be used to weld, cut through metal, or clean off surfaces. Or, as [Cranktown City] demonstrated, you can use one to build a metal 3D printer.
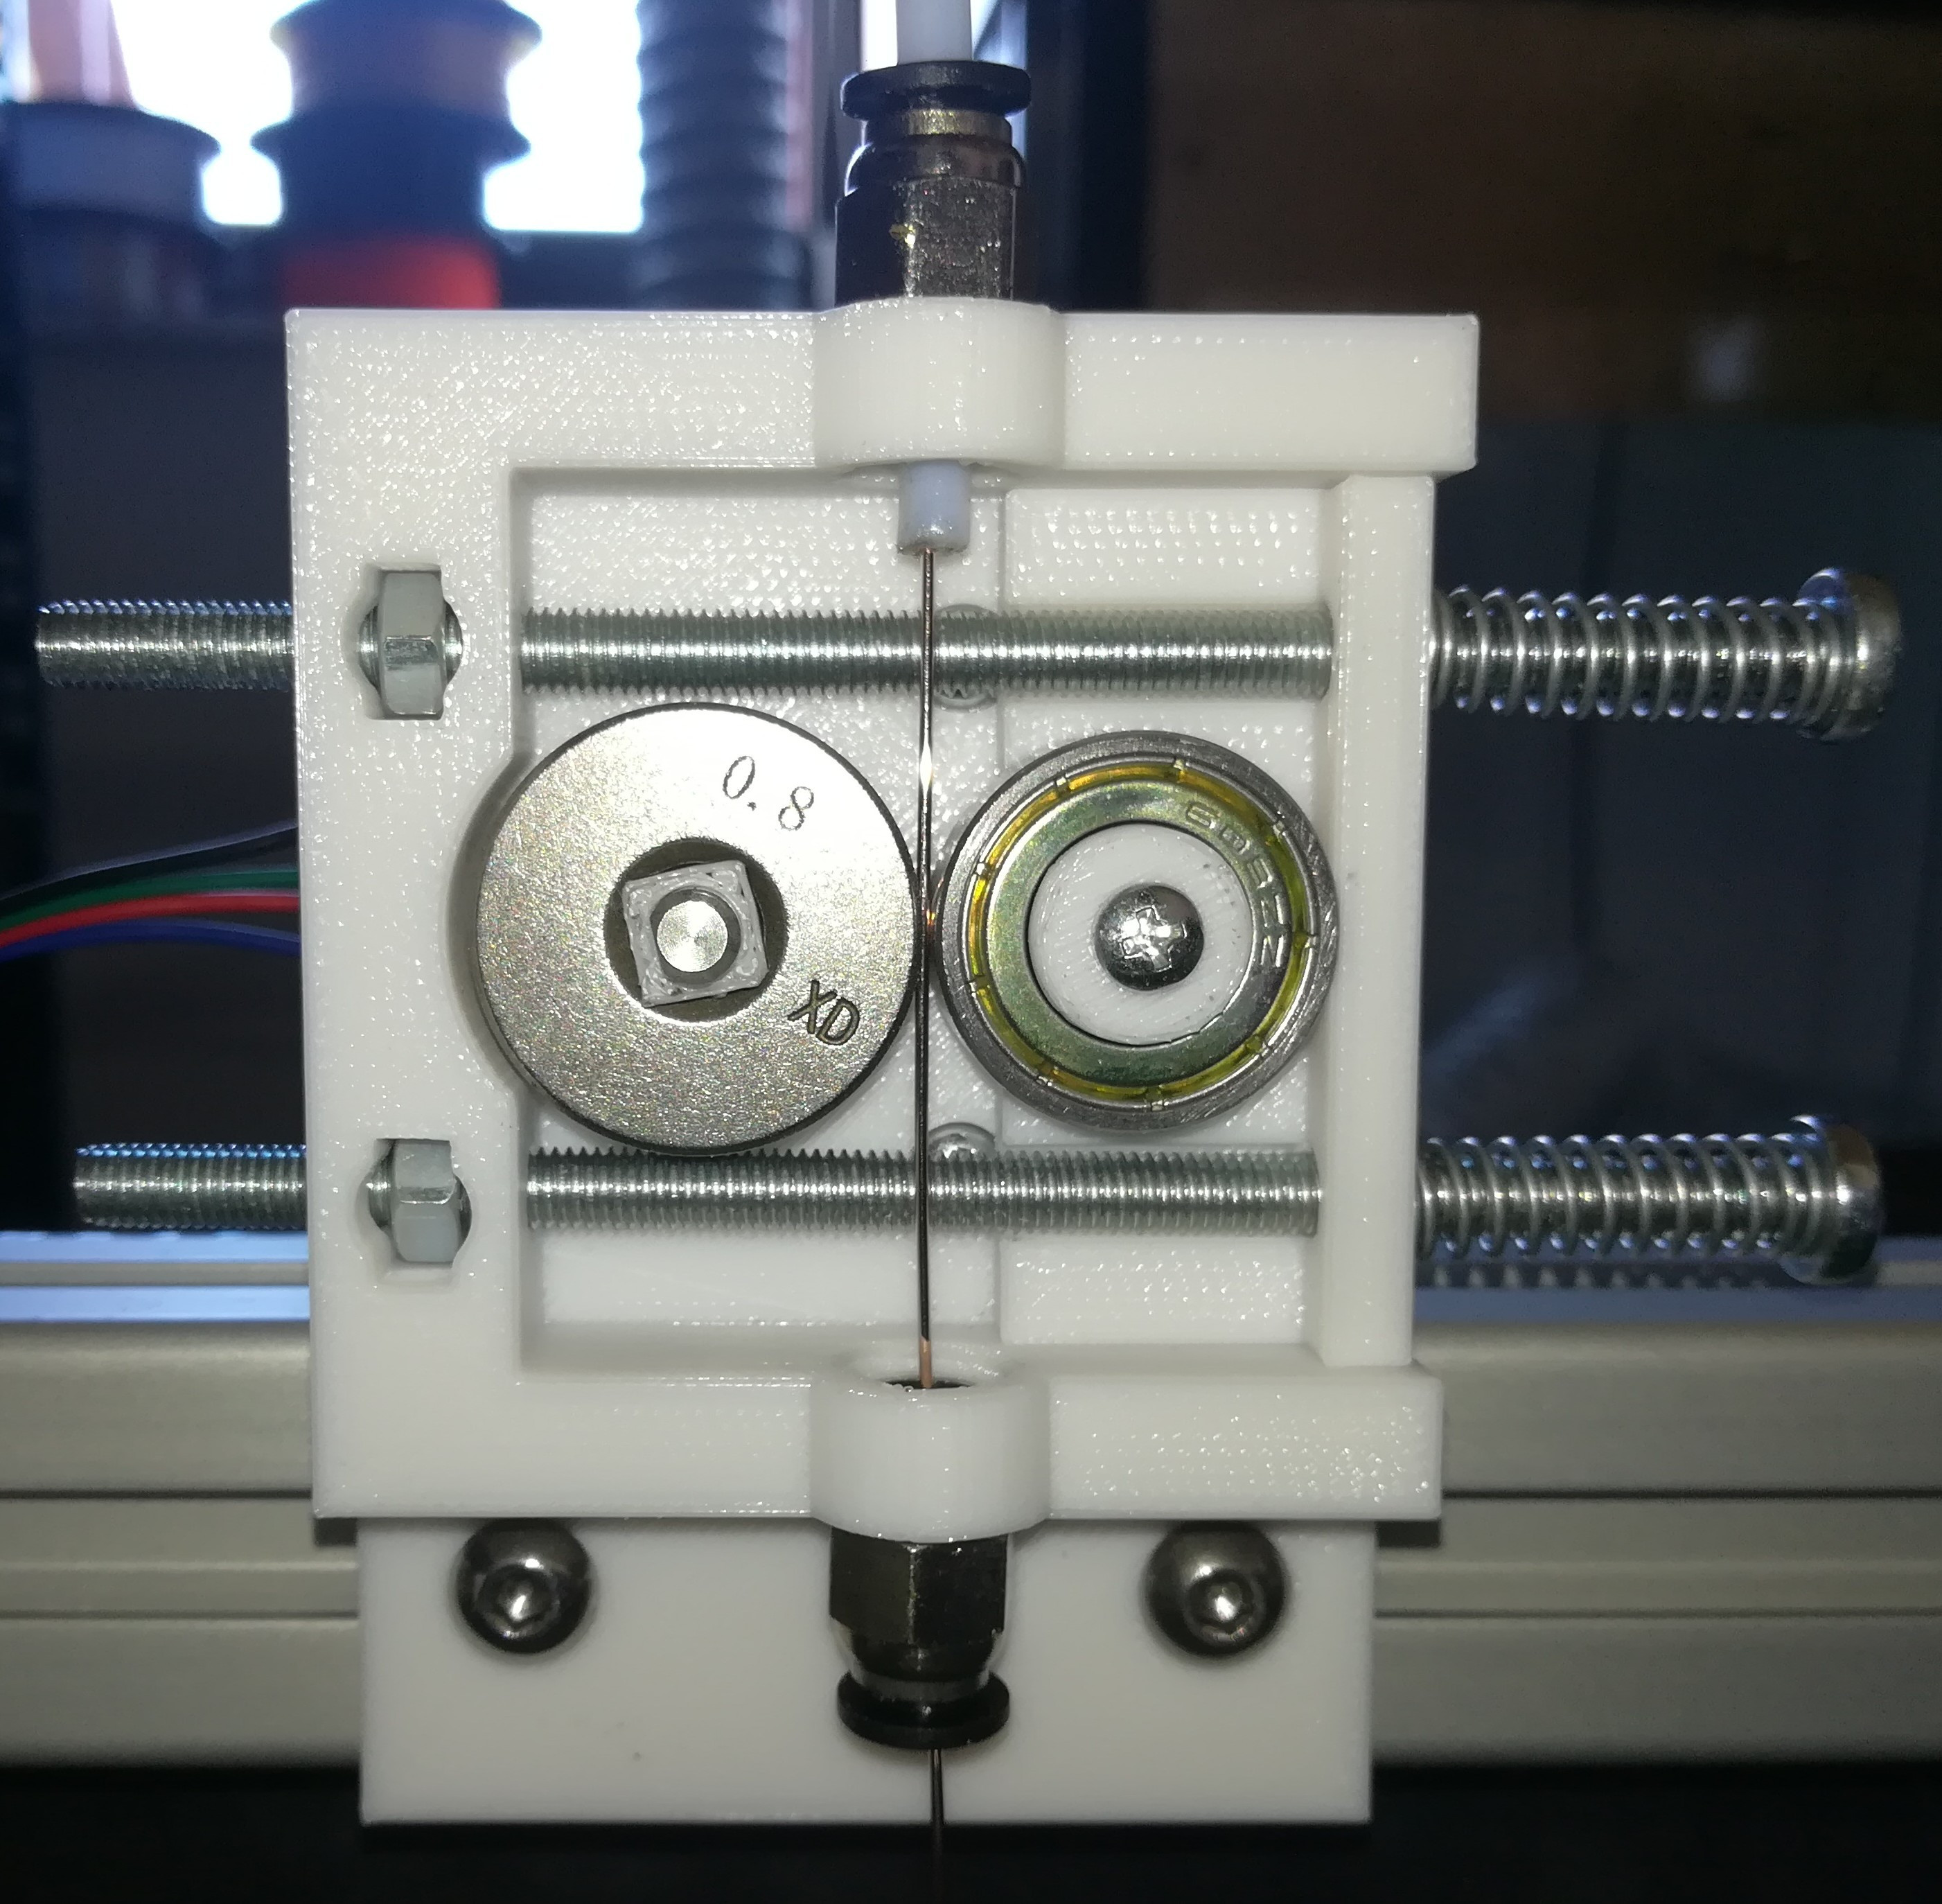
The printer’s built around a 2000-Watt fiber laser welder from Skyfire, and the motion system came from a defunct secondhand 3D printer built by an out-of-business insole printing company. The frame was reinforced with steel, the welding gun was mounted in place of the hotend, and the trigger was replaced with a CNC-controlled switch. It didn’t originally use any specific shielding gas, since the welder was supposed to perform adequately with just compressed air if high weld quality wasn’t essential.
The first few tests were promising, but did reveal quite a few problems. Heat buildup was an early issue which threatened to warp the build plate, and which eventually welded the build plate to the Z-axis gantry. Adding a strong cooling fan and putting a gap between the build plate and the gantry solved this. The wire also kept getting stuck to the build surface, which [Cranktown City] solved by pausing the wire feed and pulling it away from the part when a layer finished. Simply using compressed air led to a weak deposit that cracked easily, and while a nitrogen stream improved the print somewhat, argon shielding gas gave the best results. For his final print, [Cranktown City] made a vase. The layers were a bit crude, but better than most welder-based metal printers, and the system shows some real promise.
We’ve seen a few printers built around welders before, and a few built around lasers, but this seems to be the first to use both.