Coil Winding Machine Makes It Easy

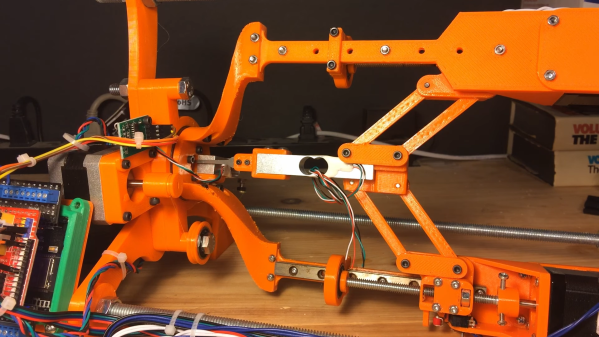
[Mr Innovative] needed to wind some coils, and decided to make a machine to do the work. Making such machines has become a lot easier over the years. There was a time when we might probably have had to hack an old printer or scanner to get linear rods and stepper motors. Now, thanks to widespread 3D printing, we can order parts like that from lots of places. The 3D printing helps, too, to fabricate all the little custom widgets you need to put something like that together.

The machine looks great. It uses a number of parts that would look at home on a 3D printer or CNC build. We thought his Chinese mini table saw did a great job cutting the aluminum extrusions, but we did worry about the safety of his fingers. We’ll admit we are generally lazy and buy the extrusions precut.

Continue reading “Coil Winding Machine Makes It Easy”

3D-Printed Press-Forming Tools Dos And Don’ts

Press-forming is a versatile metal forming technique that can quickly and easily turn sheet metal into finished parts. But there’s a lot of time and money tied up in the tooling needed, which can make it hard for the home-gamer to get into. Unless you 3D-print your press-form tooling, of course.

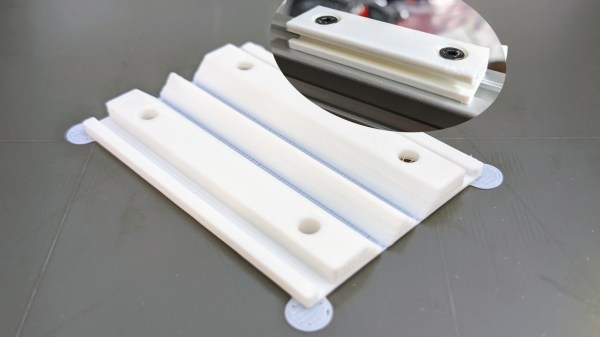
Observant readers will no doubt recall our previous coverage of press-forming attempts with plastic tooling, which were met with varying degrees of success. But [Dave]’s effort stands apart for a number of reasons, not least of which is his relative newbishness when it comes to hot-squirt manufacturing. Even so, he still came up with an interesting gradient infill technique that put most of the plastic at the working face of the dies. That kept print times in the reasonable range, at least compared to the days of printing that would have been needed for 100% infill through the whole tool profile.

The other innovation that we liked was the idea to use epoxy resin to reinforce the tools. Filling the infill spaces on the tools’ undersides with resin resulted in a solid, strong block that was better able to withstand pressing forces. [Dave] didn’t fully account for the exothermic natures of the polymerization reaction, though, and slightly warped the tools. But as the video below shows, even suboptimal tools can perform, bending everything he threw at them, including the hydraulic press to some extent.

It sure seems like this is one technique to keep in mind for a rainy day. And hats off to [Dave] for sharing what didn’t work, since it points the way to improvements.

Continue reading “3D-Printed Press-Forming Tools Dos And Don’ts”

Peek Into This Synth’s Great Design (And Abandoned Features)

[Tommy]’s POLY555 is an analog, 20-note polyphonic synthesizer that makes heavy use of 3D printing and shows off some clever design. The POLY555, as well as [Tommy]’s earlier synth designs, are based around the 555 timer. But one 555 is one oscillator, which means only one note can be played at a time. To make the POLY555 polyphonic, [Tommy] took things to their logical extreme and simply added multiple 555s, expanding the capabilities while keeping the classic 555 synth heritage.

The real gem here is [Tommy]’s writeup. In it, he explains the various design choices and improvements that went into the POLY555, not just as an instrument, but as a kit intended to be produced and easy to assemble. Good DFM (Design For Manufacturability) takes time and effort, but pays off big time even for things made in relatively small quantities. Anything that reduces complexity, eliminates steps, or improves reliability is a change worth investigating.

For example, the volume wheel is not a thumbwheel pot. It is actually a 3D-printed piece attached to the same potentiometer that the 555s use for tuning; meaning one less part to keep track of in the bill of materials. It’s all a gold mine of tips for anyone looking at making more than just a handful of something, and a peek into the hard work that goes into designing something to be produced. [Tommy] even has a short section dedicated to abandoned or rejected ideas that didn’t make the cut, which is educational in itself. Want more? Good news! This isn’t the first time we’ve been delighted with [Tommy]’s prototyping and design discussions.

POLY555’s design files (OpenSCAD for enclosure and parts, and KiCad for schematic and PCB) as well as assembly guide are all available on GitHub, and STL files can be found on Thingiverse. [Tommy] sells partial and complete kits as well, so there’s something for everyone’s comfort level. Watch the POLY555 in action in the video, embedded below.

Continue reading “Peek Into This Synth’s Great Design (And Abandoned Features)”

Explore The Cosmos With This DIY Digital Telescope

Getting a closer look at the Moon isn’t particularly difficult; even an absolute beginner can point a cheap telescope towards our nearest celestial neighbor and get some impressive views. But if you’re looking to explore a bit farther, and especially if you want to photograph what you find out there amongst the black, things can get complicated (and expensive) pretty quick.

While building this 3D printed automated telescope designed [Greg Holloway] isn’t necessarily cheap, especially once you factor in what your time is worth, the final product certainly looks to be considerably streamlined compared to most of what’s available in the commercial space. Rather than having to lug around a separate telescope, tripod, motorized tracker, and camera, you just need this relatively compact all-in-one unit.

It’s taken [Greg] six months to develop his miniature observatory, and it shows. The CAD work is phenomenal, as is the documentation in general. Even if you’re not interested in peering into the heavens, perusing the Instructables page for this project is well worth your time. From his tips on designing for 3D printing to information about selecting the appropriate lens and getting it mated to the Raspberry Pi HQ Camera, there’s a little something for everyone.

Of course if you are looking to build your own motorized “GOTO” telescope, then this is must-read stuff. [Greg] has really done his homework, and the project is a fantastic source of information about motor controllers, wiring, hand controllers, and the open source firmware you need to tie it all together. Many of the ideas he’s outlined here could be applicable to other telescope projects, or really, anything that needs to be accurately pointed to the sky. If you’d like to get started with night sky photography and aren’t picky about what kind of things you capture, we’ve seen a number of projects that simply point a camera towards the stars and wait for something to happen.

[Thanks to Eugene for the tip.]

Smart Lid Spies On Sourdough Starter, Sends Data Wirelessly

[Justin Lam] created a wonderfully-detailed writeup of his Smart Sourdough Lid project, which was created out of a desire to get better data on the progress and health of his sourdough starters, and to do so more efficiently. The result is a tidy, one-piece lid that constantly measures temperature, humidity, and height of the starter in the jar. Data is sent wirelessly for analysis, but there is also a handy OLED display on the top of the lid that shows immediately useful data like how much the starter has peaked, and how much time has passed since it did so.

The PCB was optimized for size, and not designed with mounting in mind, so a hot-glued machine screw serves as a “button extender”. Issues like this can happen when enclosures are designed after the fact; it’s something to which we can all relate.

We really like how focused the design is, and the level of detail [Justin] goes into to explain his design decisions and describe how well they worked out. This isn’t [Justin]’s first kick at the can when it comes to getting data on his sourdough, after all. We remember his earlier work using computer vision to analyze sourdough starters, and he used what he learned to inform this new design; the smart lid is easier to use and handles data much more efficiently.

The project’s GitHub repository has all the information needed to build your own. The lid is ESP8266-based and integrates a VL6180X time-of-flight (ToF) distance sensor, DHT22 to sense temperature and humidity, and a small SSD1306 OLED display for data. A small custom PCB keeps the modules tidy, and a 3D-printed custom enclosure makes it one tidy package.

[Justin] also analyzes the results he obtained and talks about what they mean in the last part of his writeup, so if you’re into baking and interested in his findings, be sure to give that a look.

Attack Of The Flying 18650s

When somebody builds a quadcopter with the express purpose of flying it as fast and aggressively as possible, it’s not exactly a surprise when they eventually run it into an immovable object hard enough to break something. In fact, it’s more like a rite of passage. Which is why many serious fliers will have a 3D printer at home to rapidly run off replacement parts.

Avid first person view (FPV) flier [David Cledon] has taken this concept to its ultimate extreme by designing a 3D printable quadcopter that’s little more than an 18650 cell with some motors attached. Since the two-piece frame can be produced on a standard desktop 3D printer in a little over two hours with less than $1 USD of filament, crashes promise to be far less stressful. Spend a few hours during the week printing out frames, and you’ll have plenty to destroy for the weekend.

While [David] says the overall performance of this diminutive quadcopter isn’t exactly stellar, we think the 10 minutes of flight time he’s reporting on a single 18650 battery is more than respectable. While there’s still considerable expense in the radio and video gear, this design looks like it could be an exceptionally affordable way to get into FPV flying.

Of course, the argument could be made that such a wispy quadcopter is more likely to be obliterated on impact than something larger and commercially produced. There’s also a decent amount of close-quarters soldering involved given the cramped nature of the frame. So while the total cost of building one of these birds might be appealing to the newbie, it’s probably a project best left to those who’ve clocked a few hours in on the sticks.

We’ve seen quite a few 3D printed quadcopter frames over the years, but certainly none as elegant as what [David] has created here. It’s an experiment in minimalism that really embraces the possibilities afforded by low-cost desktop 3D printing, and we wouldn’t be surprised to see it become the standard by which future designs are measured.

3D-Printed Macro Pad Ditches The PCB With Slick Wiring Guides

Reddit user [duzitbetter] showed off their design for a 3D-printed programmable macro keyboard that offers a different take on what can be thought of as a sort of 3D-printed PCB. The design is called the Bloko 9 and uses the Raspberry Pi PICO and some Cherry MX-style switches, which are popular in DIY keyboards.

The enclosure and keycaps are all 3D printed, and what’s interesting is the way that the enclosure both holds the components in place as well as providing a kind of wire guide for all the electrical connections. The result is such that bare copper wire can be routed and soldered between leads in a layout that closely resembles the way a PCB would be routed. The pictures say it all, so take a look.

Bloko 9 is available as a paid model, and while going PCB-free thanks to 3D printing is a technique others have played with, it is very well demonstrated here and shows there is still plenty of room to innovate on the concept. DIY keyboard and macro pad design is also fertile ground for hackers; we have even seen that it’s possible to 3D print one right down to the switches themselves.