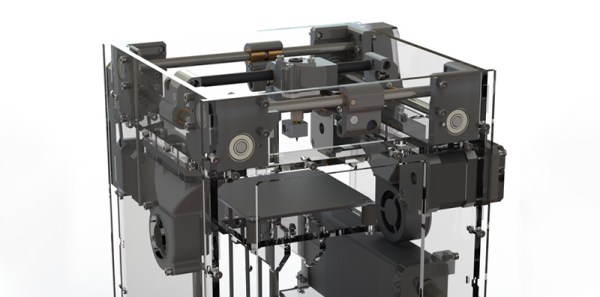
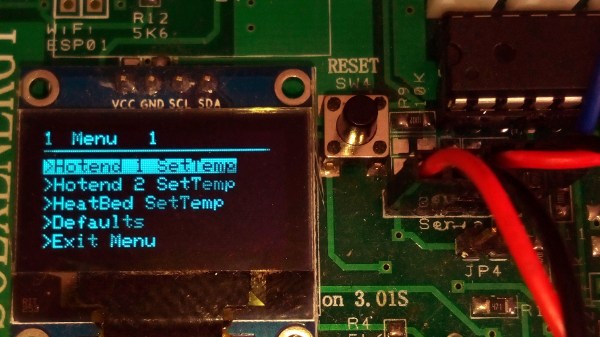
3D Printing On The Subway; Or Anywhere Else!

3D-Printed wearable electronics are on the rise, however our own [Naomi Wu] flipped it around and made a wearable 3D printer which not only is portable but also manufactures on the move!

The project starts with a baby carrier that was locally purchased, and the extra fat was trimmed off leaving behind only the primary harness and square frame. This square frame is left intact to provide stability to the mounted printer as well as some level of comfort to the wearer. [Naomi] then drills a number of new holes in the delta printer in question, of which fortunately the top is made of plastic. Using swivel screws and long screws, the upper part connects with the harness. The receptacle clamp for the upper part is 3D-printed as well, and provides a modular rigid fixture for the machine.

The lower part also uses a 3D-printed triangular base that has a slot for the carrier frame which attaches with the bottom part of the delta using screws. The project is powered via two 3 Ah batteries that are kept in place behind the printer using custom clamps made with PLA. The whole project works on the move, as demonstrated by [Naomi] in the video below.

From dissecting the baby carrier to puncturing holes in a harness using a screwdriver heated by a blow torch, this project has a lot of DIY in it. For those looking for a more productive motorised wearable, check out Adding Haptic Feedback For The Disabled. Continue reading “3D Printing On The Subway; Or Anywhere Else!”

Automatic part remover for 3D printer

Automatically 3D Print Infinite Number Of Parts

We’ve seen 3D printers coming out with infinite build volumes, including some attempts at patenting that may or may not stall their development. One way around the controversy is to do it in a completely different way. [Aad van der Geest]’s solution may not give you the ability to print an infinitely long part, but it will allow you to print an infinite number of the same, or different, parts, at least until your spool runs out.

[Aad]’s solution is to have a blade automatically remove each part from the print bed before going on to the next. For that he put together a rail system that sits on the bed of his Ultimaker 2, but out of the way on the periphery. A servo at one end pulls a blade along the rails, sweeping over the bed and moving any parts on the bed to one end where they fall away. This is all done by a combination of special G-code and a circuit built around a PIC12F629.

One of many things that we think is pretty clever, as well as fun to watch, is that after the part is finished, the extruder moves to the top corner of the printer and presses a micro switch to tell the PIC12F629 to start the part removal process. You can see this in the first video below. The G-code takes over again after a configurable pause.

But [Aad]’s put in more features than just that. As the second video below shows, after the parts have been scraped from the build plate, a pin on the extruder is used to lift and drop the blade a few times to remove small parts that tend to stay on the blade. Also, the extruder is purged between prints by being moved over a small ridge a few times. This of course is also in that special G-code.

How do you produce the special G-code, since obviously it also has to include the parts to print? For that [Aad]’s written a Windows program called gcmerge. It reads a configuration file, which you edit, that contains: a list of files containing the G-code for your parts, how many to print, whether or not you want the extruder to be purged between prints, various extruder temperatures, cooling times, and so on. You can find all this, as well as source for the gcmerge program, packaged up on a hackaday.io page. Incidentally, you can find the PIC12F629 code there too.

Continue reading “Automatically 3D Print Infinite Number Of Parts”

XYZ Printing Unveils Inkjet-Based Filament Printer

XYZ Printing, makers of the popular da Vinci line of 3D printers, have just released one of the holy grails of desktop 3D printing. The da Vinci Color is a full-color, filament based printer. How does this work? A special filament (Color PLA, although this filament is white in color) is extruded through a nozzle like any other 3D printer. Color is then added layer by layer by a system of inkjets in the head of the printer. Yes, it’s a full-color 3D printer, and yes, people have been suggesting this type of setup for years. This is the first time it’s been made real.

The specs for this printer are about what you would expect from any other filament-based printer in 2017. The build volume is 200 x 200 x 150mmm, the print bed has auto-leveling (although strangely doesn’t have a heated bed), and the user interface is a 5-inch color LCD. The da Vinci Color is available for preorder right now for $2,999.

You can check out a few pics of samples printed on the da Vinci Color below:

Continue reading “XYZ Printing Unveils Inkjet-Based Filament Printer”

3D Printer Tool Changer Gives You Access To Lots Of Extruders

The benefits of having a 3D printer with multiple extruders are numerous: you can print soluble support material for easy removal, print a combination of flexible and rigid filament, or simply print in different colors. Unfortunately, traditional multi-extruder setups have some serious drawbacks, even aside from the cost.

Usually, the extruders are all mounted next to each other on a single carriage. This increases the mass, which can cause print quality issues like shadowing. It also reduces the printable area, as each extruder needs to be able to reach the entire area. All of this means that the design becomes more and more impractical with each extruder you add, and that’s why it’s uncommon to see more than two extruders on a printer.

Over on Hackaday.io, [rolmie] has come up with a very practical (and affordable) solution to this problem. He has designed a tool changer that gives the printer the ability to switch out hot ends on the fly. The system is very similar to the tool changers we see on CNC machining centers: tools (the hotends) are stored on a rack, and a tool change in the G-code sends the carriage over to the rack to drop off the old hotend and pick up a new one.

The benefit of the design is that both the mass and volume of the carriage are kept to a minimum, while allowing you to use many different hot ends. Each hotend’s settings can be configured individually, and you can even use different models of hotend altogether (maybe one model works better for PLA, while another is better for ABS). The design is still in the prototyping stage and needs some refinement, but it’s a very promising proof of concept that seems like it could be implemented fairly easily into most 3D printer models.

Continue reading “3D Printer Tool Changer Gives You Access To Lots Of Extruders”

A Functioning 3D Printer For 10€

There was a time when crowdfunding websites were full of 3D printers at impossibly low prices. You knew that it would turn out to be either blatant vaporware or its delivery date would slip into the 2020s, but still there seemed always to be an eager queue ready to sign up. Even though there were promised models for under $200, $150, and then $100, there had to be a lower limit to the prices they were prepared to claim for their products. A $10 printer on Kickstarter for example would have been just a step too far.

There is a project that’s come close to that mark though, even though the magic figure is 10 euros rather than 10 dollars, so just short of 12 dollars at today’s exchange rate. [Michele Lizzit] has built a functioning 3D printer for himself, and claims that magic 10€ build price. How on earth has he done it? The answer lies in extensive use of scrap components, in this case from broken inkjet printers and an image scanner. These provide all the mechanical parts for the printer, leaving him only having to spend his 10€ on some hot end parts and the printer’s electronics. In an unusual move, the frame of the machine appears to come from a set of cardboard biscuit boxes, a master stroke of junk box construction.

The claimed resolution is 33µm, and using the position encoders from the inkjet printers he is able to make it a closed loop device. We salute his ingenuity in building such an impressive printer from so little, and were we ever locked by the bad guys in a room full of IT junk and lacked a handy escape device, we’d wish to be incarcerated with [Michele] any day over [Angus MacGyver] or [Sgt. Bosco BA Baracus].

You can see the printer in action in the video below the break.

Continue reading “A Functioning 3D Printer For 10€”

Finishing A Mini PS One: SLA Vs Extruded

One of the biggest lessons learned by first time 3D printer users is that not everything can be replicated and a printer is a machine and not a miracle worker. It has limitations in terms of what it can print as well as the quality of the output. For teeny tiny objects, the 0.8 mm nozzle will just not do and with resin printers on the rise, the question is, ‘are extruder printers obsolete?’

[Dorison Hugo] has made a mini version of the PS One using a Raspberry Pi which you can play games one. The kicker is that in his video, he does a comparison of an SLA printer and a cheaper extruder one for his enclosure. He goes through a laundry-list of steps to print, file, fill, repair, sand paint, sand, paint etc to try to get a good model replica of the original PS One. He then proceeds to print one with an SLA printer and finishes it to compare with the first model. The decals are printed on an inkjet for those who are wondering, and there is a custom cut heatsink in there as well that was salvaged from an old PC.

Spoiler alert! The SLA wins but in our view, just slightly. The idea is that with enough elbow grease and patience, you can get pretty close to making mini models with a cheaper machine. The SLA print needs work too but it is relatively less and for detailed models, it is a much better choice. We really enjoyed watching the process from start to finish including the Dremel work, since it is something that is forgotten when we see a 3D print. Creating something of beauty takes time and effort which stems from a passion to make.

Take a look at the video below of the time lapse and for  SLA printer fans, have a look at the DIY SLA printer which is a Hackaday Prize Entry this year. Continue reading “Finishing A Mini PS One: SLA Vs Extruded”

Mini Delta Gets A Hot End Upgrade

3D printers are now cheaper than ever and Monoprice is at the absolute forefront of that trend. However, some of their printers struggle with flexible filaments, which is no fun if you’ve discovered you have a taste for the material properties of Ninjaflex and its ilk. Fear not, however — the community once again has a solution, in the form of a hot end adapter for the Monoprice Mini Delta.

The Mini Delta is a fantastic low-cost entry into 3D printing but its hot end has a break in the Bowden between the extruder and nozzle. This can lead to flexible filaments not being properly guided through the hot end and a general failure to print. This adapter allows the fitting of the popular E3D V6 hot end, and is similar to modifications out there for other Monoprice printers.

Overall, 3D printing has long benefited from the efforts of the community to bring both incremental improvements and major leaps forward to the technology. We look forward to seeing more hacks on the Monoprice range!