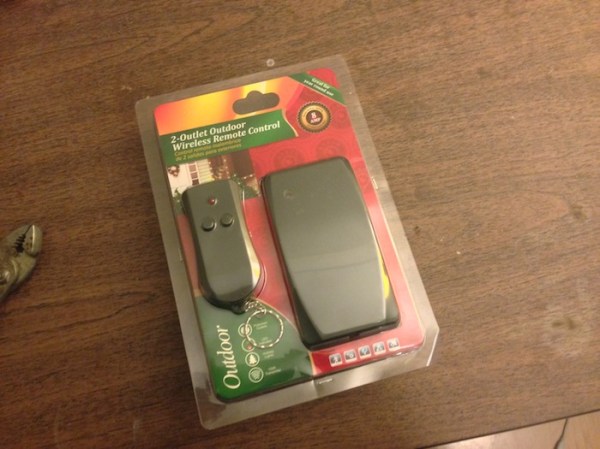
Reverse Engineering Wireless Temperature Probes

[bhunting] lives right up against the Rockies, and for a while he’s wanted to measure the temperature variations against the inside of his house against the temperature swings outside. The sensible way to do this would be to put a few wireless temperature-logging probes around the house, and log all that data with a computer. A temperature sensor, microcontroller, wireless module, battery, case, and miscellaneous parts meant each node in the sensor grid would cost about $10. The other day, [bhunting] came across the exact same thing in the clearance bin of Walmart – $10 for a wireless temperature sensor, and the only thing he would have to do is reverse engineer the protocol.

These wireless temperature sensors are exactly what you would expect for a cheap piece of Chinese electronics found in the clearance bin at Walmart. There’s a small radio operating at 433MHz, a temperature sensor, and a microcontroller under a blob of epoxy. The microcontroller and transmitter board in the temperature sensor were only attached by a ribbon cable, and each of the lines were labeled. After finding power and ground, [bhunting] took a scope to the wires that provided the data to the radio and took a look at it with a logic analyzer.

After a bit of work, [bhunting] was able to figure out how the temperature sensor sent data back to the base station, and with a bit of surgery to one of these base stations, he had a way to read the temperature data with an Arduino. From there, it’s just a data logging problem that’s easily solved with Excel, and [bhunting] has exactly what he originally wanted, thanks to a find in the Walmart clearance bin.

RFToy Makes Wireless Projects Easier

[Ray] has created RFToy, a simple gadget to aid in setting up wireless systems with a variety of common radio modules. RFToy is an open source microcontroller board running on an ATmega328. While RFToy is Arduino code compatible, [Ray] chose to ditch the familiar Arduino shield layout for one that makes it easier to install RF modules, and is more handheld friendly.

[RFToy] includes headers for the popular nRF24L01 2.4 GHz transceiver, as well as 433/315 transmitters and receivers found in many low-cost wireless electronic devices. The 128×64 pixel OLED screen and 3 button interface make it easy to set up simple user interfaces for testing new designs.

[Ray] hasn’t broken any new ground here. What he has done is create a simple tool for wireless projects. Anyone who’s worked on a wireless system can tell you that tools like this are invaluable for debugging why your circuit isn’t talking. Is it the transmitter? The receiver? Something else in the power supply circuit?

Check out [Ray’s] demo video after the break. In it, he sniffs, records, and plays back signals from several remote-controlled outlets. [Ray] also has a great demo of sending temperature data back and forth using an nRF24L01.

Continue reading “RFToy Makes Wireless Projects Easier”

Fail Of The Week: Reverse Engineering A Wireless Energy Monitor

fotw-wireless-energy-monitor-reverse-engineering

[Afonso] picked up a cheap energy use monitor a few years back. He really like the data it displays about his home’s electricity, using a sensor to gather this info and a display that communicates with it wirelessly. But there is no option to log or dump the data. He set out to reverse engineer the wireless protocol in order to extend the use of the system. As the name of this column implies, he failed to get this working.

The hardware above is a 433Mhz transceiver that he rigged up as test hardware. It sounds like he’s assuming the monitor works on this band, which could have been his first misstep (we really don’t know). The speaker is there to give audible confirmation that he’s receiving something from the transmitter. This is where things start to get pretty weird. White noise was coming from the speaker, but when he stepped away from the bench it stopped. He was able to measure a regular pattern to the noise, and proceeded to place the speaker next to his computer MIC so that he could record a sample for further analysis.

Fail of the Week always aims to be a positive experience. In this case we’d like to have a conversation about the process itself. We agree that connecting a speaker (or headphones) should help get your foot in the door because your ear will recognize a rhythmic pattern when it is received. But with this noise, measuring the timing and recording a sample we’re not so sure about. Given the situation, how would you have soldiered on for the best chance at successfully sniffing out the communication scheme used by this hardware? Leave a comment below!


2013-09-05-Hackaday-Fail-tips-tileFail of the Week is a Hackaday column which runs every Wednesday. Help keep the fun rolling by writing about your past failures and sending us a link to the story — or sending in links to fail write ups you find in your Internet travels.

Wireless Microcontroller/PC Interface For $3

uc

Sending data from a microcontroller to a PC usually requires some sort of serial connection, either through fiddly on-chip USB, FTDI chips, or expensive radio ICs. [Scott] didn’t want to deal with this when creating a network of wireless temperature sensors, so he hacked up a few cheap 433 MHz radio transmitters and receivers to transmit data to a PC for about $3.

After sensor data is collected on a microcontroller and sent over radio, there’s still the issue of getting it into a PC. For this, [Scott] piped the data into the microphone port of a cheap USB sound card. We’ve seen this trick before both in the world of microcontrollers and loading programs onto a Commodore 64 via a cassette interface.

Once the data is sent into the sound card, it’s decoded with a a small Python app. Given the range and quality of the RF transmitters and receivers  [Scott] says it’s not an extremely reliable way to send data to a PC. It is cheap, though, and if you need to read sensors wirelessly on a budget, it’s hard to do much better.

Check out [Scott]’s demo of his creation below.

[youtube=http://www.youtube.com/watch?v=GJHFldPwZvM&w=580]

Getting An Arduino To Control A Wireless Outlet

[Reza’s] methodical investigation of this remote controlled outlet let him patch in with an Arduino using a 433 MHz transmitter. This is a single-device unit, but the techniques used here should allow you to take control of wireless rigs that have multiple modules to control many devices.

We’ve seen some folks at our local hackerspace try to patch into the remote control itself. That used some type of weird button scanning (not just connecting a pin to ground or voltage) and didn’t pan out. [Reza] doesn’t even crack open the case of either of the units seen above. Instead, he goes straight for a wireless receiver he had on hand, using a logic analyzer to capture the signals coming from the remote.

Once he had a good snapshot of the signals sent when pressing the on or off button of the remote he set out to replicate it in his Arduino code. His function called setStateWithDelay takes three parameters: the transmit pin, the level (high or low), and a number of milliseconds to delay. Each signal calls this function many times, but working the bugs out is pretty easy; just capture the signal with the logic sniffer and compare to the stock remote.

Wireless Hackerspace Music Control

skipbutton_bitlair.nl

The crew at the Netherlands-based Bitlair hackerspace love their music, and have set up a digital jukebox for their workshop using mpd and fookebox. One problem that you run into with a bunch of different people working in one place is that everyone has their own distinct taste in music. The rhythmic “wub wub wub” of Dubstep might be great for some while leaving others trying to solder while simultaneously covering their ears. To ensure that everyone can exercise a musical veto (a la Empire Records) now and again, they built a Skipbutton which allows members to change what’s playing.

The button allows users to skip to the next song in the queue. as well as to control the volume of the space’s sound system. It uses an Arduino pro mini to run the show, sending signals to the mpd daemon using a 433 MHz transmitter. Bitlair is pretty large and they often spend time outdoors, so they had to ensure that the Skipbutton worked wherever they did. To do this, they built a Yagi-Uda antenna at the receiving end to ensure that the button functions no matter where it’s being triggered from.

Check out their wiki if you’re interested in making a similar system for your home or hackerspace – all of the code and schematics are available for the taking.

BPSK On 433 MHz European ISM Band

main

[WaveRider] is using a type of phase shift keying called BPSK to transmit digital sound and video for remote telemetry. Though a higher signal to noise ratio (SNR) is generally sought after with communications, legal limitations are imposed on total radiated power. To balance the two headed beast, he opted out on frequency shift keying due to binary shift keying’s ability to work with lower SNR. This adds the difficulty of properly reconstructing the digital signal at the receiver. A PLL based carrier regeneration circuit is used to reconstruct the signal. Using the Rabit2000 processor as the host controller on both transmitter and receiver, 96KB/Sec serial data is obtained. On the other side of the spectrum is the Homemade regenerative tube radio.