Driving E-Paper Displays With Memory Limited MCUs

It’s easy to become jaded by modern microcontrollers: for just a few bucks you can get a MCU that’s powerful enough to give a desktop computer from the early 90s a run for its money while packing in contemporary technology like WiFi and Bluetooth. For many projects we don’t even have to consider optimizing our code, because we aren’t even scratching the surface of what the hardware is capable of.

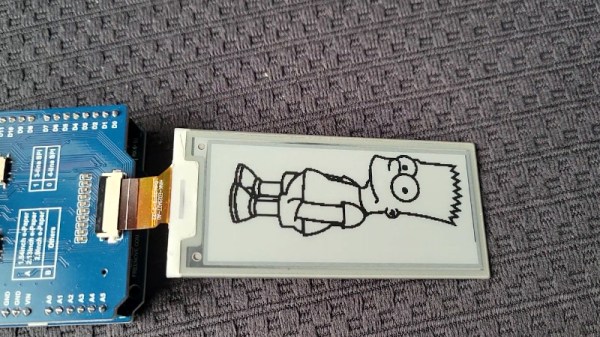
But sometimes you don’t have the luxury of using the latest-and-greatest chip, and have to play the hand you’re dealt. That’s when folks like [Larry Bank] really shine. In a recent write-up, he goes over his experiments with driving e-paper displays (specifically, salvaged electronic shelf labels) with 8-bit MCUs that on paper shouldn’t have the resources to run them.

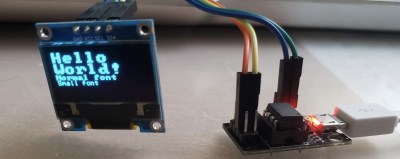
A similar trick can be used on OLEDs

The problem is that these displays generally expect to be handed a fully-formed image, which can easily exceed the free RAM on a low-end chip. For example, a 1-bit 128 x 128 image would consume 2 KB of RAM — more than four times the available memory on an ATtiny85.

As [Larry] explains, his alternate approach is to write data to the display in columns that are only one byte wide. Combined with his existing work with image decompression on constrained hardware, he’s able to rapidly draw out full-screen TIFF images using an Arduino UNO as demonstrated in the video after the break. He hopes the work will inspire others to experiment with what’s possible using the dinky MCUs you generally find in second-hand shelf labels.

Continue reading “Driving E-Paper Displays With Memory Limited MCUs”

This Snappy 8-Bit Microcomputer Brings The Speed To Retrocomputing

When the need for speed overcomes you, thoughts generally don’t turn to 8-bit computers. Sure, an 8-bit machine is fun for retro gameplay and reliving the glory days, and there certainly were some old machines that were notably faster than the others. But raw computing power isn’t really the point of retrocomputing.

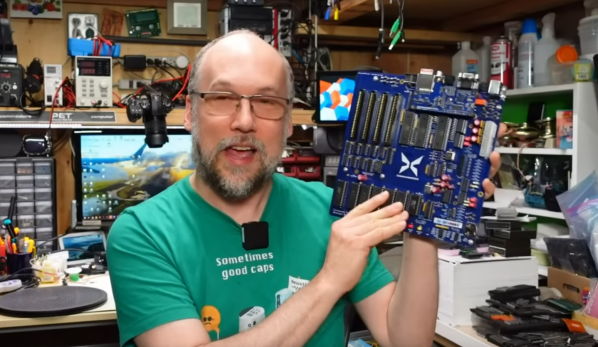
Or is it? [Bernardo Kastrup] over at The Byte Attic has introduced an interesting machine called the Agon Light, an 8-bit SBC that’s also a bit like a microcontroller. The machine has a single PCB that looks about half as big as an Arduino Uno, and sports some of the same connectors and terminals around its periphery. The heart of the Agon Light is an eZ80 8-bit, 18.432 MHz 3-stage pipelined CPU, which is binary compatible with the Z80. It also has an audio-video coprocessor, in the form of an ESP32-Pico-D4, which supports a 640×480 64-color display and two mono audio channels. There’s no word we could find of whether the ESP32’s RF systems are accessible; it would be nice, but perhaps unnecessary since there are both USB ports and a PS/2 keyboard jack. There’s also a pin header for 20 GPIOs as well as I2C, SPI, and UART for serial communication.

The lengthy video below goes into all the details on the Agon Light, including the results of benchmark testing, all of which soundly thrash the usual 8-bit suspects. The project is open source and all the design files are available, or you can get a PCB populated with all the SMD components and just put the through-hole parts on. [Bernardo] is also encouraging people to build and sell their own Agon Lights, which seems pretty cool too. It honestly looks like a lot of fun, and we’re looking forward to seeing what people do with this.

Continue reading “This Snappy 8-Bit Microcomputer Brings The Speed To Retrocomputing”

WheatSystem Is A Homebrew 8-Bit OS

[Esperantanaso] has long been involved in producing homebrew 8-bit computers. His various builds could all achieve different things, but he grew frustrated that applications written for one could not be easily run on another. He recently took a big leap forward in this area, though, cooking up his own 8-bit operating system called WheatSystem.

The work initially began with BreadSystem, which relied on applications existing in bytecode. This would then be run by the BreadSystem OS which would handle the requisite conversion to the machine code of the system it ran on. However, the work quickly got out of hand when it came to implementing advanced features like the file system and floating-point handling. BreadSystem was looking likely to be too heavy to run on lightweight 8-bit systems.

That led to the development of WheatSystem, which kept the bytecode runtime environment, unified heap, and a memory permission system from BreadSystem. Fancier features like granular memory permissioning, automatic garbage collection, and file system directories were dropped.

WheatSystem quickly became a basic and functional OS. To demonstrate it, [Esperantanaso] created WheatBox 55A1, a small homebrew computer based on the ATmega328. It readily runs simple applications like a prime number generator or a basic RPG.

Creating one’s own OS is no mean feat, even at the 8-bit level. We’ve seen it done before, and it never fails to impress.

Continue reading “WheatSystem Is A Homebrew 8-Bit OS”

Recreating DOOM On A Homebrew 8-Bit CPU

[James Sharman] has been working away on a 8-bit CPU of his own design. Naturally, with his computing device largely functional, the obvious question was asked: can it run DOOM? [James’] latest video explores this question, showing just how close he was able to get.

[James’] 8-bit pipelined CPU also has its own UART, VGA adapter, and sound adapter all built up on discrete components on various PCBs. There’s also a custom interface for a SNES controller as an input device. However, it’s fundamentally well below the specs that DOOM originally required at launch. His 8-bit CPU runs at just 4 MHz, with 64 KB of RAM. This compares poorly to the 32-bit, 33 MHz Intel 386 chips and 4 MB of RAM originally recommended to run the game.

In lieu of running the real thing, [James] demonstrated the limitations of his machine by coding his own demo, nicknamed Doomed. It’s able to average 19 fps video output at a resolution of 80×60, and consists of over 5,000 lines of hand-written assembly code. Fundamentally, it’s a basic 3D engine not dissimilar to Wolfenstein 3D, though without any actual gaming interactions involved.

[James] could have simply stated the machine won’t run DOOM. However, trying to get something similar up and running was a useful learning experience, and in his own words, highly satisfying. This attitude of pushing on in the face of adversity is what propels many other DOOM porting efforts.

Continue reading “Recreating DOOM On A Homebrew 8-Bit CPU”

Yo Dawg, We Heard You Like Retrocomputers

The idea of having software translation programs around to do things like emulate a Super Nintendo on your $3000 gaming computer or, more practically, run x86 software on a new M1 Mac, seems pretty modern since it is so prevalent in the computer world today. The idea of using software like this is in fact much older and easily traces back into the 80s during the era of Commodore and Atari personal computers. Their hardware was actually not too dissimilar, and with a little bit of patience and know-how it’s possible to compile the Commodore 64 kernel on an Atari, with some limitations.

This project comes to us from [unbibium] and was inspired by a recent video he saw where the original Apple computer was emulated on Commodore 64. He took it in a different direction for this build though. The first step was to reformat the C64 code so it would compile on the Atari, which was largely accomplished with a Python script and some manual tweaking. From there he started working on making sure the ROMs would actually run. The memory setups of these two machines are remarkably similar which made this slightly easier, but he needed a few workarounds for a few speed bumps. Finally the cursor and HMIs were configured, and once a few other things were straightened out he has a working system running C64 software on an 8-bit Atari.

Unsurprisingly, there are a few things that aren’t working. There’s no IO besides the keyboard and mouse, and saving and loading programs is not yet possible. However, [unbibium] has made all of his code available on his GitHub page if anyone wants to expand on his work and may also improve upon this project in future builds. If you’re looking for a much easier point-of-entry for emulating Commodore software in the modern era, though, there is a project available to run a C64 from a Raspberry Pi.

Thanks to [Cprossu] for the tip!

VGA From Scratch On A Homebrew 8-bit Computer

[James Sharman] has built an impressive 8-bit homebrew computer. Based on TTL logic chips, it has a pipelined design which makes it capable of Commodore-level computing, but [James] hasn’t quite finished everything yet. While it is currently built on its own custom PCB, it has a limiting LCD display which isn’t up to the standards of the rest of the build. To resolve this issue, he decided to implement VGA from scratch.

This isn’t a bit-bang VGA implementation, either. He plans for full resolution (640×480) which will push the limits of his hardware. He also sets goals of a 24-bit DAC which will allow for millions of colors, the ability to use sprites, and hardware scrolling. Since he’s doing all of this from scratch, the plan is to keep it as simple as possible and make gradual improvements to the build as he goes. To that end, the first iteration uses a single latching chip with some other passive components. After adding some code to the CPU to support the new video style, [James] is able to display an image on his monitor.

While the image of the parrot he’s displaying isn’t exactly perfect yet, it’s a great start for his build and he does plan to make improvements to it in future videos. We’d say he’s well on his way to reproducing a full 8-bit retrocomputer. Although VGA is long outdated for modern computers, the standard is straightforward to implement and limited versions can even be done with very small microcontrollers.

Thanks to [BaldPower] for the tip!

Continue reading “VGA From Scratch On A Homebrew 8-bit Computer”

8-Bit Computer Addresses LEDs

Homebrew 8-bit computers tend to have fairly limited displays, often one or more seven-segment displays and an array of LEDs to show the values of RAM or perhaps some other states of the computer. [Duncan] is in the process of building just such an computer, but wondered if there was a way to create a more visually appealing display while still keeping the computer true to its 8-bit roots. With some interesting TTL logic he was able to create this addressable RGB LED display to some remarkable results.

The array works by controlling the WS2812B LED strips with a specific timing cycle which was pioneered by [Tim] for a different project. [Tim] was able to perform this timing cycle with some simple Assembly code, which means that [Duncan] could convert that code into TTL gate logic relatively easily. Using 74LS02 NOR chips gets the job done as far as timing goes, and the pulses are then fed into a shift register and support logic which then creates the signal for the LED strips.

When everything is said and done, [Duncan] has a fully addressable 16×16 RGB LED array as a display for his 8-bit computer without violating any of his design principles and keeping everything to discrete TTL logic chips and a stick of RAM. It’s a unique method of display that might go along really well with any other homebrew computer like this one that’s also built with 74LS chips.