For a lot of us, projects take time, and they have to be squeezed in around the regular chores of real life. Thus, if you’re starting your Halloween builds after the holiday displays have already hit the stores, you’re probably too late. We’re here to implore you to start building early this year—and you can take inspiration from a great pumpkin called Gourdan.
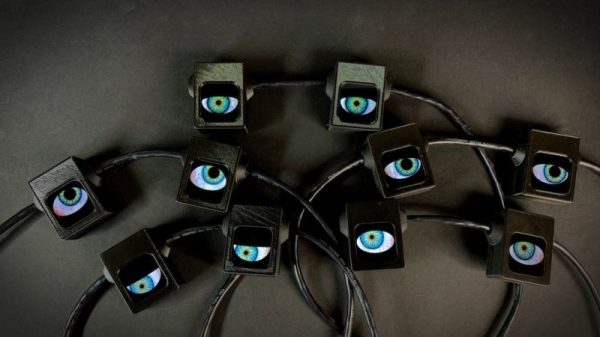
Gourdan is the work of [Braden Sunwold]. It’s a pumpkin with a fearsome visage and creepy eyes that follow you around the room. This is achieved thanks to a Raspberry Pi 3 nestled within Gourdan’s gourdy body. Gourdan’s eyes are a pair of 1.54-inch LCDs which display animated eyes. Thus, no mechanical wizardry is required here—it’s all done digitally. A camera attached to the Raspberry Pi tracks people with the aid of OpenCV, and the eyes are created and animated with the help of Adafruit example code.
There’s never a better time to start hacking for Halloween than right now. And hey, who knows—your neighbour might have kicked off in January, so they’ll have an almighty head start. They could have something really impressive in the works!
And don’t forget—you can always send us your holiday hacks, whatever the time of year! Just hit up the tipsline. Happy making!