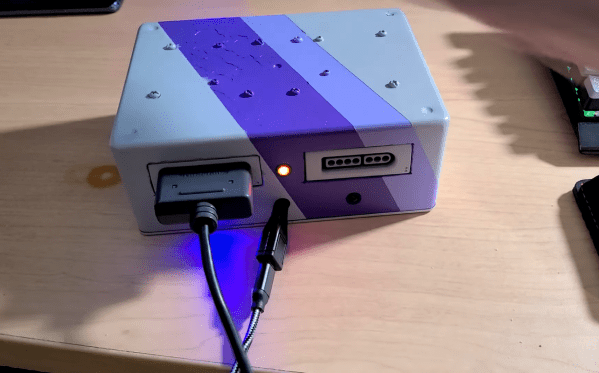
Hamster Trades Crypto Better Than You

The inner machinations of the mind of cryptocurrency markets are an enigma. Even traditional stock markets often seem to behave at random, to the point that several economists seriously suggest that various non-human animals might outperform one market or another just by random chance alone. The classic example is a monkey picking stocks at random, but in the modern world the hamster [Mr Goxx] actively trades crypto from inside his hamster cage.

[Mr Goxx]’s home comprises a normal apartment and a separate office where he can make his trades. The office contains an “intention wheel” where he can run in order to select a currency to trade, and two tunnels that [Mr Goxx] can use to declare his intention to buy or sell the currency he selected with the wheel. The wheel is connected to an Arduino Nano with an optical encoder, and the Nano also detects the hamster’s presence in the “buy” or “sell” tunnel and lights up status LEDs when he wants to execute a trade. The Nano also communicates with an intricate Java program which overlays information on the live video feed and also executes the trades in real life with real money.

Live updates are sent directly both on Twitter and Reddit, besides the live Twitch stream of [Mr Goxx] we linked above. The stream only shows his office and not his apartment, and he’s mostly active at night (Berlin time). But we can’t wait for his random walks to yield long-term results which can be analyzed for years to come. In the meantime we’ll see if others have been able to make any profits in crypto with any less-random methods.

Drink Water On Schedule Or Else Flood Your Desk

How much water have you had to drink today? We would venture to guess that the answer is somewhere between ‘absolutely none’ and ‘not not nearly enough’. You can go ahead and blame poor work/life balance — that’s our plan, anyway — and just try to do better. All this working from home means the bathroom situation is now ideal, so why not drink as much water as you can?

But how? Well, you’re human, so you’ll need to make it as easy as possible to drink the water throughout the day. You could fill up one big jug and hoist it to your mouth all day long (or use a straw), but facing that amount of water all at once can be intimidating. The problem with using a regular-sized vessel is that you have to get up to refill it several times per day. When hyper-focus is winning the work/life tug-of-war, you can’t always just stop and go to the kitchen. What you need is an automatic water dispenser, and you need it right there on the desk.

[Javier Rengel]’s water pomodoro makes it as easy as setting your cup down in front of this machine and leaving it there between sips. As long as the IR sensor detects your cup, it will dispense water every hour. This means that if you don’t drink enough water throughout the day, you’re going to have it all over the desk at some point. [Javier] simply connected an Arduino UNO to a water pump and IR sensor pair and repurposed the milk dispenser from a coffee machine. Check it out in action after the break.

Of course, if you aren’t intimidated by the big jug approach, you could keep tabs on your intake with the right kind of straw.

Continue reading “Drink Water On Schedule Or Else Flood Your Desk”

Understanding Custom Signal Protocols With Old Nintendos

For retro gaming, there’s really no substitute for original hardware. As it ages, though, a lot of us need to find something passable since antique hardware won’t last forever. If a console isn’t working properly an emulator can get us some of the way there, but using an original controller is still preferred even when using emulators. To that end, [All Parts Combined] shows us how to build custom interfaces between original Nintendo controllers and a PC.

The build starts by mapping out the controller behavior. Buttons on a SNES controller don’t correspond directly to pins, rather a clock latches all of the button presses at a particular moment all at once during each timing event and sends that information to the console. To implement this protocol an Adafruit Trinket is used, and a thorough explanation of the code is given in the video linked below. From there it was a simple matter of building the device itself, for which [All Parts Combined] scavenged controller ports from broken Super Nintendos and housed everything into a tidy box where it can be attached via USB to his PC.

While it might seem like a lot of work to get a custom Nintendo controller interface running just because he had lost his Mega Man cartridge, this build goes a long way to understanding a custom controller protocol. Plus, there’s a lot more utility here than just playing Mega Man; a method like this could easily be used to interface other controllers as well. We’ve even seen the reverse process where USB devices were made to work on a Nintendo 64.

Continue reading “Understanding Custom Signal Protocols With Old Nintendos”

From Printer To Vinyl Cutter

Some might look at a cheap inkjet printer and see a clunky device that costs more to replace the ink than to buy a new one. [Abhishek Verma] saw an old inkjet printer and instead saw a smooth gantry and feed mechanism, the perfect platform to build his own DIY vinyl cutter.

The printer was carefully disassembled. The feed mechanism was reworked to be driven by a stepper motor with some 3D printed adapter plates. A solenoid-based push/pull mechanism for the cutting blade was added with a 3D printed housing along with a relay module. An Arduino Uno takes in commands from a computer with the help of a CNC GRBL shield.

What we love about this build is the ingenuity and reuse of parts inside the old printer. For example, the old PCB was cut and connectors were re-used. From the outside, it’s hard to believe that HP didn’t manufacture this as a vinyl cutter.

If you don’t have a printer on hand, you can always use your CNC as a vinyl cutter. But if you don’t have a CNC, [Abhishek] shares all the STL files for his cutter as well as the schematic. Video after the break.

Continue reading “From Printer To Vinyl Cutter”

Quick And Simple Morse Decoder

[Rostislav Persion] wrote a simple Morse Code decoder to run on his Arduino and display the text on an LCD shield. This is probably the simplest decoder possible, and thus its logic is pretty straightforward to follow. Simplicity comes at a price — changing the speed requires changing constants in the code. We would like to see this hooked up to a proper Morse code key, and see how fast [Rostislav] could drive it before it conks out.

In an earlier era of Morse code decoders, one tough part was dealing with the idiosyncrasies of each sender. Every operator’s style, or “fist”, has subtle variations in the timings of the dots, dashes, and the pauses between these elements, the letters, and the words. In fact, trained operators can recognize each other because of this, much like we can often recognize who is speaking on the phone just by hearing their voice. The other difficulty these decoders faced was detecting the signal in low signal-to-noise ratio environments — pulling the signal out of the noise.

A Morse decoder built today is more likely to be used to decode machine-generated signals, for example, debugging information or telemetry. This would more than likely be sent at fixed, known speeds over directly connected links with very high S/N ratios (a wire, perhaps). In these situations, a simple decoder like [Rostislav]’s is completely sufficient.

We wrote about a couple of Morse code algorithms back in 2014, the MorseDetector and the Magic Morse algorithm. While Morse code operators usually rank their skills by speed — the faster the better — this Morse code project for very low power transmitters turns that notion on its head by using speeds more suitably measured in minutes per word (77 MPW for that project). Have you used Morse code in any of your projects before? Let us know in the comments below.

Jigsaw Puzzle Lights Up With Each Piece

Putting the last piece of a project together and finally finishing it up is a satisfying feeling. When the last piece of a puzzle like that is a literal puzzle, though, it’s even better. [Nadieh] has been working on this jigsaw puzzle that displays a fireworks-like effect whenever a piece is placed correctly, using a lot of familiar electronics and some unique, well-polished design.

The puzzle is a hexagonal shape and based on a hexagonally symmetric spirograph, with the puzzle board placed into an enclosure which houses all of the electronics. Each puzzle piece has a piece of copper embedded in a unique location so when it is placed on the board, the device can tell if it was placed properly or not. If it was, an array of color LEDs mounted beneath a translucent diffuser creates a lighting effect that branches across the entire board like an explosion. The large number of pieces requires a multiplexer for the microcontroller, an ATtiny3216.

This project came out of a FabAcademy, so the documentation is incredibly thorough. In fact, everything on this project is open sourced and available on the project page from the code to the files required for cutting out the puzzle pieces and the enclosure. It’s an impressive build with a polish we would expect from a commercial product, and reminds us of an electrified jigsaw puzzle we saw in a previous build.

Thanks to [henk] for the tip!

Tiny Operating System For Tiny Computer

Before the World Wide Web became ubiquitous as the de facto way to access electronic information, there were many other ways of retrieving information online. One of the most successful of these was Minitel, a French videotex service that lasted from 1980 all the way until 2012. But just because the service has been deactivated doesn’t mean its hardware can’t be used for modern builds like this Arduino-based operating system. (Google Translate from French)

Called ZARDOS, the operating system is built to run on an Arduino MEGA although a smaller version is available for the Uno. The Arduino is connected by a serial cable to the Minitel terminal. It can take input from a keyboard and PS/2 mouse and displays video on the terminal screen with the same cable. There is functionality built-in for accessing data on a cartridge system based on SD cards which greatly expands the limited capabilities of the Atmel chip as well, and there is also support for a speaker and a Videotex printer.

Even though the build uses a modern microcontroller, it gives us flashbacks to pre-WWW days with its retro terminal. All of the code is available on the project site for anyone looking to build an Arduino-based operating system, although it will take a little bit of hardware hacking to build a Minitel terminal like this. Either way, it’s a great way to revive some antique French hardware similar to a build we’ve seen which converts one into a Linux terminal.

Thanks to [troisieme_type] for the tip!