Robotic Arm Follows The Movements Of Your Own Limbs

[Alejandro] and his friends recently finished a first prototype of scratch-built robotic arm. They’ve got some nice electronics bench equipment for use with a project like this, but for the actual fabrication work it’s off to the kitchen.

As you can see in the video after the break, they’re using PVC as the stock material in this build. Flat sheets are produced by slitting a PVC pipe down the middle, warming it in oven until soft, then compressing it between two floor tiles with a big jug of water used as a weight for the makeshift press. Mounting holes for the servo motors that make up the joints are drilled with a hand drill, and the assembly was affixed to an old CD as a base.

Once assembled they wired it to the control circuitry and build a set of sensors that you wear on your arm. Now your elbow, wrist, and pointer finger are in control of the servos. A demonstration of this functionality starts around two minutes into the video.

We’ve seen other examples of robot arms built without the use of machine tools. This arm made out of ShapeLock plastic is one of the most interesting examples.

Continue reading “Robotic Arm Follows The Movements Of Your Own Limbs”

Arduino Releases New Products; Help Them Develop ARM-based Arduino

The Arduino folks took advantage of Maker Faire New York to announce their new line of products. There’s several interesting new additions to their product line.

They’ve got a WiFi shield in the works that utilizes a module from H&D Wireless in conjunction with an AVR32 processor to take the workload off of the ATmega chip on the Arduino board. It even has room for you to run your own code on the shield’s processor.

Notable (but of less interest to us) is the 1.0 release of the IDE and the development of a new low-cost board. That hardware is intended to make USB device development easier for those already familiar with the Arduino platform.

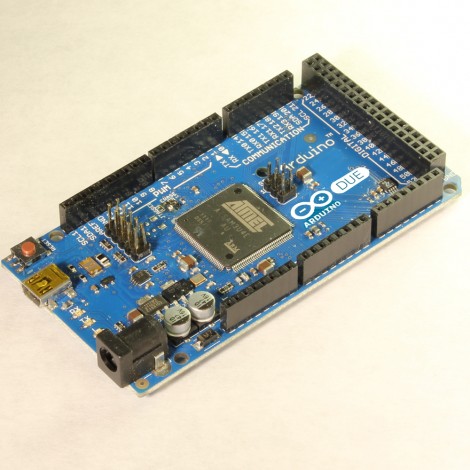
But the big news that caught our eye is the announcement of an ARM Cortex-M3 Arduino called the Due (we already wish that had been named something different just for search term contrast to the Duemilanova). The hardware hasn’t been finalized yet, although you can see a prototype in the picture above. They want community input on the final touches, so get in there and give them a hand!

[Thanks Insapio and Tom]

Have You Got What It Takes To Code Android Apps Using Assembly?

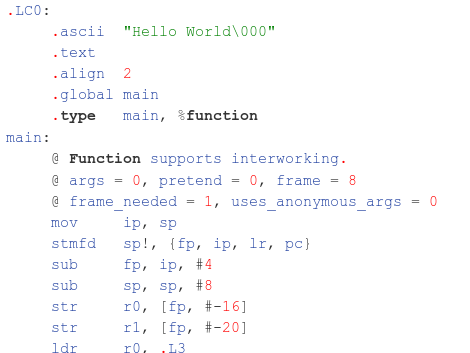
Do you have a rooted Android device and a computer running Linux? If so, you’re already on your way to coding for Android in Assembly. Android devices use ARM processors, and [Vikram] makes the argument that ARM provides the least-complicated Assembly platform, making it a great choice for those new to Assembly programming. We think his eight-part tutorial does a great job of introducing the language and explaining how to get the development tools up and running. You’ll need to know some basic programming concepts, but from what we saw you don’t need any prior experience with ARM or Android.

So why learn Assembly at all? We took a stab at Assembly for AVR a few months ago and really learned a lot about the hardware that we just never needed to know writing in C. It’s a great way to optimise functions that waste too much time because of quirks with higher-level language compilers. That means you don’t need to write your entire application in Assembly. You can simply use it to streamline hairy parts of your code, then include those Assembly files at compile time.

Making Oscilloscopes From ARM Development Boards

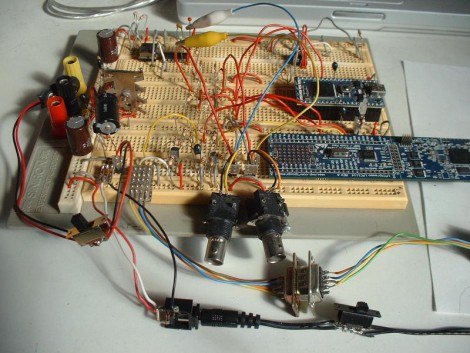
If you’ve got an ARM development board gathering dust in the corner of your shop, perhaps you could repurpose it as an oscilloscope. [Arend-Paul Spijkerman] was able to use an mbed and LPCXpresso as the hardware end of an oscilloscope. He didn’t use a standalone screen as a display, instead opting to push the scope readings from the hardware to a computer for display. This was greatly simplified by using StampDock as a basis for the GUI.

His circuit diagrams calls for an RS-232 connection for the LPCXpresso but not for the mbed. We’re not quite familiar enough with the mbed to know why, but perhaps those in the know can clue us in by leaving a comment. The probe connections are quite simple, each made up of a voltage divider and a pair of diodes. But the breadboard above looks much busier because it has two oscilloscope circuits built on it, and there’s a 10 MHz clock and a 4040 ripple counter which were used to provide a test signal.

An ARM Dev Board You Can Make At Home


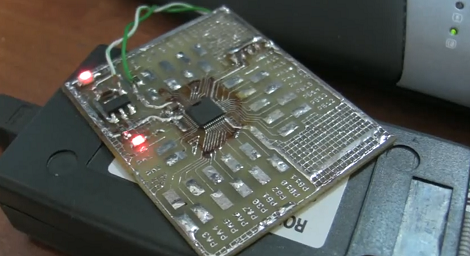
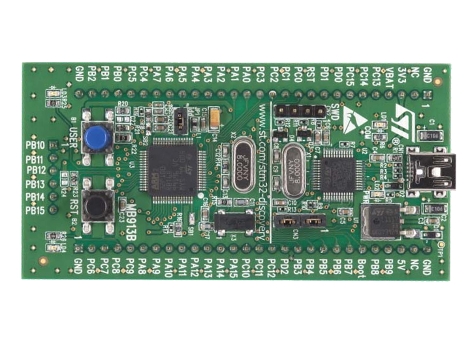
[BarsMonster] just challenged our conceptions of ARM development with his single-sided development board that’s loaded with an STM32F100 (PDF warning) ARM microcontroller. The board is remarkably simple – just a regulator, resistor and a few caps are necessary to get a $1 ARM μC up and running.

Continue reading “An ARM Dev Board You Can Make At Home”

Desktop Email Notification Bell

email_notification_bell

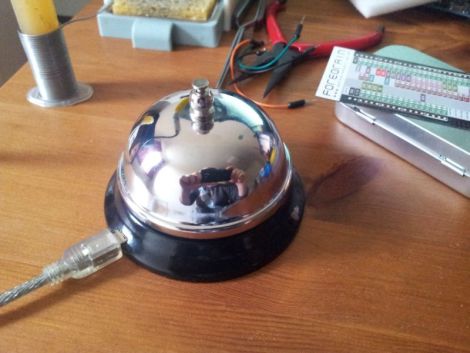
Instructables user [meseta] wanted an audible notification whenever he received an email, but must have thought that his computer’s built-in sounds were lacking in some regard. To get the perfect sound that he desired, he built himself a USB-powered notification bell.

Using an off the shelf “front desk bell” and a hand made electromagnet, he constructed a bell that could be triggered whenever a message showed up in his desktop email client. The electromagnet can be triggered by a quick pulse from a microcontroller, and in [meseta’s] case, he used a Forebrain dev board. He created a filter in his email client that runs an executable each time a message is received. This executable in turn sends a message to his microcontroller via USB, triggering the bell.

While we think that the notifier could have been put together using a far less powerful microcontroller, it’s a neat idea regardless. People seem to love alternative notification systems, so we’re pretty sure this bell will appeal to many in that crowd.

Keep reading to see a short video demonstration of his email notifier in action.

Continue reading “Desktop Email Notification Bell”

Put Your ARM Skills To The Test With The Freescale Make It Challenge

Throw down your mad skills and you might win some cash while you’re at it. [Zeta] tipped us off that Freescale just announced a new challenge. They call it the Make It Challenge and it centers around their 32-bit Kinetis microcontrollers. These are ARM Cortex-M4 chips and if you’re selected to compete they’ll offer their development hardware at a discount for you to get started.

You’ll need to jump through a few hoops. To be considered as a contestant you’ll need to preregister, cruise through some online training, and complete a quiz. From there, just come up with an idea and submit a design paper as the first round of competition. Ten finalists will rise from the group and take their design through to completion for judging in the fall. The top three will get some serious cash ($11,000 for first place) and be treated to an expense paid trip to Austin, Texas.