ATMega328 SSB SDR For Ham Radio

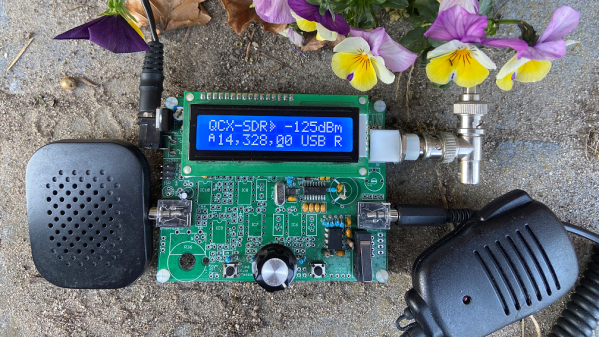
The humble ATmega328 microcontroller, usually packaged as an Arduino Uno, is the gateway drug for millions of people into the world of electronics and embedded programming. Some people just can’t pass up the challenge of seeing how far they can push the old workhorse, and it looks like [Guido PE1NNZ] is one of those. He has managed to implement a software-defined SSB ham radio transceiver for the HF bands on the ATMega328, and it looks like the project is going places.

The radio started life as a QRP Labs QCX, a $49 single-band CW (morse code) HF transceiver kit that is already one of the cheapest ways to get on the HF bands. [Guido] reduced the part count of the radio by about 50%, implementing much of the signal processing digitally on the ATmega328. On the transmitter side, the SSB signal is generated by making slight frequency changes to a Si5351 clock generator using 800kbit/s I2C, and controlling a very efficient class-E RF power amplifier with PWM for about 5W of output power. The increased efficiency means that there is no need for the bulky heat sink usually seen on SSB radios. The radio is continuously tunable from 80m to 10m (3.5 Mhz – 30 Mhz), but it does require plugging in a different low pass filters for each band. Continue reading “ATMega328 SSB SDR For Ham Radio”

Circuit Sculpture Teaches Binary, Plays PONG

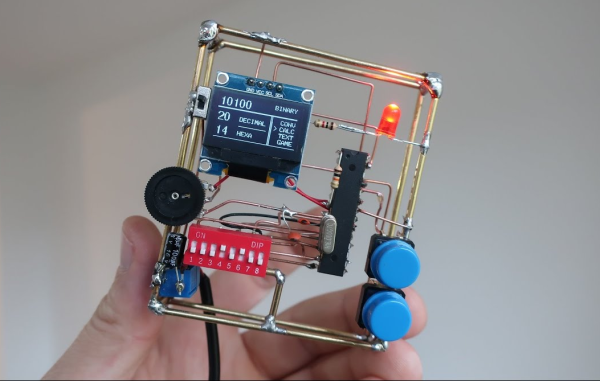
We sure wish we’d had a teacher like [Danko Bertović]. He built this beautiful circuit sculpture to teach his students how to count in binary and convert it to decimal and hexadecimal. If you don’t already know binary, you get to learn it on DIP switches and a dead-bugged ATMega328 in his latest Volos Projects video after the break. Lucky you!

Once the students have the hang of entering binary input on the switches, they can practice it on the four-banger calculator. This educational sculpture can also take text input and scroll it, but it takes a bit of work. You have to look up the ASCII value of each character, convert the decimal to binary, and program it in with the switches. There’s one more function on the menu — a one-player PONG game to help the students relax after a long day of flipping switches.

Funny enough, this project came to be after [Danko] came upon the DIP switch in his parts box and wasn’t quite sure what it was called. How great is it that he learned something about this part, and then used that knowledge to build this machine that uses the part to teach others? It’s surely the best fate that parts bin curiosities can hope for.

Don’t have the patience for circuit sculpture? You can make a pretty nice binary calculator with a bit of paper and a lot of compressed air.

Continue reading “Circuit Sculpture Teaches Binary, Plays PONG”

Don’t Forget The Baby!

It must be a common worry among parents, that they might forget their offspring and leave them in the car where they would succumb to excessive heat. So much so that [Matt Meerian] has produced an alarm that issues a verbal reminder to check for the youngster when the vehicle is turned off.

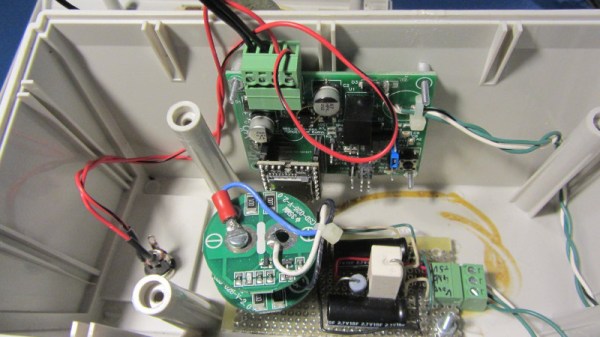
It’s a simple enough device, with an ATmega328, an off-the-shelf MP3 module, and a power supply regulator to deliver 5 V into a pair of supercapacitors from the vehicle accessory socket’s 12 V. The idea is that the  power is cut when the vehicle ignition is turned off, and that the supercaps have enough energy within them to play the reminder sample for the driver to check for forgotten children.

We can’t help remarking that a percentage of cars leave their accessory sockets turned on all the time, so it would be interesting to ponder how one might detect the car being turned off in that case. He muses about using a surplus cell phone instead of his ATmega328, perhaps the MEMS sensor on a phone could also be used to detect the vibrations of the engine stopping as it was turned off. Such cars notwithstanding, this unit is a straightforward solution to the problem in hand.

Mini-VFD Clock Floats The Display Above It All

As [sjm4306] says, “You can never have too many clocks based on obsolete display technologies.” We couldn’t agree more, and this single-tube VFD clock is one we haven’t seen before.

The vacuum-fluorescent display that [sjm4306] chose to base this clock on is the IV-21, an eight-digit seven-segment display on the smallish side. The tube is Russian surplus from the ’80s, as all such displays seem to be. The main PCB sports an ATMega328, a boost converter to provide the high voltage needed to run the VFD, a real-time clock, and the driver chip for the tube segments. The tube itself lives on a clever riser card that elevates the display above the main PCB and puts it at the proper angle for reading. [sjm4306] designed it to be modular; should you want to user a bigger VFD you need only make a new riser PCB. Figuring out the proper way to space the through-holes in Eagle proved elusive, but he hacked a solution using a spreadsheet to handle the trigonometry and spit out Cartesian coordinates for each hole. Pretty neat. The video below shows the clock assembly and a test.

We really like the look of this clock for some reason – perhaps it’s the quirky nature of the VFD, or the soft teal glow of the digits. We’ve featured plenty of clocks with odd displays before: VFDs large and small, faux-NIMO, de-encapsulated LED “filaments”, and lots and lots of Nixies.

Continue reading “Mini-VFD Clock Floats The Display Above It All”

This Wristwatch Is A Free Form Work Of Art

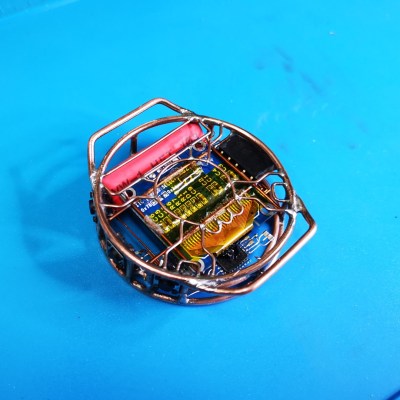
Free-form circuitry built as open wire sculpture can produce beautiful pieces of electronics, but it does not always lend itself to situations in which it might be placed under physical stress. Thus the sight of [Mile]’s free-form wristwatch is something of a surprise, as a wristwatch cam be exposed to significant mechanical stress in its everyday use.

A wire Wrencher graces thewe underside.
A wire Wrencher graces the underside.

The electronic side of this watch is hardly unusual, the familiar ATmega328-AU low-power microcontroller drives a tiny OLED display. Mechanically though it is a different story, as the outline of a wristwatch shell is traced in copper wire with a very neat rendition of a Wrencher in its base, and a glass lens is installed over the screen to take the place of a watch glass. A strap completes the wristwatch, which can then be worn like any other. Power comes from a small 110 mAh lithium-polymer cell, which it is claimed gives between 6 and 7 hours of on time and over a month of standby with moderate use.

Unfortunately there does not seem to be much detail about the software in this project, but since ATmega328 clocks and watches are ten a penny we don’t think that’s a problem. The key feature is that free-form construction, and for that we like it a lot.

Handheld Game Console Puts Processing Power In The Cartridge

With the proliferation of cheap screens for use with microcontrollers, we’ve seen a matching proliferation in small handheld gaming projects. Pick your favourite chip, grab a screen off the usual suspects, add some buttons and you’re ready to go. [bobricius] has put a unique spin on this, with an unconventional cartridge-based build.

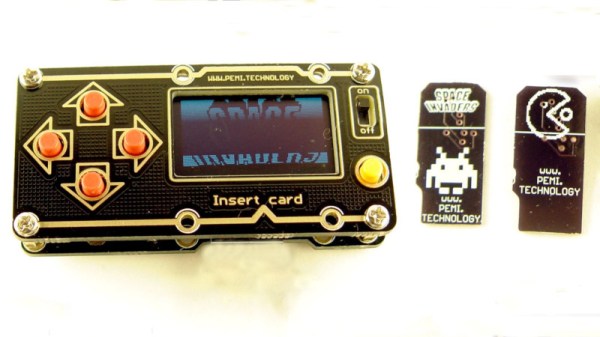
The main body of the handheld is constructed from attractive black and gold PCBs, and features a screen, some controls and an on/off switch. There’s also a microSD socket is on the board, which interfaces with cartridges which carry the microcontroller. Change the cart, and you can change the game.

[bobricius] has developed carts for a variety of common microcontroller platforms, from the Attiny85 to the venerable ATmega328. As the microSD slot is doing little more then sharing pins for the screen and controls, it’s possible to hook up almost any platform to the handheld. There’s even a design for a Raspberry Pi cart, just for fun.

It’s an entertaining take on the microcontroller handheld concept, and we can’t wait to see where it goes next. It reminds us of the Arduboy, which can even do 3D graphics if you really push it. Video after the break.

Continue reading “Handheld Game Console Puts Processing Power In The Cartridge”

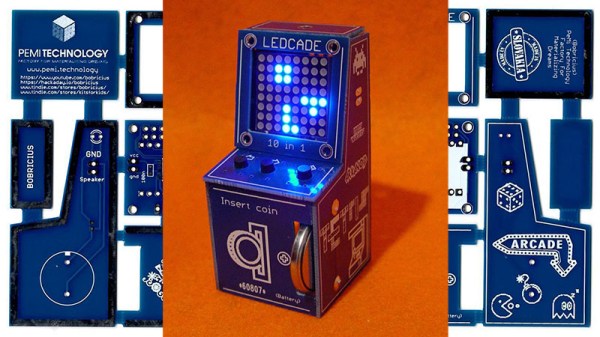
Insert Coin (Cell) To Play LedCade

In this era of 4K UHD game console graphics and controllers packed full of buttons, triggers, and joysticks, it’s good to occasionally take a step back from the leading edge. Take a breath and remind ourselves that we don’t always need all those pixels and buttons to have some fun. The LedCade is a μ (micro) arcade game cabinet built by [bobricius] for just this kind of minimalist gaming.

Using just three buttons for input and an 8×8 LED matrix for output, the LedCade can nevertheless play ten different games representing classic genres of retro arcade gaming. And in a brilliant implementation of classic hardware hacking humor, a player starts their game by inserting not a monetary coin but a CR2032 coin cell battery.

Behind the screen is a piezo speaker for appropriately vintage game sounds, and an ATmega328 with Arduino code orchestrating the fun. [bobricius] is well practiced at integrating all of these components as a result of developing an earlier project, the single board game console. This time around, the printed circuit board goes beyond being the backbone, the PCB sheet is broken apart and reformed as the enclosure. With classic arcade cabinet proportions, at a far smaller scale.

If single player minimalist gaming isn’t your thing, check out this head-to-head gaming action on 8×8 LED arrays. Or if you prefer your minimalist gaming hardware to be paper-thin, put all the parts on a flexible circuit as the Arduflexboy does.