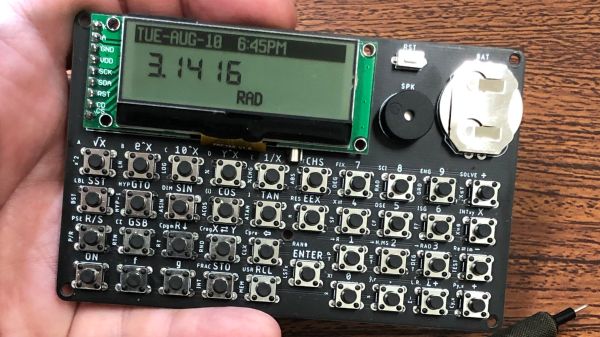
An HP15-C emulator PCB

Calculate Like It’s 1989 With This HP15C Emulator

Back in the day, your choice of calculator said a lot about your chops, and nothing made a stronger statement than the legendary Hewlett-Packard Voyager series of programmable calculators. From the landscape layout to the cryptic keycaps to the Reverse Polish Notation, everything about these calculators spoke to a seriousness of purpose.

Sadly, these calculators are hard to come by at any price these days. So if you covet their unique look and feel, your best bet might be to do like [alxgarza] and build your own Voyager-series emulator. This particular build emulates the HP15C and runs on an ATMega328. Purists may object to the 192×64 LCD matrix display rather than the ten-digit seven-segment display of the original, but we don’t mind the update at all. The PCB that the emulator is built on is just about the right size, and the keyboard is built up from discrete switches that are as satisfyingly clicky as the originals. We also appreciate the use of nothing but through-hole components — it seems suitably retro. The video below shows that the calculator is perfectly usable without a case; a 3D-printed case is available, though, as is an overlay that replicates the keypad of the original.

We’ve seen emulators for other classic calculators of yore, including Sinclair, Texas Instruments, and even other HP lines. But this one has a really nice design that gets us going.

Continue reading “Calculate Like It’s 1989 With This HP15C Emulator”

Accurate Digital Clock Keeps Ticking With FPGA

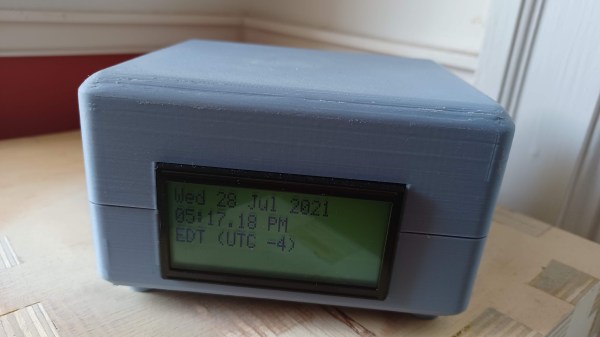
Even the most punctual among us are content to synchronize their clocks to external time sources like navigation satellite constellations, network time servers, frequency-controlled AC mains, or signals broadcast by radio stations such as WWV, CHU, and DFC77 — but not [zaphod]. After building a couple of more traditional clocks over the years, he set his sights on making a completely isolated digital clock that doesn’t rely on external synchronization (well, except to initialize the time at first power-up).

The accuracy goal he set for himself was that of a Casio F-91W wristwatch, which is specified to maintain +/- 30 seconds per month (about 12 ppm). At the heart of the design is an oven-controlled crystal oscillator whose stability is in the single-digits parts-per-billion.

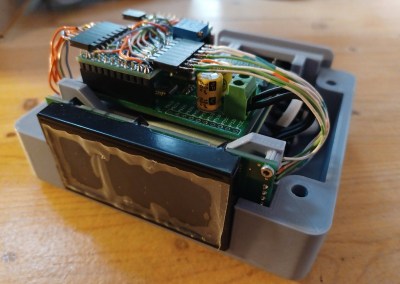
The counter chain that accumulates the time is implemented in an FPGA — admittedly overkill, but [zaphod] wanted to learn FPGA programming for this project as well. An ATmega328 drives the display and does other bookkeeping tasks. The whole design is partitioned into three PCBs which fit inside a custom 3D-printed case.

[zaphod] does a thorough job documenting his build, including the bugs and failures along the way. We like the honest summary he wrote at the project’s conclusion, noting things that could be improved or should have been done differently. Be sure to check out the GitHub repository, where all the source code and PCB design files are posted. How accurate is your wristwatch, if you even wear one anymore?

12-Note Polyphony On An Arduino Synth

When synthesizers first hit the scene back in the mid-20th century, many were monophonic instruments, capable of producing just one pitch at a time. This was a major limitation, and over time polyphonic synthesizers began to flood into the scene, greatly expanding performance possibilities. [Kevin] decided to build his own polyphonic synthesizer, but far from taking the easy route, he built it around the Arduino Uno – not a platform particularly well known for its musical abilities! 

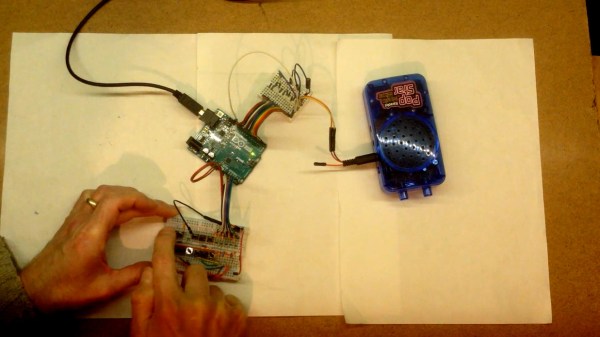
[Kevin]’s build manages 12-note polyphony, an impressive feat for the ATmega328 at the heart of the Arduino Uno. It’s done by running an interrupt on a timer at a steady rate, and implementing 12 counters, one per note. When a counter overflows, a digital IO pin is flipped. This outputs a square wave at a certain pitch on the IO pin, producing the given note. The outputs of 12 digital IO pins are mixed together with a simple resistor arrangement, producing a basic square wave synth. Tuning isn’t perfect, but [Kevin] notes a few ways it could be improved down the line.

[Kevin] has added features along the way, expanding the simple synth to work over several octaves via MIDI, while also building a small tactile button keyboard, too. It’s a project that serves as a great gateway into basic synthesis and music electronics, and we’re sure [Kevin] learned a lot along the way. We’ve seen other microcontroller synths before too, like this tiny device that fits inside a MIDI plug. Video after the break.

Continue reading “12-Note Polyphony On An Arduino Synth”

Squeezing Every Bit From An ATMega

While the ATMega328 is “mega” for a microcontroller, it’s still a fairly limited platform. It has plenty of I/O and working memory for most tasks, but this Battleship game that [thorlancaster328] has put together really stretches the capabilities of this tiny chip. Normally a Battleship game wouldn’t be that complicated, but this one has audio, an LED display, and can also play a fine rendition of Nyan Cat to boot, which really puts the Atmel chip through its paces.

The audio is played through a 512-byte buffer and an interrupt triggers the microcontroller when to fill the buffer while it works on the other processes. The 12×12 LED display is also fed through a shift register triggered by the same interrupt as the audio, and since the build uses so many shift registers the microcontroller can actually output four separate displays (two players, each with a dispaly for shots and one for ships). It will also eventually support a player-vs-computer mode for the battleship game, and also has a mode where it plays Nyan cat just to demonstrate its own capabilities.

We’re pretty impressed with the amount of work this small microcontroller is doing, largely thanks to code optimization from its creator [thorlancaster328]. If there’s enough interest he also says he will provide the source code too. Until then, be sure to check out this other way of pushing a small microcontroller to its limits.

Thanks to [Thinkerer] for the tip!

Minimalist Low Power Supercapacitor Sensor Node

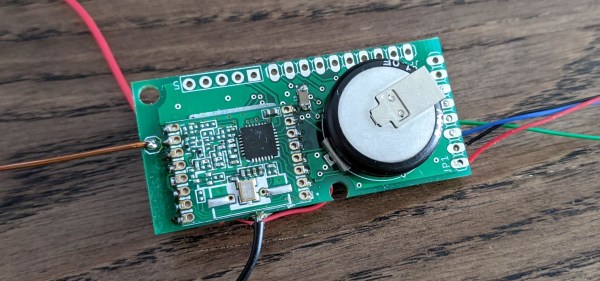
One of the biggest challenges for wireless sensor networks is that of power. Solar panels usually produce less power than you hoped, especially small ones, and designing super low power circuits is tricky. [Strange.rand] has dropped into the low-power rabbit hole, and is designing a low-cost wireless sensor node that runs on solar power and a supercapacitor.

The main components of the sensor node is an ATMega 328P microcontroller running at 4Mhz, RFM69 radio transceiver, I2C temperature/humidity sensor, 1F supercapacitor, and a small solar panel. The radio, MCU, and sensor all run on 1.5-3.6V, but the supercap and solar panel combination can go up to 5.5V. To regulate the power to lower voltage components a low-drop voltage regulator might seem like the simplest solution, but [strange.rand] found that the 3.3V regulator was consuming an additional 20uA or more when the voltage dropped below 3.3V. Instead, he opted to eliminate the LDO, and limit the charging voltage of the capacitor to 3.6V with a comparator-based overvoltage protection circuit. Using this configuration, the circuit was able to run for 42 hours on a single charge, transmitting data once per minute while above 2.7V, and once every three minutes below that.

Another challenge was undervoltage protection. [strange.rand] discovered that the ATmega consumes an undocumented 3-5 mA when it goes into brown-out below 1.8V. The small solar panel only produces 1 mA, so the MCU would prevent the supercapacitor from charging again. He solved this with another comparator circuit to cut power to the other components.

We see challenges like these a lot with environmental sensors and weather stations with smaller solar panels. For communication, low power consumption of a sub-Ghz radio is probably your best bet, but if you want to use WiFi, you can get the power usage down with a few tricks.

Deep-Sleep Problems Lead To Forensic Investigation Of Troublesome Chip

When you buy a chip, how can you be sure you’re getting what you paid for? After all, it’s just a black fleck of plastic with some leads sticking out of it, and a few laser-etched markings on it that attest to what lies within. All of that’s straightforward to fake, of course, and it’s pretty easy to tell if you’ve got a defective chip once you try it out in a circuit.

But what about off-brand chips? Those chips might be functionally similar, but still off-spec in some critical way. That was the case for [Kevin Darrah] which led to his forensic analysis of potentially counterfeit MCU chips. [Kevin] noticed that one of his ATMega328 projects was consuming way too much power in deep sleep mode — about two orders of magnitude too much. The first video below shows his initial investigation and characterization of the problem, including removal of the questionable chip from the dev board it was on and putting it onto a breakout board that should draw less than a microamp in deep sleep. Showing that it drew 100 μA instead sealed the deal — something was up with the chip.

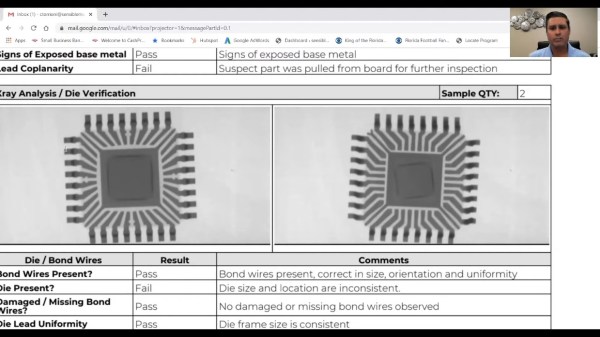
[Kevin] then sent the potentially bogus chip off to a lab for a full forensic analysis, because of course there are companies that do this for a living. The second video below shows the external inspection, which revealed nothing conclusive, followed by an X-ray analysis. That revealed enough weirdness to warrant destructive testing, which showed the sorry truth — the die in the suspect unit was vastly different from the Atmel chip’s die.

It’s hard to say that this chip is a counterfeit; after all, Atmel may have some sort of contract with another foundry to produce MCUs. But it’s clearly an issue to keep in mind when buying bargain-basement chips, especially ones that test functionally almost-sorta in-spec. Caveat emptor.

Counterfeit parts are depressingly common, and are a subject we’ve touched on many times before. If you’d like to know more, start with a guide.

Continue reading “Deep-Sleep Problems Lead To Forensic Investigation Of Troublesome Chip”

A Pocket Retro Computer Anyone Can Build

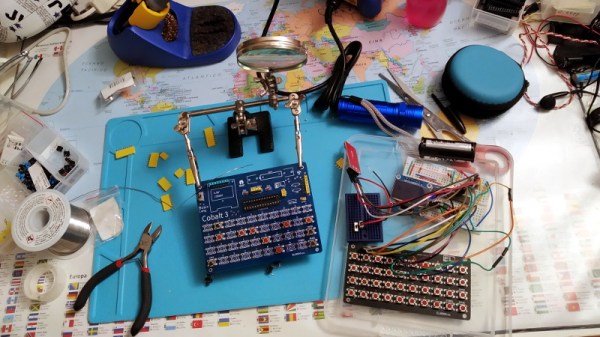
Not satisfied with any of the DIY retro computer kits on the market, [Leonardo Leoni] decided to make his own. Built using only the finest through-hole technology and powered by the ATmega328 microcontroller, his diminutive 8-bit computer is easy to build and even easier to develop for. Whether you’re looking to hone your BASIC skills or play some Zork on the bus, this little computer looks like a great project for anyone who has a soft spot for computing’s simpler days.

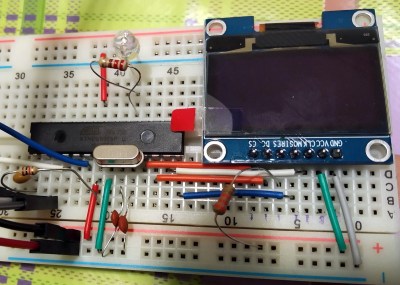
All things considered, using this tiny machine looks like it would be relatively pleasant. [Leonardo] is using a common SH1106 OLED display, and there’s a full QWERTY keyboard (with number row) done up with tactile momentary buttons. There’s very few passive components involved in the build, which is sure to be appealing to new players; especially after they’ve finished soldering all those switches to the board.

On the software side, [Leonardo] says he leaned heavily on open source projects to get his machine up and running. Beyond the hardware drivers for things like the display, he specifically calls out the Tiny Basic and Tiny Lisp Computer projects for their code. If small-scale programming isn’t your style, the machine is compatible with the Arduino IDE so you can easily throw something else on it. If you’ve ever dreamed of a QWERTY Arduboy, this might be your chance.

From the way [Leonardo] describes the computer, which he calls the Cobalt 3, we get the impression a commercial kit might be in the cards. We hope the community shows enough interest to make it happen. After all, not everyone was able to make it to Hackaday Belgrade 2018 to get their own pocket retro computer.