Modern Spin On An Old Technology

It seems that the longer a technology has been around, the more likely it is that all of the ideas and uses for that technology will be fleshed out. For something that’s been around for around 5500 years it must be especially rare to teach an old dog new tricks, but [Sebastian] has built a sundial that’s different from any we’ve ever seen.

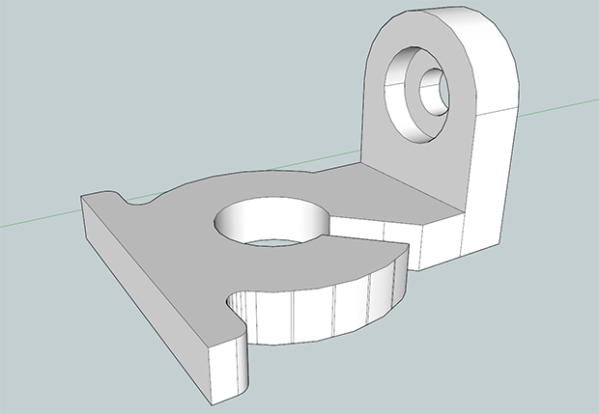
Once done with all of the math for the sundial to compute its angles and true north based on his latitude and longitude, [Sebastian] used Autodesk Inventor to create a model. From there it was 3D printed, but the interesting part here is that the 3D printer allowed for him to leave recesses for numbers in the sundial. The numbers are arranged at such angles inside the sundial so that when it’s a particular hour, the number of the hour shines through the shadow of the sundial which creates a very unique effect. This would be pretty difficult to do with any machine tools but is easily accomplished via 3D printing.

[Sebastian] wanted a way to appreciate the beauty of time, and he’s certainly accomplished that with this new take on  the sundial! He also wonders what it would be like if there was a giant one in a park. This may also be the first actual sundial build we’ve featured. What does that mean? Check out this non-pv, sun-powered clock that isn’t a sundial.

Thanks to [Todd] for the tip!

Wimshurst

3D Printed Wimshurst Machine

Steampunk extraordinaire [Jake von Slatt] has released his latest creation. This time he’s built a Wimshurst machine from mostly 3D printed parts. The Wimshurst machine is an electrostatic generator and was originally invented in the late 1800’s by James Wimshurst. It uses two counter-rotating disks to generate an electrostatic charge which is then stored in two Leyden jars. These jars are also connected to a spark gap. When the voltage raises high enough, the jars can discharge all at once by flashing a spark across the gap.

[Jake’s] machine has a sort of Gothic theme to it. He designed the parts using Autodesk’s 123D Design. They were initially printed in PLA. Skate bearings were used in the center of the disks to ensure a smooth rotation. The axle was made from the fiberglass shaft of a driveway reflector. The vertical supports were attached the base with machine screws.

The Leyden jars were made from sections of clear plastic tube. The caps for the jars were 3D printed and are designed to accept a short length of threaded 1/8″ pipe. Copper wire was used for the interior contacts and are held in place with electrical tape. The metal sectors on each disk were made from pieces of cut aluminum tape.

You may be wondering how this machine works if it’s almost entirely made out of plastic. [Jake] actually painted most of the parts with a carbon paint. This makes them electrically conductive and he can then use the parts to complete electrical circuits. Unfortunately he found this to be rather ineffective. The machine does work, but it only produces sparks up to 1/2″ in length. For comparison, his other machine is capable of 6″ sparks using similar sized Leyden jars.

[Jake] actually tried rebuilding this project using ABS, thinking that the PLA may have been collecting moisture from his breath, but the result is still only 1/2″ sparks. He suspects that the bumpy surface of the plastic parts may be causing the charge to slowly leak away, preventing a nice build up. He’s released all of his designs on Thingiverse in case any other hackers want to give it a whirl.

3D Printing Circuits Gets Rid Of The Box Altogether

Many think that the next big step in 3D printing is when we’ll be able to print in metal, well, at an affordable rate. But what about printing in metal and plastic at the same time?

The thing is, most electronics are typically two-dimensional. Layers upon layers of relatively flat PCBs make up the brains of every bit of technology we know and love. The funny thing is, we live in a three-dimensional world, and we like to shove these flat circuits into three-dimensional boxes. Well, what if we didn’t have to? What if the circuit could be embedded directly into whatever shape we want? It’d be pretty awesome — minus the whole servicing aspect of the product…

Anyway we’ve seen some great hacks over the years attempting this, like adding a copper wire strand into your 3D print, embedding components into your print by pausing the job, or even going old school and using the point-to-point Manhattan style circuit construction to add some electronic features to your part. But what if your printer could do it for you?

That’s exactly what Optomec is attempting with the Voxel8 3D printing electronics platform. It is your standard run of the mill FDM style 3D printer, but it has a 2nd extruder that is capable of squeezing out liquid silver ink that dries at room temperature. Just take a look at this quadrotor they were able to make.

Continue reading “3D Printing Circuits Gets Rid Of The Box Altogether”

Break Your Frames? Print Some New Ones!

3D Printed Glasses

When [Aaron Porterfield] accidentally broke his glasses frame, he saw it as an opportunity, rather than an unfortunate event. He decided he was going to design and print new ones to fit his prescription lenses!

The trickiest part of taking on a project like this is designing the glasses around the pre-existing lenses, because typically, lenses are cut to fit the frame — not vice versa. This is why we’re particularly impressed with the project. [Aaron] was able to 3D scan the lenses using his camera phone and Autodesk’s 123D Catch software (free) to create the lens model! Once he had the lens outline, he scaled it properly by measuring its maximum dimensions with calipers.

Now this is where it gets a bit tricky – designing the frames. [Aaron] is using Rhino to do the design work, and he’s actually laid out the steps quite nicely for anyone who wants to attempt something like this. He describes in detail matching the curvature of the lenses, designing the frame around it, and of course actually fitting the lenses in place.

There is a small caveat to this entire project — The frames were printed on a nice Stratasys polyjet 3D printer — due to the geometry, it might be a bit tricky (or impossible) to print on a traditional hobby FDM machine. Regardless — making your own glasses is some serious geek cred. Nice work [Aaron]!

3D Printering: Making A Thing In Autodesk 123D

printering

In the continuing battle against 3D printers used exclusively for fabricating plastic octopodes and useless trinkets, here’s yet another installment of a Making A Thing tutorial. If you’ve ever wanted to make one single object in multiple 3D design softwares, this is for you.

Previously, we’ve built a ‘thing’ in a few different 3D modeling programs, including:

See that ‘Read more…’ link below? You might want to click that.

Continue reading “3D Printering: Making A Thing In Autodesk 123D”

123D Circuits: Autodesk’s Free Design Tool

Arduino fanatics rejoice: Autodesk and Circuits.io have jointly released a new electronics design tool with some unique features: 123D Circuits. Anyone familiar with Autodesk knows they have a bit of a habit of taking over the world, but you can relax knowing this is a (pretty much) free product that’s filed under their Free 3D tools—though we’re not quite sure what is “3D” about a circuits layout program.

123D is web-based software, and using it requires account creation on the circuits.io website. Anything you design sits on the cloud: you can collaborate with others and even embed your circuit (with functioning simulation) straight into a webpage. Unfortunately, your work is public and therefore accessible by anyone unless you fork over $12 or $25 monthly: the former only gives you 5 private circuits. Dollar signs pop up again when you hit “finish circuit;” they offer to sell you PCBs in multiples of three.

Some features of the free account, however, may tempt the Arduino veteran away from a go-to program like Fritzing. Plopping in a virtual Arduino lets you edit its code on the fly in another window, which you can then simulate. If you’re new to circuit design or want some guidance for using 123D Circuits, they have provided an extensive list of applicable Instructables. Check out their promotional video below.

Continue reading “123D Circuits: Autodesk’s Free Design Tool”

Scanning Turntable Digitizes Objects As 3D Models

This turntable can automatically digitize objects for use in 3D rendering software like Blender3D. [James Dalby] built it using a high-quality DSLR, and some bits and pieces out of his junk box. The turntable itself is a Lazy Susan turned on its head. The base for the spinning model is normally what sits on the table, but this way it gives him an area to rest the model, and the larger portion acts as a mounting surface for the drive mechanism.

He used the stepper motor from a scanner, as well as the belt and tension hardware from a printer to motorize the platform. This is driven by a transistor array (a ULN2003 chip) connected to an Arduino. The microcontroller also controls the shutter of the camera. We’ve included his code after the break; you’ll find his demo video embedded there as well.

The concept is the same as other turntable builds we’ve seen, But [James] takes the post-processing one step further. Rather than just make a rotating gif he is using Autodesk 123D to create a digital model from the set of images.

Continue reading “Scanning Turntable Digitizes Objects As 3D Models”