ChatGPT Patched A BIOS Binary, And It Worked

[devicemodder] wrote in to let us know they managed to install Linux Mint on their FRP-locked Panasonic Toughpad FZ-A2.

Android devices such as the FZ-A2 can be locked with Factory Reset Protection (FRP). The FRP limits what you can do with a device, tying it to a user account. On the surface that’s a good thing for consumers as it disincentivizes stealing. Unfortunately, when combined with SecureBoot, it also means you can’t just install whatever software you want on your hardware. [devicemodder] managed to get Linux Mint running on their FZ-A2, which is a notable achievement by itself, but even more remarkable is how it was done.

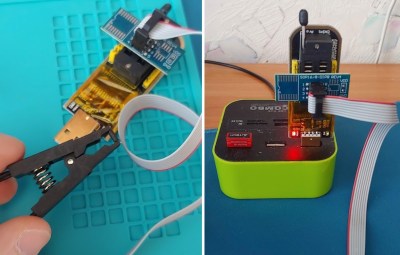
So how did [devicemodder] get around this limitation? The first step was to dump the BIOS using a CH341A-based programmer. From there, the image was uploaded to ChatGPT along with a request to disable SecureBoot. The resulting file was flashed back onto the FZ-A2, and all available fingers were crossed.

And… it worked! ChatGPT modified the BIOS enough that the Linux Mint installer could be booted from a flash drive. There are a bunch of bugs and issues to work through but in principle we have just seen AI capable enough to successfully patch a binary dump of BIOS code, which, for the record, is kind of hard to do. We’re not sure what all of this might portend.

So is uploading binaries to ChatGPT with requests for mods vibe coding? Or should we invent a new term for this type of hack?

Bring Back The BIOS! (To UEFI Systems, That Is)

At the dawn of the PC, IBM provided the Basic Input Output System (BIOS). It took care of bringing the machine up, and exposed a series of software hooks for the hardware. Over the years the BIOS and its updated descendants served us well, but as we entered a 64-bit world its limitations began to show.

The replacement was the Unified Extensible Firmware Interface or UEFI, and the chances are you’re viewing this on a machine which uses it in some capacity. But what if you only have UEFI and need BIOS to run a piece of older software? Never fear, because here’s CSMWrap, which brings it back, just for you.

Under the hood it’s a wrapper for the SeaBIOS compatibility support module, doing the work of setting up the memory mapping such that it will load, and ensuring that other services such as the VGA BIOS are loaded. As it stands it can boot FreeDOS and some older Windows versions under UEFI in QEMU, and it’s claimed also run on real hardware. We don’t often need to run DOS on our 2025 machine, but it’s neat to know we can.

Meanwhile if the BIOS interests you, know that there’s also an open source BIOS for the earliest of PCs.

BIOS header image: Thomas Schanz, CC BY-SA 4.0.

Tiny Laptop Gets A New Case And An Unlocking

Unless you’ve got an especially small lap, calling the Toshiba Libretto a laptop is a bit of a stretch. The diminutive computers from the mid-1990s had a lot of the usual laptop features, but in an especially compact and portable case that made them a great choice for anyone with an on-the-go lifestyle.

Fast-forward thirty years or so, and the remaining Librettos haven’t fared too well. Many of them have cases that crumble at the slightest touch, which is what led [polymatt] to undertake this meticulous case replacement. The effort started with a complete teardown; luckily, the lower aluminum-alloy shell was in fine shape, but the upper case parts were found to be almost too deteriorated to handle. Still, with a little patience and the judicious application of tape, [polymatt] was able to scan the case pieces on a flatbed scanner and import them into his CAD package. Great tip on the blue-tack for leveling the parts for accurate scanning, by the way.

After multiple rounds of printing and tweaking, [polymatt] had a case good enough to reassemble the Libretto. Unfortunately, the previous owner left an unwanted gift: a BIOS password. Disconnecting the CMOS battery didn’t reset it, but a little research told him that shorting a few pins on the parallel port on the machine’s dock should do the trick. It was a bit involved, requiring the design and subsequent bodging of a PCB to fit into the docking port connector, but in the end he was able to wake up a machine to all its Windows 95 glory. Better get patching.

In a time when laptops were more like lap-crushers, the Libretto was an amazing little machine, and thirty years on, they’re well worth saving from the scrap heap. Hats off to [polymatt] for the effort to save this beauty, and if he needs tips on reading data from any PCMCIA cards that may have come with it, we’ve got him covered.

Continue reading “Tiny Laptop Gets A New Case And An Unlocking”

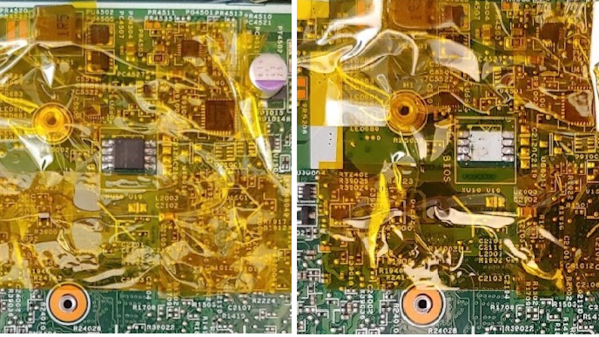
Two pictures of the mobo side by side, both with kapton tape covering everything other than the flash chip. On the left, the flash chip is populated, whereas on the right it's not

Enabling Intel AMT For BIOS-over-WiFi

Intel ME, AMT, SMT, V-Pro… All of these acronyms are kind of intimidating, all we know about them is that they are tied to remote control technologies rooted deep in Intel CPUs, way deeper than even operating systems go. Sometimes though, you want remote control for your own purposes, and that’s what [ABy] achieved. He’s got a HP ProDesk 600 G3 Mini, decided to put it into a hard to reach spot in his flat, somewhere you couldn’t easily fetch a monitor and a keyboard for any debugging needs. So, he started looking into some sort of remote access option in case he’d need to access the BIOS remotely, and went as far as it took to make it work. (Google Translate)

The features he needed are covered by Intel AMT — specifically, BIOS access over a WiFi connection. However, his mini PC only had SMT enabled from the factory, the cut-down version of AMT without features like wireless support. He figured out that BIOS dumping was the way, promptly did just that, found a suitable set of tools for his ME region version, and enabled AMT using Intel’s FIT (Flash Image Tool) software.

Now, dumping the image could be done from a running system fully through software, but apparently, flashing back requires an external programmer. He went with the classic CH341, did the 3.3 V voltmod that’s required to make it safe for flash chip use, and proceeded to spend a good amount of time making it work. Something about the process was screwy, likely the proprietary CH341 software. Comments under the article highlight that you should use flashrom for these tasks, and indeed, you should.

This article goes into a ton of detail when it comes to working with Intel BIOS images — whichever kind of setting you want to change, be it AMT support or some entirely different but just as tasty setting, you will be well served by this write-up. Comments do point out that you might want to upgrade the Intel ME version while at it, and for what it’s worth, you can look into disabling it too; we’ve shown you a multitude of reasons why you should, and a good few ways you could.

Antique Motherboard Speaks

[Bits und Bolts] has been restoring an old PC motherboard with the infamous bad electrolytic capacitors. The video of his exploits was interesting enough, but pretty standard stuff. What we found interesting though, was an odd feature of the ASUS Bios called “Post Reporter” that let the motherboard speak error codes and status through the external speaker. (Video, embedded below.) We aren’t sure who wanted that, and since we haven’t seen it around lately, we are guessing the answer was nobody wanted it.

We enjoyed watching the PCB rework. Those large internal ground plane layers do make it hard to unsolder and then solder the caps. That makes the job seem deceptively easy. However, if you want to skip to the exotic BIOS, jump to the 8:20 mark.

Continue reading “Antique Motherboard Speaks”

Finally, An Open-Source 8088 BIOS

The Intel 8088 is an interesting chip, being a variant of the more well-known 8086. Given the latter went on to lend its designation to one of the world’s favorite architectures, you can tell which of the two was higher status. Regardless, it was the 8088 that lived in the first IBM PC, and now, it even has its own open-source BIOS.

As with any BIOS, or Basic Input Output System, it’s charged with handling core low-level features for computers like the Micro 8088, Xi 8088, and NuXT. It handles chipset identification, keyboard and mouse communication, real-time clock, and display initialization, among other things.

Of course, BIOSes for 8088-based machines already exist. However, in many cases, they are considered to be proprietary code that cannot be freely shared over the internet. For retrocomputing enthusiasts, it’s of great value to have a open-source BIOS that can be shared, modified, and tweaked as needed to suit a wide variety of end uses.

If you want to learn more about the 8088 CPU, we’ve looked in depth at that topic before. Feel free to drop us a line with your own retro Intel hacks if you’ve got them kicking around!

BIOS POST Card Built Using Raspberry Pi Pico

A computer’s BIOS includes basic diagnostic tools for troubleshooting issues. Often, we rely on the familiar beeps from the POST system for this reason. However, error codes are also available via hardware “POST Cards” that were particularly popular in the 1990s. [Mr. Green] has now built a POST card using readily-available modern hardware.

[Mr. Green] built the device to help troubleshoot an x86 based firewall appliance that was having trouble. Like many x86 systems, it featured a Low Pin Count (LPC) bus which can be used to capture POST troubleshooting codes. By hooking up a Raspberry Pi Pico to the LPC bus on the firewall’s motherboard, it was possible to get it to display the POST error codes on some LEDs. This is of great use in the absence of a conventional PC speaker to sound the error out with beeps.

The build can be used for POST-based troubleshooting on any x86 system with an LPC bus. Files are on Github for those eager to replicate the build. We’ve seen similar work before, too. Video after the break.

Continue reading “BIOS POST Card Built Using Raspberry Pi Pico”