Is It A Golden Gun If It’s Made Out Of Brass?

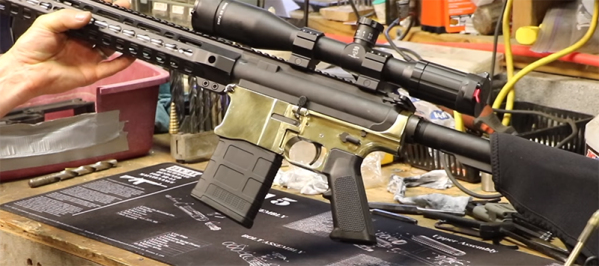
On today’s episode of ‘this is a really neat video that will soon be demonetized by YouTube’ comes this fantastic build from [John]. It is the Golden Gun, or at least it looks like a Golden Gun because it’s made out of melted down brass casings. It’s a masterclass demonstration of melting stuff down and turning a thirteen-pound blob of metal into a two-pound precision machined instrument.

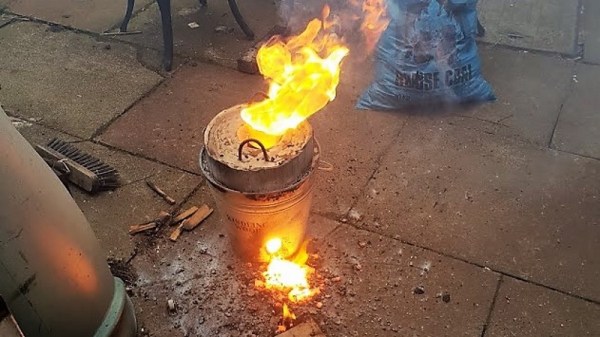
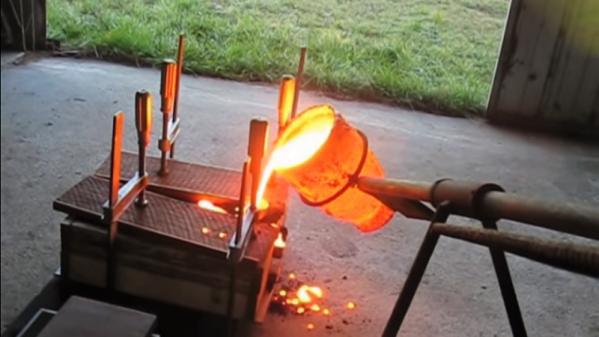
This build began by simply cutting a wooden block, packing it in sand, and melting approximately 1425 shell casings of various calibers in a DIY furnace. The molten brass was then simply poured into the open mold. This is standard yellow brass, with about 70% copper and 30% zinc. There’s a bit of aluminum in there from the primers, and the resulting block isn’t terribly great for machining. [John] says this could be fixed by adding a few percent of lead to the melt. To all the jokesters suggesting he add some unfired bullets to the melt, don’t worry, we already have that covered.

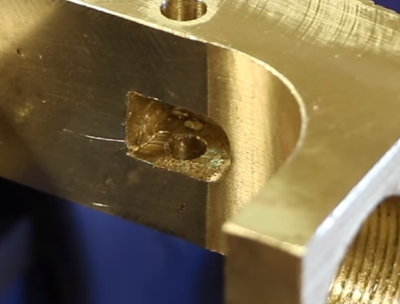
chiseling a hole square, with a chisel.

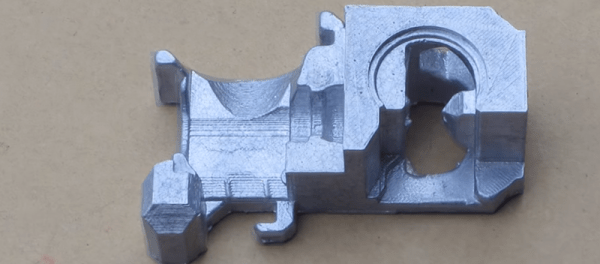
The machining went as you would expect it would with a large mill, but there are a few things that made this entire video worthwhile. For some of the holes, [John] had to square up the corners. The simplest and easiest way to do this is to break out a file. This is brass, though, and with some steel chisels hanging around the shop your mortise and tenon skills might come in handy. With the very careful application of force, [John] managed to put corners on a circle with a standard wood chisel. A bit later in the build video, a few more sharp corners were created by shoving a broach in the mill and jamming it down into the work.

When it comes to machining builds, this is high art. Yes, it’s the same as building an AR-15 out of a few hundred soda cans, but this one is made out of brass. It looks just great, and that final polish turns the entire project into something that looks like it’s out of a video game. Simply amazing.

If you’re looking for more ways to push your metalwork boundaries, give cast iron a try!

Continue reading “Is It A Golden Gun If It’s Made Out Of Brass?”

Move Over Aluminum: Cast Iron For The Home Foundry

When it comes to choice of metals that can be melted in the home foundry, it’s a little like [Henry Ford]’s famous quip: you can melt any metal you want, as long as it’s aluminum. Not that there’s anything wrong with that; there’s a lot you can accomplish by casting aluminum. But imagine what you could accomplish by recycling cast iron instead.

It looks like [luckygen1001] knows a thing or two about slinging hot metal around. The video below shows a fairly expansive shop and some pretty unique tools he uses to recycle cast iron; we were especially impressed with the rig he uses to handle the glowing crucibles from a respectful distance. The cast iron comes from a cheap and abundant source: car disc brake rotors. Usually available free for the asking at the local brake shop, he scores them with an angle grinder and busts them into manageable chunks with a hammer before committing them to the flames. The furnace itself is quite a thing, running on a mixture of diesel and waste motor oil and sounding for all the world like a jet engine starting up. [luckygen1001] had to play with the melt, adding lumps of ferrosilicon alloy to get a cast iron with better machining properties than the original rotors. It’s an interesting lesson in metallurgy, as well as a graphic example of how not to make a flask for molding cast iron.

Cast iron from the home shop opens up a lot of possibilities. A homemade cast aluminum lathe is one thing, but one with cast iron parts would be even better. And if you use a lot of brake rotors for your homebrew cast iron lathe, it might require special handling.

Continue reading “Move Over Aluminum: Cast Iron For The Home Foundry”

Make 3D-Modeling Child’s Play With A Can Of Play-Doh

You need to replicate a small part on a 3-D printer, so you start getting your tools together. Calipers, rulers, and a sketch pad at a minimum, and if you’re extra fancy, maybe you pull out a 3D-scanner to make the job really easy. But would you raid your kid’s stash of Play-Doh too?

You might, if you want to follow [Vladimir Mariano]’s lead and use Play-Doh for accurately modeling surface features in the part to be replicated. Play-Doh is a modeling compound that kids and obsolete kids alike love to play with, especially a nice fresh can before it gets all dried out or mixed in with other colors or gets dog hair stuck in it.

For [Vladimir], the soft, smooth stuff was the perfect solution to the problem of measuring the spacing of small divots in the surface of a cylinder that he was asked to replicate. Rather than measuring the features directly on the curved surface, he simply rolled it across a flattened wad of Play-Doh. The goop picked up the impressions on the divots, which were then easy to measure and transfer to Fusion 360. The video below shows the Play-Doh trick up front, but stay tuned through the whole thing to get some great tips on using the sheet metal tool to wrap and unwrap cylinders, as well as learning how to import images and recalibrate them in Fusion 360.

Run into a modeling problem that Play-Doh can’t solve? Relax, we’ve got a rundown on the basics for you.

Continue reading “Make 3D-Modeling Child’s Play With A Can Of Play-Doh”

Recycling And Casting Styrofoam With Solvents

Styrofoam is an ever-present waste material in modern society, being used to package everything from food to futons. It’s also not the easiest thing to deal with as a waste stream, either. With this in mind, [killbox] decided to have a go at recycling some styrofoam and putting it to better use.

The process starts by combining the EPS styrofoam with a solvent called D-limonene. This was specifically chosen due to its low toxicity and ease of use. The solvent liquifies the solid foam and the air bubbles are then allowed to make their way out of the solution. If it’s desired to create a coloured end product, it’s noted that this can be achieved by using other plastic items to provide colour at this stage, such as a red Solo cup.

It’s a slow process thanks to the choice of solvent, but it makes the process much more palatable to carry out in the average home lab setup. It’s possible to then perform casting operations or further work with the recovered material, which could have some interesting applications. It’s not the first plastics recycling project we’ve seen, either – check out this full setup.

[Thanks to Adric for the tip!]

Fail Of The Week: Casting A Bolt In A 3D-Printed Mold

Here’s a weird topic as a Fail of the Week. [Pete Prodoehl] set out to make a bolt the wrong way just to see if he could. Good for you [Pete]! This is a great way to learn non-obvious lessons and a wonderful conversation starter which is why we’re featuring it here.

The project starts off great with a model of the bolt being drawn up in OpenSCAD. That’s used to create a void in a block which then becomes two parts with pegs that index the two halves perfectly. Now it’s time to do the casting process and this is where it goes off the rail. [Pete] didn’t have any flexible filament on hand, nor did he have proper mold release compound. Considering those limitations, he still did pretty well, arriving at the plaster bold seen above after a nice coat of red spray paint.

One side of the mold didn’t make it

He lost part of the threads getting the two molds apart, and then needed to sacrifice one half of the mold to extract the thoroughly stuck casting. We’ve seen quite a bit of 3D printed molds here, but they are usually not directly printed. For instance, here’s a beautiful mold for casting metal but it was made using traditional silicon to create molds of the 3D printed prototype.

Thinking back on it, directly 3D printed molds are often sacrificial. This method of pewter casting is a great example. It turns out gorgeous and detailed parts from resin molds that can stand up to the heat but must be destroyed to remove the parts.

So we put it to you: Has anyone out there perfected a method of reusable 3D printed molds? What printing process and materials do you use? How about release agents — we have a guide on resin casting the extols the virtues of release agent but doesn’t have any DIY alternatives. What has worked as a release agent for you? Let us know in the comments below.

Shutter Bug Goes Extreme With Scratch-Built Film Camera

Should a camera build start with a sand mold and molten aluminum? That’s the route [CroppedCamera] took with this thoroughly impressive camera project.

When we think of cameras these days, chances are we picture the ones that live inside the phones in our pockets. They’re the go-to image capture devices for most of us, but even for the more photographically advanced among us, when a more capable camera is called for, it’s usually an off-the-shelf DSLR from Canon, Nikon, or the like. Where do hand-built cameras fall in today’s photography world? They’re a great way to add a film option to your camera collection.

[CroppedCamera] previously built a completely custom large-format view camera, but for this build he decided that something a bit more portable might do. The body of the camera is scratch-built from aluminum, acting as the lightproof box to hold the roll film and mount the leaf-shutter lens. There’s an impressive amount of metalwork here — sand casting, bending, TIG welding, and machining all came into play, and most of them new skills to [CroppedCamera]. We were especially impressed with the shrink-fit of the lens cone to the body. It’s unconventional looking for sure, but not without its charm, and it’s sure to make a statement dangling around his neck.

It’s tough to find non-digital DIY camera builds around here — best we could do were these laser-cut plywood modular cameras. Then again, you can’t beat this wearable camera for functional style.

Continue reading “Shutter Bug Goes Extreme With Scratch-Built Film Camera”

You Can Build Anything Out Of What Is Holding Your 97 Eagle Talon Together

We all know it, we all love it, and the guy parked outside of the 7-11 covered his car in it. What is it? Polyester body filler, better known by the almost generic trademark, Bondo. There’s a lot more you can do with Bondo than fairing in that sweet body kit, bro, and [Eric Strebel] is here to show you how far you can push the mechanical properties of polyester body filler.

We didn’t always have polyester body filler. In the days before OSHA, auto body workers would use a torch, bricks of lead, and a grinder. You can check out a video of the era before OSHA here. Needless to say, vaporizing and grinding lead in your shop isn’t the greatest idea, and there had to be a better way. This led Robert ‘Bondo Bob’ Spink to invent a much less toxic auto body filler that we now know as Bondo.

For the beginning of the demonstration, [Eric] mixes up a cup of polyester body filler with a few special additions: he’s using printer ink to get his mixture to something other than that one shade of pink we all know. Although Bondo is a bit too thick to cast, he did manage to put a little bit of it in a square mold, a PVC pipe, and applied a little to foam and wood. It’s enough for a demonstration, but for the actual ins and outs of machining Bondo we’re going to have to wait until [Eric]’s next video. Until then, you can check out this introduction below, or look at his previous work on free-form sculpting of uncured Bondo.

Continue reading “You Can Build Anything Out Of What Is Holding Your 97 Eagle Talon Together”