Li-ion Battery Charging

A Li-ion Battery Charging Guide

Although [pinomelean’s] Lithium-ion battery guide sounds like the topic is a bit specific, you’ll find a number of rechargeable battery basics discussed at length. Don’t know what a C-rate is? Pfffft. Roll up those sleeves and let’s dive into some theory.

As if you needed a reminder, many lithium battery types are prone to outbursts if mishandled: a proper charging technique is essential. [pinomelean] provides a detailed breakdown of the typical stages involved in a charge cycle and offers some tips on the advantages to lower voltage thresholds before turning his attention to the practical side: designing your own charger circuit from scratch.

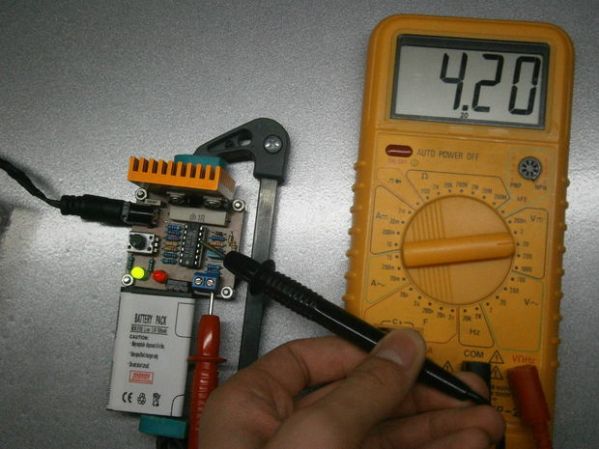
The circuit itself is based around a handful of LM324 op-amps, creating a current and voltage-limited power supply. Voltage limits to 4.2V, and current is adjustable: from 160mA to 1600mA. This charger may take a few hours to juice up your batteries, but it does so safely, and [pinomelean’s] step-by-step description of the device helps illustrate exactly how the process works.

[Thanks mansalvo]

Inductive charger

Inductive Charger Mod Allows For Non-Stop Wireless Rocking

When you want to jam out to the tunes stored on your mobile devices, Bluetooth speakers are a good option. Battery power means you can take them on the go and the Bluetooth connection means you don’t have to worry about cables or wires dangling around. Unfortunately the batteries never seem to last as long as we want them too. You can always plug the speaker back in to charge up the battery… but when you unhook those cords they always seem to end up falling back behind the furniture.

[Pierre] found himself with this problem, but being a hacker at heart meant that he was able to do something about it. He modified his JAM Classic Bluetooth Wireless Speaker to include an inductive charger. It used to be a lot of work to fabricate your own inductive charging system, or to rip it out of another device. But these days you can purchase kits outright.

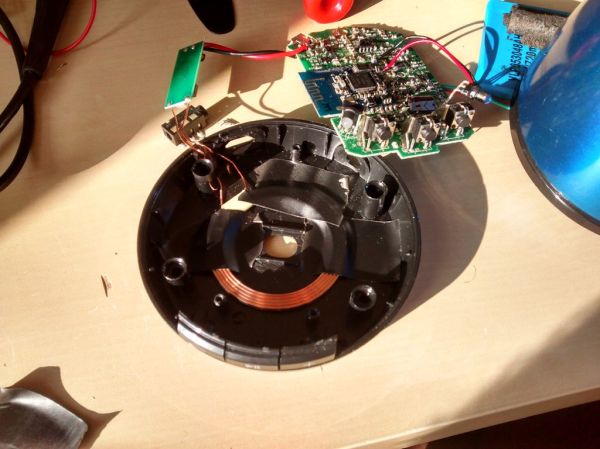
The JAM speaker was simply put together with screws, so no cracking of the plastic was necessary. Once the case was removed, [Pierre] used a volt meter to locate the 5V input line. It looks like he just tapped into the USB port’s power and ground connections. The coil’s circuit is soldered in place with just the two wires.

All [Pierre] had left to do was to put the speaker back together, taking care to find space for the coil and the new circuit board. The coil was taped to the round base of the speaker. This meant that [Pierre] could simply tape the charging coil to the underside of a glass table top. Now whenever his Bluetooth speaker gets low on battery, he can simply place it on the corner of the table and it will charge itself. No need to mess with cables.


Lots of battery reviews and more!

An Obsessively Thorough Battery (and More) Showdown

There are a number of resources scattered across the Internet that provide detailed breakdowns of common products, such as batteries, but we haven’t seen anything quite as impressive as this site. It’s an overwhelming presentation of data that addresses batteries of all types, including 18650’s (and others close in size)26650’s, and more chargers than you can shake a LiPo at. It’s an amazing site with pictures of the product both assembled and disassembled, graphs for charge and discharge rates, comparisons for different chemistries, and even some thermal images to illustrate how the chargers deal with heat dissipation.

Check out the review for the SysMax Intellicharger i4 to see a typical example. If you make it to the bottom of that novel-length repository of information, you’ll see that each entry includes a link to the methodology used for testing these chargers.

But wait, there’s more! You can also find equally thorough reviews of flashlights, USB chargers, LED drivers, and a few miscellaneous overviews of the equipment used for these tests.

[Thanks TM]

Counterfeit Apple Charger

More Counterfeit Apple Chargers Than You Can Shake An IPod At

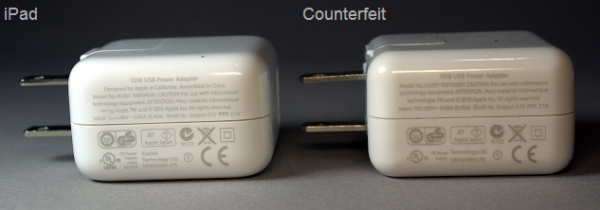
Phones, MP3 players, designer bags, artwork, money…. anything with value will bring out the counterfeiters looking to make a quick buck. Sometimes the product being counterfeited isn’t even necessarily expensive. For example, an Apple iPad Charger. [Ken Shirriff] got a hold of a counterfeit iPad Charger, took it apart, and did some testing.

So why would someone buy a counterfeit product? To save some money! The counterfeits are usually cheaper to reel the potential buyer in thinking they are getting a deal. In this case, the Apple product costs $19 and the knock-off is $3, that’s a huge difference.

Continue reading “More Counterfeit Apple Chargers Than You Can Shake An IPod At”

First Stab At Motion Sensor To Disconnect A Car Charger

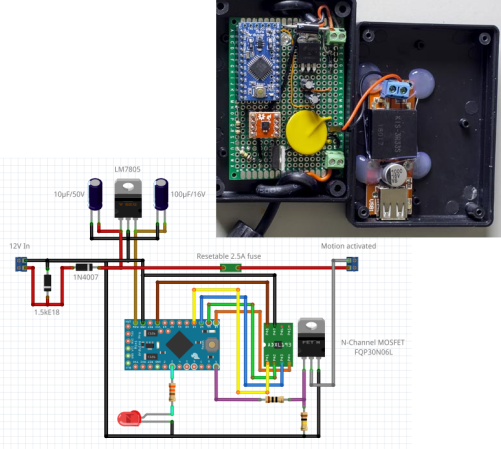
motion-sensing-car-charger


[Pixel] just sent in this automotive hack which disconnects his car charger when the vehicle stops moving for at least 10 minutes. Why would you need such a thing? The 12V outlet in his vehicle isn’t disconnected when the ignition is turned off. If he leaves a charger plugged in when parking the car, he often returns to a drained battery.

The fritzing diagram tells the story of this hack. He’s using a 7805 to power the Arduino mini. This monitors an ADXL362 accelerometer, starting the countdown when motion is no longer sensed by that chip. At the 10-minute mark the N-channel MOSFET kills the ground side of the outlet. Good for [Pixel] for including a resetable fuse on the hot side. But it was the diode all the way to the left that caught our eye. Turns out this is part of a filtering circuit recommended in a forum post. It’s a Zener that serves as a Transient-Voltage-Suppression diode.

Another comment on that thread brings up the issue we also noticed. The 7805 linear regulator is constantly powered. Do you think putting the uC into sleep and leaving the linear regulator connected is an adequate solution? If not, what would you do differently?

USB-ify Your Old Cell Phone Chargers

phoneChargerUSBd

If you’re like us, you probably have a box (or more) of wall warts lurking in a closet or on a shelf somewhere. Depending on how long you’ve been collecting cell phones, that box is likely overflowing with 5V chargers: all with different connectors. Bring them back to life by doing what [Martin Melchior] did: chop off the ends and solder on a bunch of USB jacks.

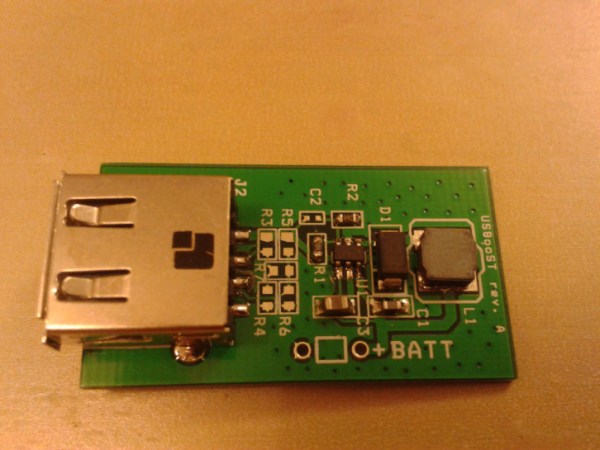
You’ll want to use chargers rated for at least 500mA (if not 1A) for this project, or you may be wasting your time considering how much current devices pull these days. Get your polarity right, solder on a USB jack, and you’re finished. Sure, it’s a no-brainer kind of project, but it can clean out some of your closet and give you a charging station for every room of your home and the office. [Martin] glued the USB jack directly onto the adapters, so there are no tangled cords to worry about. iPhone users will need to do the usual kungfu if you want your Apple device to charge.

Hacking Dell Laptop Charger Identification

If you’ve ever had a laptop charger die, you know that they can be expensive to replace. Many laptops require you to use a ‘genuine’ charger, and refuse to boot when a knock off model is used. Genuine chargers communicate with the laptop and give information such as the power, current, and voltage ratings of the device. While this is a good safety measure, ensuring that a compatible charger is used, it also allows the manufacturers to increase the price of their chargers.

[Xuan] built a device that spoofs this identification information for Dell chargers. In the four-part series (1, 2, 3, 4), the details of reverse engineering the communications and building the spoofer are covered.

Dell uses the 1-Wire protocol to communicate with the charger, and [Xuan] sniffed the communication using a MSP430. After reading the data and verifying the CRC, it could be examined to find the fields that specify power, voltage, and current.

Next, a custom PCB was made with two Dell DC jacks and an MSP430. This passes power through the board, but uses the MSP430 to send fake data to the computer. The demo shows off a 90 W adapter pretending to run at 65 W. With this working, you could power the laptop from any supply that can meet the requirements for current and voltage.