CircuitPython Macro Pad Is One Build That Won’t Bite

Have you built a macro keypad yet? This is one of those projects where the need can materialize after the build is complete, because these things are made of wishes and upsides. A totally customized, fun build that streamlines processes for both work and play? Yes please. The only downside is that you actually have to like, know how to build them.

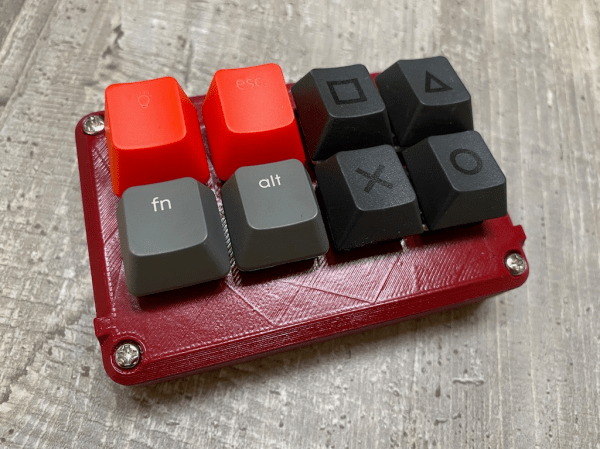
Suffer no more, because [Andy Warburton] can show you exactly how to put a macro pad together without worrying about wiring up a key switch matrix correctly. [Andy]’s keypad uses the very affordable Seeeduino Xiao, a tiny board that natively runs Arduino code. Since it has a SAMD21 processor, [Andy] chose to run CircuitPython on it instead. And lucky for you, he wrote a separate guide for that.

Practicalities aside, the next best thing about macro keyboards is that they can take nearly any shape or form. Print a case from Thingiverse as [Andy] did, or build it into anything you have lying around that’s sturdy enough to stand up to key presses and won’t slide around on your desk.

No room left on the desk? Build a macro foot stool and put those feet to work.

Via r/circuitpython

The CLUE Tracker Points You To A Target, Using CircuitPython

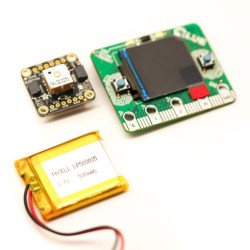
The main components are an Adafruit CLUE, Stemma GPS, and a lithium-polymer battery. No soldering required.

[Jay Doscher] shares a quick GPS project he designed and completed over a weekend. The device is called the CLUE Tracker and has simple goals: it shows a user their current location, but also provides a compass heading and distance to a target point. The idea is a little like geocaching, in that a user is pointed to a destination but must find their own way there. There’s a 3D printed enclosure, and as a bonus, there is no soldering required.

The CLUE Tracker uses the Adafruit CLUE board (which is the same size as the BBC micro:bit) and Stemma GPS sensor, with the only other active component being a lithium polymer battery. The software side of the CLUE Tracker uses CircuitPython, and [Jay] has the code and enclosure design available on GitHub.

[Jay] did a nice job of commenting and documenting the code, so this could make a great introductory CircuitPython project. No soldering is required, which makes it a little easier to re-use the parts in other projects later. This helps to offset costs for hackers on a budget.

The fact that a device like this can be an afternoon or weekend project is a testament to the fact that times have never been better for hobbyists when it comes to hardware. CircuitPython is also a fast-growing tool, and projects like this can help make it easy and fun to get started.

Baby Keyboard Is Really Three Boards

Just when we think we’ve peeped all the cool baby keebs out there, another think comes along. This bad boy built by [andyclymer] can be configured three different ways, depending on what kind of control you’re after.

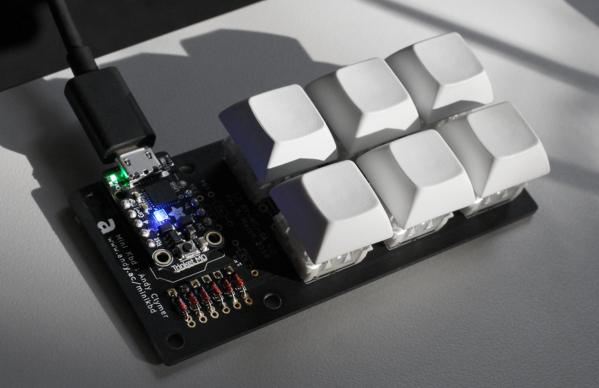
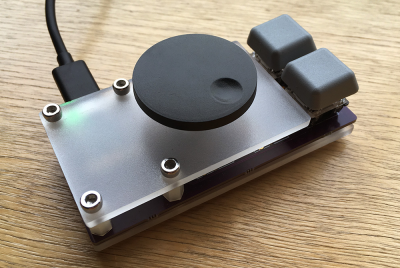
As designed, the PCB can be used as a six-switch macro keyboard, or a rotary encoder with two switches, or a pair of rotary encoders. It’s meant to be controlled with Trinket M0, which means it can be programmed with Arduino or CircuitPython.

This could really only be cooler if the key switch PCB holes had sockets for hot-swapping the switches, because then you could use this thing as a functional switch tester. But hey, you can always add those yourself.

If you’re in the market for purpose-built add-on input device, but either don’t have the purpose nailed down just yet, or aren’t sure you want to design the thing yourself, this board would be a great place to start. Usually, all it takes is using someone else’s design to get used to using such a thing, at which point it’s natural to start thinking of ways to customize it. [andyclymer] is selling these boards over on Tindie, or you can roll your own from the repo.

Need just a few more inputs? We’ve got you covered.

Scott Shawcroft Is Programming Game Boys With CircuitPython

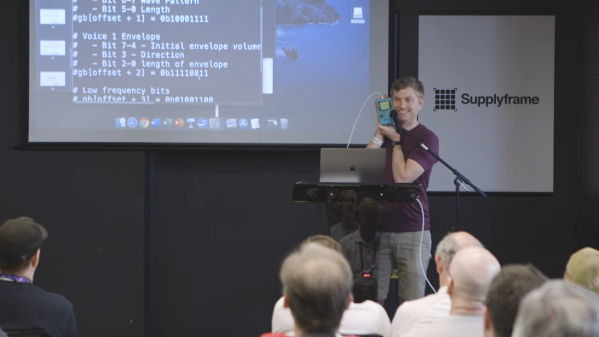
Some people like to do things the hard way. Maybe they drive a manual transmission, or they bust out the wire wrap tool instead of a soldering iron, or they code in assembly to stay close to the machine. Doing things the hard way certainly has its merits, and we are not here to argue about that. Scott Shawcroft — project lead for CircuitPython — on the other hand, makes a great case for doing things the easy way in his talk at the 2019 Hackaday Superconference.

In fact, he proved how easy it is right off the bat. There he stood at the podium, presenting in front of a room full of people, poised at an unfamiliar laptop with only the stock text editor. Yet with a single keystroke and a file save operation, Scott was able make the LEDs on his Adafruit Edge Badge — one of the other pieces of hackable hardware in the Supercon swag bag — go from off to battery-draining bright.

Code + Community

As Scott explains, CircuitPython prides itself on being equal parts code and community. In other words, it’s friendly and inviting all the way around. Developing in CircuitPython is easy because the entire environment — the code, toolchain, and the devices — are all extremely portable. Interacting with sensors and other doodads is easy because of the import and library mechanics Python is known for, both of which are growing within the CircuitPython ecosystem all the time.

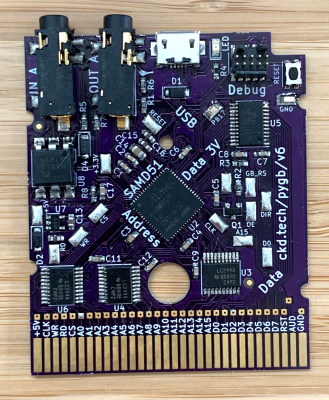
CircuitPython is so friendly that it can even talk to old hardware relatively easily without devolving into a generational battle. To demonstrate this point, Scott whipped out an original Nintendo Game Boy and a custom cartridge, which he can use to play fun sounds via the Game Boy’s CPU.
Now You’re Playing With Python

It’s interesting to see the platforms on which Scott has used the power of CircuitPython. The Game Boy brings the hardware for sound and pixel generation along with some logic, but he says it’s the code on the cartridge that does the interesting stuff.

The CPU communicates with carts at a rate of 1MHz. As long as you can keep this rate up and the CPU understands your instructions, you can get it to do anything you want.

Scott’s custom cart has a 120MHz SAMD51. He spends a second explaining how he gets from Python libraries down to the wire that goes to the Game Boy’s brain — basically, the C code underneath CircuitPython accesses direct structs defined within the SAMD to do Direct Memory Access (DMA), which allows for jitter-free communication at 1MHz.

He’s using the chip’s lookup tables to generate a 1MHz signal out of clock, read, and A15 in order to send music-playing instructions to the sound register of the Game Boy’s CPU. It sounds like a lot of work, but CircuitPython helps to smooth over the dirty details, leaving behind a simpler interface.

If you want easy access to hardware no matter how new or nostalgic, the message is clear: snake your way in there with CircuitPython.

Continue reading “Scott Shawcroft Is Programming Game Boys With CircuitPython”

CircuitPython Slithers Into 100th Board — The OHS 2020 Badge

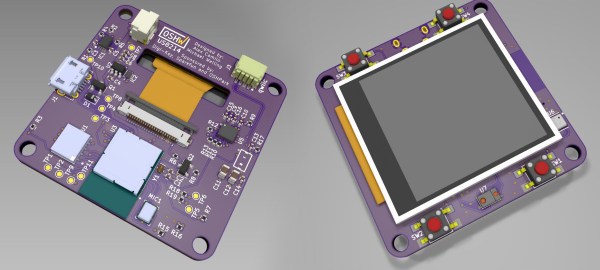
CircuitPython reached a major milestone last week as it welcomed its 100th board into the fold: the wristwatch form factored badge designed for the 10th annual Open Source Hardware Summit, which takes place March 13th in New York City. Although CircuitPython — an open source derivative of MicroPython — was born at Adafruit, more than half of the boards on this list were produced outside of the company. That just goes to show the strength of the community in support of the snake.

The OSHW 2020 badge joins a litany of familiar boards happy to drop you into a Python interpreter. Among them there’s the Adafruit Feather ecosystem, the ItsyBitsy, specialized boards like the Edge Badge that was in some goodie bags at Supercon, and the CircuitPlayground — that Swiss army knife of sensors which now comes in a Bluetooth version. The first 100 boards were rounded out in strong fashion with [Joey Castillo]’s OpenBook e-reader and the Teensy 4.0. Continue reading “CircuitPython Slithers Into 100th Board — The OHS 2020 Badge”

CircuitPython Now Working On Teensy 4.0

Python is often touted as a great language for beginner coders to learn. Until recently, however, it simply wasn’t a viable choice in the embedded space. That’s begun to change with projects like CircuitPython, and now it’s available on the Teensy 4.0!

This milestone is thanks in part to [arturo182], who did the ground work of getting CircuitPython to run on the iMX RT series of microcontrollers. This was built upon by [tannewt], who is the lead in charge of the CircuitPython project.

There are some bugs to work out; currently, the project is in a very early stage of development. [Paul Stoffregen], who heads Teensy development, has already pointed out that there needs to be allowance for the 4096 byte recovery partition in the Teensy 4.0’s storage, for example. Development continues at a rapid pace, and those with ideas about where the project should go can weigh in online.

It’s an exciting development, which brings easy Python development to one of the more powerful embedded development platforms on the market. We look forward to seeing many more projects take advantage of the power of the Teensy 4.0 moving forward. If you’re eager to see what can be done with CircuitPython, be sure to check out projects we’ve featured before. Video after the break.

Continue reading “CircuitPython Now Working On Teensy 4.0”

DIY CircuitPython Brain Snakes Into Small Spaces

Whether you’re new to electronics and programming, or you were bit-banging bare metal long before hair metal, CircuitPython is a great tool for getting a project up and working without all the fuss. The boards show up as mass storage devices, and programming consists of editing the Python file and saving it back to the board.

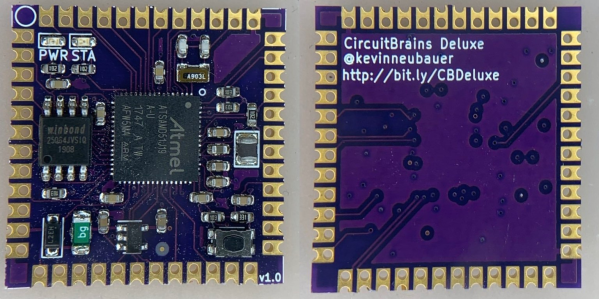
The only hard part about CircuitPython is trying to cram those official boards into small projects. [Kevin Neubauer] got tired of making his own board every time and came up with a slim system-on-module that has all the core functionality of CircuitPython. CircuitBrains Deluxe has regular holes for using headers, but also has castellated pads so he can solder these modules directly to a larger project PCB. [Kevin] says these are still in the testing and cost-optimization phase, but we would totally buy a few of them.

[Kevin] probably has a programming method for this module in mind already. But if you find yourself mystified by castellated pads, take a look at this pogo pin programmer built for ESP8266s. If your problem is pitch-related, maybe you can save the day with a breakout board.

Thanks to [Drew Fustini] for the tip!