Junkbox Build Keeps Tesla Coils Perfectly Varnished

Admittedly, not a lot of people have a regular need to varnish coils. It’s mainly something that Tesla coil builders and other high-voltage experimenters are concerned with. But since that group probably constitutes a not insignificant fraction of the Hackaday audience, and because there are probably more applications for this homebrew coil varnishing setup, we figured it would be a good idea to share it.

For [Mads Barnkob], coil maintenance isn’t something to take lightly. If you check out his Kaizer Power Electronics channel on YouTube, you’ll see that he has quite a collection of large, powerful Tesla coils, some of which are used for demos and shows, and others that seem to be reserved mainly for blowing stuff up. To prevent one of his coils from joining the latter group, keeping the coat of insulating varnish on the secondary coil windings in tip-top condition is essential.

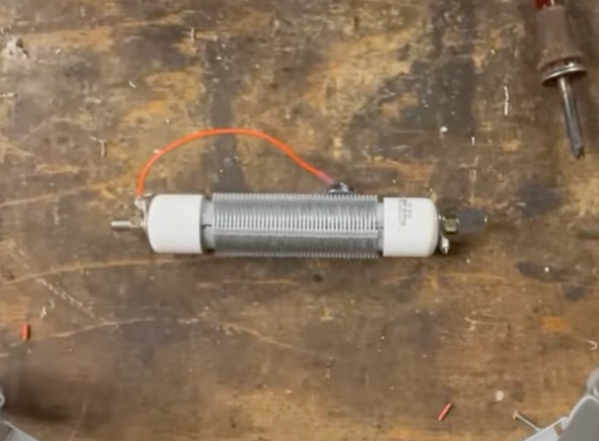
The setup seen in the video below helps with that tedious chore. Built entirely from scraps and junk bin parts, the low-speed, low-precision lathe can be set up to accommodate coils of all sizes. In use, the lathe turns the coil very slowly, allowing [Mads] to apply an even coat of varnish over the coil surface, and to keep it from sagging while it dries.

[Mads]’ setup is probably not great for coil winding as it is, but for coil maintenance, it’s just the thing. If your needs are more along the lines of a coil winder, we’ve got a fully automated winder that might work for you.

Continue reading “Junkbox Build Keeps Tesla Coils Perfectly Varnished”

Beautiful Inductors, Now Not Such A Lost Art

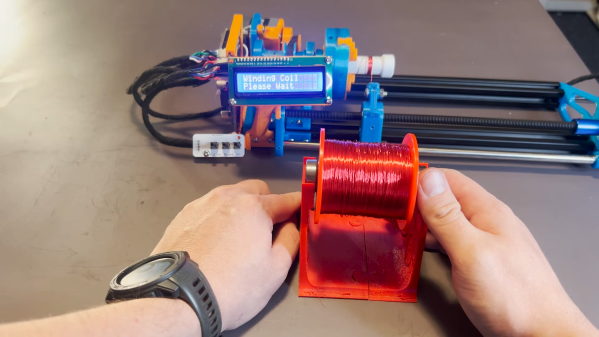
As ferrite technology has progressed into a mastery of magnetic permeability, the size of inductors has gone down to the point at which they are now fairly nondescript components. There was a time though when inductors could be beautiful creations of interleaving layers of copper wire in large air-cored inductors, achieved through clever winding techniques. It’s something that’s attracted the attention of [Brett], who’s produced a machine capable of producing something close to the originals.

Part of the write-up is an investigation of the history, these coils were once present even at the consumer level but are now the preserve of only a few highly secretive companies. They are still worth pursuing though because they can deliver the high “Q” factor that is demanded in a high quality tuned circuit. The rest of the write-up dives in detail into the design of the wire feeder, and the Arduino motor control of the project. There should be enough there for any other experimenters to try their hands at layered inductors, so perhaps we’ll see this lost art make a comeback.

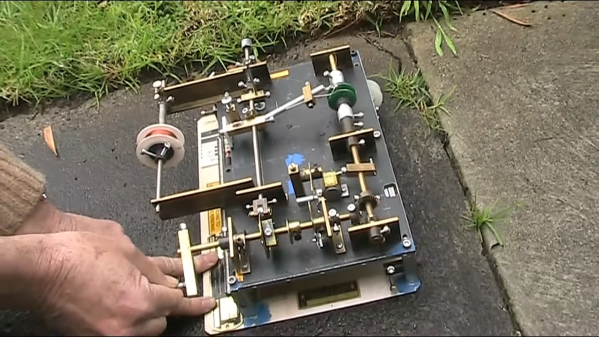
Custom coils are a regular requirement for anything from radios, to musical instruments, to switching power supplies, so it’s not surprising that quite a few projects featuring them have made it here. One of the more unusual of late has been one that winds toroids.

Metal Detector Gets Help From Smartphone

[mircemk] is quite a wizard when it comes to using coils of wires in projects, especially when their application is within easy-to-build metal detectors. There are all kinds of ways to send signals through coiled wire to detect metal objects in the ground, and today [mircemk] is demonstrating a new method he is experimenting with which uses a smartphone to detect the frequency changes generated by the metal detector.

Like other metal detectors, this one uses two coils of wire with an oscillator circuit and some transistors. The unique part of this build, though, is how the detector alerts the user to a piece of metal. Normally there would be an audible alert as the frequencies of the circuit change when in the presence of metal, but this one uses a smartphone to analyze the frequency information instead. The circuit is fed directly into the headphone jack on the smartphone and can be calibrated and used from within an Android app.

Not only can this build detect metal, but it can discriminate between different types of metal. [mircemk] notes that since this was just for experimentation, it needs to be calibrated often and isn’t as sensitive as others he’s built in the past. Of course this build also presumes that your phone still has a headphone jack, but we won’t dig up that can of worms for this feature. Instead, we’ll point out that [mircemk] has shown off other builds that don’t require any external hardware to uncover buried treasure.

Continue reading “Metal Detector Gets Help From Smartphone”

Induction Heater Uses New Coil

Induction cook tops are among the most efficient ways of cooking in the home that are commercially available to the average person. Since the cook surface uses magnetic fields to generate heat in the cookware itself, there is essentially no heat wasted. There are some other perks too, such as faster cooking times and more fine control, not to mention that it’s possible to build your own induction stove. All you need is some iron, wire, and a power source, and you can have something like this homemade induction cooker.

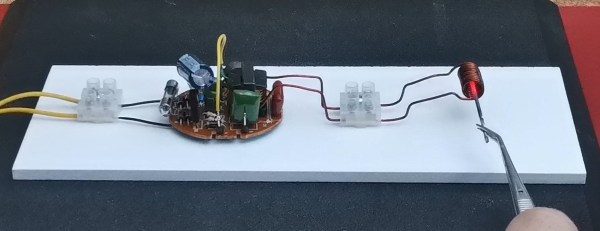
This induction heater has a trick up its sleeve, too. Instead of using an air coil to generate heat in the cookware, this one uses an iron core instead. The project’s creator [mircemk] built an air core induction stove in the past, and this new one is nearly identical with the exception of the addition of the iron core. This allows for the use of less wire, and uses a driver circuit called a Mazzilli ZVS driver running through some power MOSFETs to power the device. A couple inductors limit the current to 20A, but it appears to work just as well as the previous stove.

This build puts a homemade induction stove well within reach of anyone with an appropriate power supply and enough wire and inductors to build the coils. [mircemk] has made somewhat of a name for himself involving project that use various coils of wire, too, like this project we featured recently which uses two overlapping air-core coils to build an effective metal detector.

Continue reading “Induction Heater Uses New Coil”

DIY Metal Detector Gives You The Mettle To Find Some Medals

Hurricane season is rapidly approaching those of us who live in the northern hemisphere. While that does come with a good deal of stress for any homeowners who live in the potential paths of storms it also comes with some opportunities for treasure hunting. Storms tend to wash up all kinds of things from the sea, and if you are equipped with this DIY metal detector you could be unearthing all kinds of interesting tchotchkes from the depths this year.

The metal detector comes to us from [mircemk] who is known for building simple yet effective metal detectors. Unlike his previous builds, this one uses only a single integrated circuit, the TL804 operational amplifier. It also works on the principle of beat-balance which is an amalgamation of two unique methods of detecting metal.  When the wire coils detect a piece of metal in the ground, the information is fed to an earpiece through an audio jack which rounds out this straightforward build.

[mircemk] reports that this metal detector can detect small objects like coins up to 15 cm deep, and larger metal objects up to 50 cm. Of course, to build this you will also need the support components, wire, and time to tune the circuit. All things considered, though it’s a great entryway into the hobby.

Want to learn more about metal detecting? Check out this similar-looking build which works on the induction balance principle.

Continue reading “DIY Metal Detector Gives You The Mettle To Find Some Medals”

Winding Your Own Small Coils

Depending on what you build, you may or may not run into a lot of inductors. If you need small value coils, it is easy to make good-looking coils, and [JohnAudioTech] shows you how. Of course, doing the winding itself isn’t that hard, but you do need to know how to estimate the number of turns you need and how to validate the coil by measurement.

[John] uses a variety of techniques to estimate and measure his coils ranging from math to using an oscilloscope. He even uses an old-fashioned nomogram from a Radio Shack databook circa 1972.

Continue reading “Winding Your Own Small Coils”

Measuring current draw of home shop tools

Using Homebrew Coils To Measure Mains Current, And Taking The Circuit Breaker Challenge

Like many hackers, [Matthias Wandel] has a penchant for measuring the world around him, and quantifying the goings-on in his home is a bit of a hobby. And so when it came time to sense the current flowing in the wires of his house, he did what any of us would do: he built his own current sensing system.

What’s that you say? Any sane hacker would buy something like a Kill-a-Watt meter, or even perhaps use commercially available current transformers? Perhaps, but then one wouldn’t exactly be hacking, would one? [Matthias] opted to roll his own sensors for quite practical reasons: commercial meters don’t quite have the response time to catch the start-up spikes he was interested in seeing, and clamp-on current transformers require splitting the jacket on the nonmetallic cabling used in most residential wiring — doing so tends to run afoul of building codes. So his sensors were simply coils of wire shaped to fit the outside of the NM cable, with a bit of filtering to provide a cleaner signal in the high-noise environment of a lot of switch-mode power supplies.

Fed through an ADC board into a Raspberry Pi, [Matthias]’ sensor system did a surprisingly good job of catching the start-up surge of some tools around the shop. That led to the entertaining “Circuit Breaker Challenge” part of the video below, wherein we learn just what it really takes to pop the breaker on a 15-Amp branch circuit. Spoiler alert: it’s a lot.

Speaking of staying safe with mains current, we’ve covered a little bit about how circuit protection works before. If you need a deeper dive into circuit breakers, we’ve got that too.

Continue reading “Using Homebrew Coils To Measure Mains Current, And Taking The Circuit Breaker Challenge”