Custom built Playstation handheld

The Phantom PSP: Crafting The Handheld Sony Never Sold

In the world of retro gaming, some legends never die – especially the ‘phantom’ PSP, Sony’s mythical handheld that never saw the light of day. While that elusive device remains a dream, hacker and gaming wizard [Kyle Brinkerhoff] built his own – and Macho Nacho made a video about it. His creation, which also goes by the name ‘Playstation Zero’, isn’t just another handheld emulator; it’s a powerful, custom-built system that revives the classics and plays them on a portable device that feels like the future.

Driven by a hunger for the ultimate gaming experience, [Kyle] set out to blend modern tech with retro gaming magic. He started with the Raspberry Pi, loading it up with emulation software for all the iconic systems—from NES and SNES to the Sega Genesis and Game Boy. But [Kyle] didn’t just slap on an off-the-shelf emulator; he dived into the code himself, optimizing and tweaking for lightning-fast responsiveness, so each game plays like it’s running on the original hardware. That’s hacking in true form: pushing the limits of software and hardware until they work exactly the way you want them to. Best of all: he published it all open source for others to use.

In the spirit of the Geneboy—a handheld Sega Genesis built by [Downing] and featured on Hackaday back in 2012—[Kyle]’s device pairs handheld emulation with the consoles all nineties kids wanted for Christmas. To capture the tactile thrill of vintage gaming, [Kyle] went a step further by designing and 3D-printing a custom controller layout that mimics the feel of the original systems. If watching someone neatly soldering a pcb sounds relaxing to you, don’t skip the middle part of his video. Although this little beast is packed with all bells and whistles you’d expect to see on a Raspberry Pi, it does lack one serious thing: battery life. But, [Kyle] is open about that, and hopes to improve on that in a future version.

If you want to see the full build, check out the video below. Or, immediately dive into [Kyle]’s Github, order the cute Takara shell, and get started!

Continue reading “The Phantom PSP: Crafting The Handheld Sony Never Sold”

Supercon 2023: Building A Portable Vectrex, The Right Way

The Vectrex was a unique console from the early 1980s. Developed by a company you’ve probably never heard of—Smith Engineering—it was put into production by General Consumer Electronics, and later sold by Milton Bradley. It was an outright commercial failure, but it’s remembered for its sharp vector display and oddball form factor.

The Vectrex was intended for tabletop use in a home environment. However, [Jeroen Domburg], also known as [Sprite_tm], decided to set about building a portable version. This wasn’t easy, but that just makes the development process a more interesting story. Thankfully for us, [Sprite_tm] was kind enough to tell the tale at the 2023 Hackaday Supercon.

Continue reading “Supercon 2023: Building A Portable Vectrex, The Right Way”

Ryobi Battery Pack Gives Up Its Secrets Before Giving Up The Ghost

Remember when dead batteries were something you’d just toss in the trash? Those days are long gone, thankfully, and rechargeable battery packs have put powerful cordless tools in the palms of our hands. But when those battery packs go bad, replacing them becomes an expensive proposition. And that’s a great excuse to pop a pack open and see what’s happening inside.

The battery pack in question found its way to [Don]’s bench by blinking some error codes and refusing to charge. Popping it open, he found a surprisingly packed PCB on top of the lithium cells, presumably the battery management system judging by the part numbers on some of the chips. There are a lot of test points along with some tempting headers, including one that gave up some serial data when the battery’s test button was pressed. The data isn’t encrypted, but it is somewhat cryptic, and didn’t give [Don] much help. Moving on to the test points, [Don] was able to measure the voltage of each battery in the series string. He also identified test pads that disable individual cells, at least judging by the serial output, which could be diagnostically interesting.  [Don]’s reverse engineering work is now focused on the charge controller chip, which he’s looking at through its I2C port. He seems to have done quite a bit of work capturing output and trying to square it with the chip’s datasheet, but he’s having trouble decoding it.

This would be a great place for the Hackaday community to pitch in so he can perhaps get this battery unbricked. We have to admit feeling a wee bit responsible for this, since [Don] reports that it was our article on reverse engineering a cheap security camera that inspired him to dig into this, so we’d love to get him some help.

Building A Keychain Wii Looks Possible

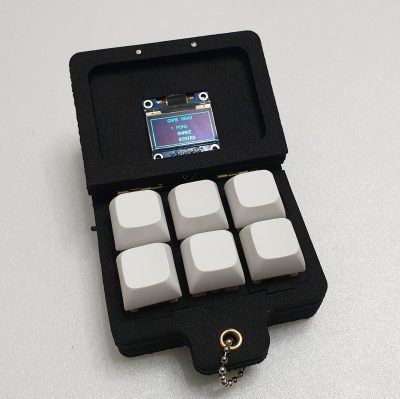
The original Nintendo Wii was not a big console, per se, but you could never hope to fit one in your pocket. Or…could you? As it turns out, console modders [Wesk] and [Yveltal] reckon they have found a way to make a functional Wii at the keychain scale!

The concept is called the Kawaii, and as you might expect, some sacrifices are necessary to get it down to pocketable size of 60 x 60 x 16 mm. It’s all based around the “Omega Trim,” an established technique in the modding community to cut a standard Wii motherboard down to size. Controllers are hooked up via a dock connection that also provides video out. There’s no Bluetooth, so Wiimote use is out of the question. You can still play some Wii games with GameCube Controllers by using GC2Wiimote, though. The Wii hardware is under-volted to allow for passive cooling, too, with an aluminum enclosure used to shed heat. Custom PCBs are used to handle power and breakouts, which will be open sourced in due time.

The forum post featured an expression of interest for those eager to order aluminium enclosures to pursue their own Kawaii build. Slots quickly filled up and the EOI was soon closed.

As of now, the Kawaii is still mostly conceptual, with images being very compelling renders. However, it relies on established Wii modding techniques, so there shouldn’t be any shocking surprises in the next stage of development. Expect to see finished Kawaii builds in gorgeous machined aluminum housings before long.

We’ve seen some other great Wii portables over the years. The console remains cheap on the used market and was built in great numbers. Thus, it remains the perfect platform for those eager to get their feet wet in the console modding community!

Continue reading “Building A Keychain Wii Looks Possible”

Console Calculator Moves One Step Closer To Original Design

With smartphone apps and spreadsheets being the main ways people crunch their numbers nowadays, there’s not much call for a desktop calculator. Or any other physical calculator, for that matter. Which is all the more reason to appreciate this  Wang 300-series calculator console’s revival through a new electronic backend.

If you haven’t made the acquaintance of the Wang calculator series, [Bob Alexander]’s previous Wang project is a perfect introduction. Despite looking very much like an overbuilt early-70s desktop calculator, what you see in the video below is just a terminal, one of four that could connect to a shared “Electronics Package” where most of the actual computational work was done. The package was big and is currently hard to come by, at least at a reasonable price, but the consoles, with their Nixie displays and sturdy keypads, are relatively abundant.

[Bob]’s previous venture into reviving his console involved embedding a PIC32-based controller, turning it into the standalone desktop calculator it never was. To keep more with the original design philosophy, [Bob]’s second stab at the problem moves much of the same circuitry from inside the console into a dedicated outboard package, albeit one much smaller than the original. The replacement package extends and enhances the console functionality a bit, adding a real-time clock and a Nixie exercise routine to ward off the dreaded cathode poisoning. [Bob] also recreates the original Wang logarithmic method of multiplication and division, which is a nice touch with its distinctive flashing display.

Seeing the Wang console hooked up to a package through that thick cable and Centronics connector is oddly satisfying. We’d love to see [Bob] take this to the logical extent and support multiple consoles, but that might be pushing things a bit.

Continue reading “Console Calculator Moves One Step Closer To Original Design”

Exploring The Sega Saturn’s Wacky Architecture

Sega Saturn mainboard with main components labelled. More RAM is found on the bottom, as well. (Credit: Rodrigo Copetti)

In the annals of game console history, the Sega Saturn is probably the most convoluted system of all time, even giving the Playstation 3 a run for its rings. Also known as the system on which Sega beached itself before its Dreamcast swansong, it featured an incredible four CPUs, two video processors, multiple levels and types of RAM, all pushed onto game studios with virtually no software tools or plan how to use the thing. An introduction to this console’s architecture is provided by [Rodrigo Copetti], which gives a good idea of the harrowing task of developing for this system.

Launched in Japan in 1994 and North America and Europe in 1995, it featured a double-speed CD-ROM drive, Hitachi’s zippy new SH-2 CPU (times two) and some 3D processing grunt that was intended to let it compete with Sony’s Playstation. The video and sound solutions were all proprietary to Sega, with the two video processors (VDP1 & 2) handling parts of the rendering process which complicated its use for 3D tasks, along with its use of quadrilaterals instead of triangles as with the Playstation and Nintendo 64.

Although a lot of performance could be extracted from the Saturn’s idiosyncratic architecture, its high price and ultimately the competition with the Sony Playstation and the 1996 release of the Nintendo 64 would spell the end for the Saturn. Although the Dreamcast did not repeat the Saturn’s mistakes, it seems one commercial failure was enough to ruin Sega’s chances as a hardware developer.

Fail Of The Week: [Mark] Makes An Atari Cartridge

Part of the magic of the movies is that the actors always know what will happen next. There never has to be a scene where James Bond orders wine, and the sommelier has to correct his pronunciation, or he miscounts his hand at baccarat. Real life is rarely as smooth. Of course, YouTube is more akin to a movie than real life, and we always wonder how many flawlessly executed projects you see on YouTube really went that well. [Mark Fixes Stuff] left no scenes on the cutting room floor, though, in his realistic portrayal of his quest to build a nice-looking Atairi 2600 cartridge. Watch it below.

Spoiler alert: In the end, it all worked out. But getting there was a series of misadventures. Starting out with [Parker Dillman’s] PCB, he put together the insides of the cartridge, including a socket for the EPROM. He then resin-printed a case. Like many of our own projects, the first run wasn’t quite the size he expected. It was probably close enough, though, but then he realized the socket made the board too tall to fit in the enclosure.

Continue reading “Fail Of The Week: [Mark] Makes An Atari Cartridge”