Hackaday Prize Entry: A Better Way Of Cheating

Believe it or not, some video games are still developed for the PC. With video games come cheat codes, and when they’re on the PC, that means using a keyboard. You can easily program any microcontroller to send a string of characters over a USB port with the touch of a button. Believe it or not, a lot of people haven’t put these two facts together. [danjovic] has, leading him to build a simple and cheap USB keystroke generator for quickly typing in cheat codes.

[danjovic] is basing his build around a Digispark, a cheap, USB-enabled ATtiny85 dev board. This, of course, means there’s not a lot of pins to play with – there are only four I/O pins, and one of them is connected to ground by a LED. That leaves only three I/O pins, but [danjovic] managed to put seven different cheats in his project using diodes and something that is almost charlieplexing.

If you’re wondering, this is a very inexpensive project. [danjovic] is using a Chinese digispark clone, a handful of 1N4148 diodes, and a few tact switches. Anyone with a well-stocked part drawer or a tenner on eBay could build this. If you want the proof of work for this project, you can check out the demo video below.

Continue reading “Hackaday Prize Entry: A Better Way Of Cheating”

Pump Up The Volume With Lead Shot And LEDs

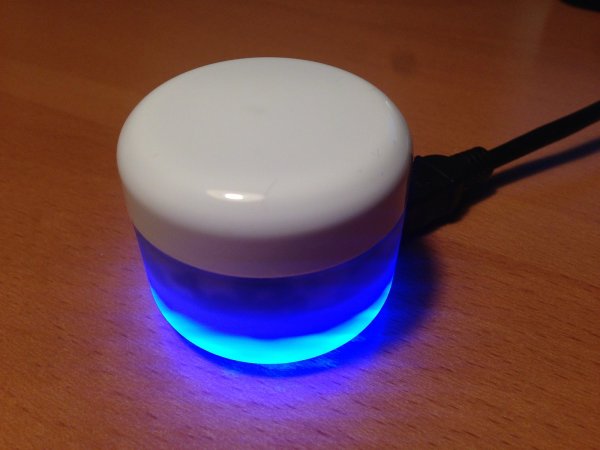
One of the redeeming qualities of many modern cheap keyboards is the built-in volume control buttons. But this is Hackaday, and many of us (and you) have Model Ms or newfangled mechanical keyboards that only have the essential keys. Those multimedia buttons only adjust the system volume anyway. We would bet that a lot of our readers have sweet sound systems as part of their rig but have to get up to change the volume. So, what’s the solution? Build a color-changing remote USB volume knob like [Markus] did.

Much like the Instructable that inspired him, [Markus] used a Digispark board and a rotary encoder. The color comes from a WS2812 LED ring that fits perfectly inside a milky plastic tub that once held some kind of cream. When the volume is adjusted, the ring flashes white at each increment and then slowly returns to whatever color it’s set to. Pushing the button mutes the volume.

The components are pretty lightweight, and [Markus] didn’t want the thing sliding all over the desk. He took an interesting approach here and filled the base with the lead from a shotgun round and some superglue. The rotating part of the button needed some weight too, so he added a couple of washers for a satisfying feel. Be sure to check out the demonstration after the break.

Digispark board not metal enough for you? Here’s a volume knob built around a bare ATtiny85 (which is the same thing anyway).

Continue reading “Pump Up The Volume With Lead Shot And LEDs”

USB Volume Control

If you buy expensive computer speakers, they often have a volume knob you can mount somewhere on your desk so you aren’t dependent on the onboard volume control. [Kris S] decided to build his own version of the remote volume control. Not surprisingly, it uses an Arduino-compatible Digispark board and a rotary controller. The Digispark (that [Kris S] bought for $2) is compatible with the Adafruit Trinket. This is key because the Trinket libraries are what make it easy to send media keys over the USB (using the HID interface) to control the volume.

Really, though, the best part of the build is the good looking knob made out of a pill bottle (see the video below). The micro Digispark is small enough to fit in the lid of the pill bottle, and some wax and pellets add some heft to the volume control. Continue reading “USB Volume Control”

relay

Controlling Mains Power Rube Goldberg Style

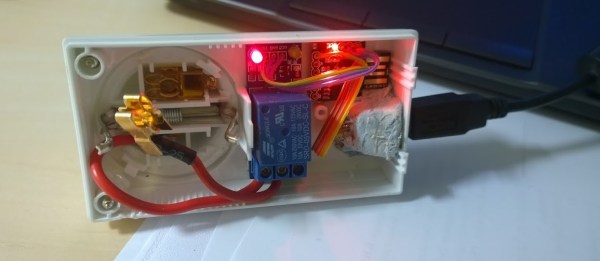
[g3gg0] has some nice radio equipment including an AOR AR-5000 receiver and a HiQ SDR. They are so nice that it appears they lack an on/off switch. [g3gg0] grew tired of unplugging the things, and decided to nerdify his desk with a switch that would turn his setup on and off for him. He decided to accomplish this task by emulating the Scroll, Number and Caps Lock LEDs on his keyboard via a Digispark board. He uses the LEDs to issue commands to the Digispark allowing him to control a 5V relay, which sits between it and the AC.

Starting off with some USB keyboard emulation code on the Digispark, he tweaked it so he could use the Scroll Lock LED as sort of a Chip Select. Once this is pressed, he can use the Caps Lock and the Number Lock LED to issue commands to the Digispark.

It’s programmed to only stay on for a total of 5 hours in case he forgets to turn it off. Let us know what you think about this interesting approach.

The Digistump Oak; An ESP8266 On Kickstarter

When it was first released, the ESP8266 was a marvel; a complete WiFi solution for any project that cost about $5. A few weeks later, and people were hard at work putting code on the tiny little microcontroller in the ESP8266 and it was clear that this module would be the future of WiFi-enabled Things for the Internet.

Now it’s a Kickstarter Project. It’s called the Digistump Oak, and it’s exactly what anyone following the ESP8266 development scene would expect: WiFi, a few GPIOs, and cheap – just $13 for a shipped, fully functional dev board.

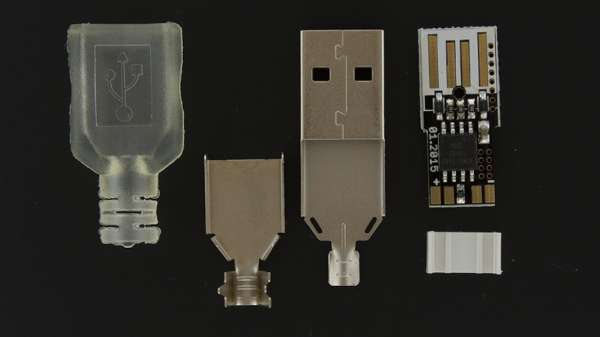
The guy behind the Oak, [Erik Kettenburg], has seen a lot of success with his crowdfunded dev boards. He created the Digispark, a tiny, USB-enabled development board that’s hardly larger than a USB plug itself. The Digispark Pro followed, getting even more extremely small AVR dev boards out in the wild.

The Digistump Oak moves away from the AVR platform and puts everything on an ESP8266. Actually, this isn’t exactly the ESP8266 you can buy from hundreds of unnamed Chinese retailers; while it still uses the ESP8266 chip, there’s a larger SPI Flash, and the Oak is FCC certified.

Yes, if you’re thinking about building a product with the ESP8266, you’ll want to watch [Erik]’s campaign closely. He’s doing the legwork to repackage the ESP into something the FCC can certify. Until someone else does it, it’s a license to print money.

The FCC-certified ESP8266 derived module, cleverly called the Acorn, will be available in large quantities, packaged in JEDEC trays sometime after the campaign is finished. It’s an interesting board, and we’re sure more than one teardown of the Acorn will hit YouTube when these things start shipping.

A Hacker-Friendly Blinky USB Stick

The availability of Smart RGB LED’s, either as individual units, as strips or even as panels, have made blinky light projects with all kinds of color control and transition effects easy to implement using even the simplest of controllers. Libraries that allow control of these smart LEDs (or Smart Pixels as they are sometimes called)  make software development relatively easy.

[overflo] at the Metalab hackerspace in Vienna, Austria recently completed development of usblinky – a hacker friendly blinky USB stick. It can control up to 150 WS2812B smart LED’s when powered via an external power supply, or up to 20 LED’s when powered via a computer USB port. The micro-controller is an ATTiny85 running the Micronucleus bootloader which implements software USB using vUSB. The hardware is based on the DigiSpark platform. The usblinky software sources are available on their Github repo. The section on pitfalls and lessons learned makes for interesting reading.

Metalab plans to run workshops around this little device to get kids into programming, as it is easy enough and gives quick visual feedback to get you started. To round off the whole project, [overflo] used OpenSCAD to design a customizable, 3D printable “parametric orb” which can house the LED strip and make a nice enclosure or psychedelic night light. Check out the mesmerizing video of the usblinky Orb after the break.

Thanks to [papst] for sending in this tip.

Continue reading “A Hacker-Friendly Blinky USB Stick”

Digispark Pro, The Bigger Smaller Dev Board

digi

There has recently been a huge influx of extremely small dev board based on the ATtiny85. This small 8-pin microcontroller is able to run most Arduino sketches,  and the small size and low price of these dev boards means they have been extremely popular. The Digispark was among the first of these small boards, and now the creator is releasing a newer, bigger version dubbed the Digispark Pro.

The new board isn’t based on the ‘tiny85, but rather the ATtiny167. This larger, 20-pin chip adds 10 more I/O pins, and a real hardware SPI interface, but the best features come with the Digispark Pro package. There’s real USB programming, device emulation, and serial over USB this time, and the ability to use the Arduino serial monitor, something not found in the original Digispark.

There are also a few more shields this time around, with WiFi and Bluetooth shields available as additional rewards. Without the shields, the Digi Pro is cheap, and only $2 more per board than the original Digispark.