Classic motorcycles are the wild west of information displays. Often lacking even basic instrumentation such as a fuel gauge and sometimes even a speedometer, motorcycles have come a long way in instrument cluster design from even 20 years ago. There’s still some room for improvement, though, and luckily a lot of modern bikes have an ECU module that can be tapped into for some extra information as [Sophie Wheeler] illustrates with her auxiliary motorcycle dashboard.
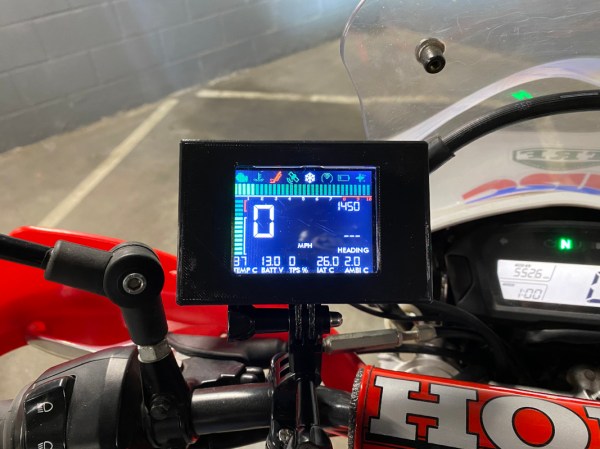
This display is built for a modern Honda enduro, and is based upon an ESP32 module. The ESP32 is tied directly into the ECU via a diagnostic socket, unlike other similar builds that interface with a CAN bus specifically. It can monitor all of the bike’s activity including engine temperature, throttle position, intake air temperature, and whether or not the bike is in neutral. [Sophie] also added an external GPS sensor so the new display can also show GPS speed and location information within the same unit.
[Sophie] credits a few others for making headway into the Honda ECU. [Gonzo] created a similar build using a Raspberry Pi and more rudimentary screen but was instrumental in gathering the information for this build. If you’re looking for a display of any kind for your antique motorcycle which is lacking an ECU, though, we would suggest a speedometer made with nixie tubes.