Sight And Sound Combine In This Engaging Synthesizer Sculpture

We’ll always have a soft spot for circuit sculpture projects; anything with components supported on nice tidy rows of brass wires always captures our imagination. But add to that a little bit of light and a lot of sound, and you get something like this hybrid synthesizer sculpture that really commands attention.

[Eirik Brandal] calls his creation “corwin point,” and describes it as “a generative dual voice analog synthesizer.” It’s built with a wide-open architecture that invites exploration and serves to pull the eyes — and ears — into the piece. The lowest level of the sculpture has all the “boring” digital stuff — an ESP32, the LED drivers, and the digital-to-analog converters. The next level up has the more visually interesting analog circuits, built mainly “dead-bug” style on a framework of brass wires. The user interface, mainly a series of pots and switches, lives on this level, as does a SeeedStudio WIO terminal, which is used to display a spectrum analyzer of the sounds generated.

Moving up a bit, there’s a seemingly incongruous vacuum tube overdrive along with a power amp and speaker in an acrylic enclosure. A vertical element of thick acrylic towers over all and houses the synth’s delay line, and the light pipes that snake through the sculpture pulse in time with sequencer events. The video below shows the synth in action — the music that it generates never really sounds the same twice, and sounds like nothing we’ve heard before, except perhaps briefly when we heard something like the background music from Logan’s Run.

Hats off to [Eirik] for another great-looking and great-sounding build; you may remember that his “cwymriad” caught our attention earlier this year.

Continue reading “Sight And Sound Combine In This Engaging Synthesizer Sculpture”

Custom Sony Camera Remote Built With ESP32

Whether you’re shooting video or photos, having a camera remote can really improve your productivity. No longer do you have to run back to the camera to press its tiny buttons! [Frank Zhao] is a Sony user, so decided to whip up a custom remote using the ESP32 for his Alpha camera, adding special features along the way.

The build communicates with the camera over WiFi, but can fall back to Infrared if there’s an issue with the radio link. It’s built around the M5StickC, which is a pre-built device featuring an ESP32 and a small display in a handheld form factor. It let him build the remote in half the size of the official Sony device. With limited buttons on board, though, he relies on the IMU to control many advanced features with motion gestures.

The remote enables a bunch of functionality that Sony didn’t bake into its cameras from the factory. There’s a sound-activated shutter release, dual shutter mode, and several timer-based tools including astrophotography modes. There’s also a big knob you can add for focus pulls, and a mode to reset the auto-focus when you’re frustrated that it isn’t working properly. Some of the features work better than others, as sometimes, the camera doesn’t respond to commands quickly enough. Regardless, it’s pretty neat that [Frank] has unlocked so much extra functionality with his custom $20 remote.

We’ve seen other homebrewed tools open up new creative possibilities for cameras before, too. If you’ve got your own nifty camera hacks, let us know on the tipsline!

Forearm Muscle Contraction Sensor Is Useful Component For Open Source Prosthetics

Being able to actuate parts of a prosthetic limb can make it much more useful. To help in this goal for partial arm or hand amputees, [TURFPTAx] has developed a sensor for detecting forearm muscle contractions. 

The sensor itself is cost-effective and simple to build.

The build is part of the Open Prosthetics project, which aims to offer open designs for various types of prosthetic devices. It apes common commercial designs using a simple electromechanical system.

The build relies on magnets mounted on twelve pistons that move when the muscles contract under the skin. The pistons are sprung to allow them to follow the expansion and contractions of the muscles, and the motion of the magnets is detected by hall effect sensors. The system is bulkier than some other solutions, but has the benefit of clean output and the ability to detect the movement of several distinct muscle groups. The data is all collected by an ESP32 which is then sent wirelessly to a computer for measurement, with [TURFPTAx] using the PyGame library to plot the sensor data.

[TURFPTAx] notes that the output of the sensors would be perfect to input into a machine learning system. Video after the break.

Continue reading “Forearm Muscle Contraction Sensor Is Useful Component For Open Source Prosthetics”

A digital caliper connected to a tablet computer

Custom Interface Adds USB And Wi-Fi To Digital Calipers

Although old-school machinists typically prefer the mechanical vernier scale on their trusty calipers, many users nowadays buy calipers with a digital readout. These models often come with additional features like differential measurements, or a “hold” function for those situations where you have to maneuver the instrument somewhere deep inside a machine. Another useful feature is a data link that lets you log your measurements on a computer directly instead of manually entering all the values.

The VINCA-branded caliper that [Liba2k] bought has such a data link feature, which requires a USB adapter that’s sold separately. There is a micro-USB connector on the tool itself, but instead of implementing a USB interface, this is used to carry a proprietary serial protocol — a design decision that ought to be classified as a felony if you ask us. Rather than buying the official USB adapter, [Liba2k] decoded the protocol and built his own interface called VINCA Reader that can connect through either USB or Wi-Fi.

The serial format turned out to be a simple serial bus that clocks out 24 bits at a time. In order to adapt its 1.2 V signal level to the 3.3 V used by an ESP32, [Liba2k] designed a simple level shifter circuit using a handful of discrete components. The ESP can communicate with the computer through its Wi-Fi interface, for which [Liba2k] wrote a spreadsheet-like application; alternatively, an ordinary USB cable can be connected to emulate a keyboard for use with any other software.

With its added Wi-Fi feature, the VINCA Reader is actually more complete than the official USB adapter, and will probably be cheaper as well. The serial interface appears to be common to all caliper manufacturers, although many went for a more sensible connector than micro-USB. An automated readout system is particularly handy if you have to make thousands of similar measurements.

A cyclotron clock display, mounted on a wooden base. There are two stepper motors exposed on either side. There is a panel installed in the wooden base with a red button on the left, two knobs and four smaller buttons in a two by two grid on the right.

A Flipping, Perpetually-Rotating Clock

Clocks are a mainstay of hackers and makers, as they provide a way to explore creative designs while still maintaining a functional aspect to the project. [Brett Oliver] follows this tradition in making a cyclotron clock that uses a perpetual rotating digit concept from a 1900s desk flip calendar.

An exploded view of one of the flip calendar digit display, showing how the tiles fit into the chamber.

Each digit of the clock has a rotating chamber that’s big enough to fit a group of tiles inside that have digits printed on either face. The tiles are sized and stacked in such a way that the rotation of the chamber allows the next tile to slide in front of the old one. Specific digits are revealed by rotating the chamber a number of times.

Each of the four digits positions has a 28BYJ-48 stepper motor to rotate the chamber, with each motor being driven by a ULN2003 driver module. The main microcontroller is a ESP32 WROOM, and an I2C compatible DS3231 real time clock (RTC) module keeps time. All of the motors are driven off of an LM2596 module that provides 7 V, while the ESP32 and RTC are powered from a USB connector.

The different modes and the ability to set time is done through a panel that has various buttons and knobs. The whole clock is mounted on a custom wooden base that has cutouts for the panels and cabling. [Brett Oliver] has done a great job of documentation, going into detail about the mechanics and electronics of the build. Design files, including STLs of the various components, are also available for download. Be sure to check out the video after the break.

We’ve featured a flip calendar with a similar operating principle before which clearly shows the inner workings of the mechanism.

Continue reading “A Flipping, Perpetually-Rotating Clock”

Tiny Thin Client Is Small But Compatible

We were impressed with [moononournation’s] tiny thin client project. It claims to use an Arduino, but as you might guess it is using the Arduino software along with a network-enabled microcontroller like an ESP32. The impressive part is that it is standards-compliant and implements VNC’s RFB protocol.

The original coding for RFB on Arduino is from [Links2004] and armed with that, the thin client is probably easier to create than you would guess. However, this project wanted to use a larger screen and found that it led to certain problems. In particular, the original code had a 320×240 display. This project was to use an 800×480 display, but with the limits on the ESP32, the frame rate possible would be under 7 frames per second. The answer was to combine a 16-bit parallel interface with better compression back to the VNC server.

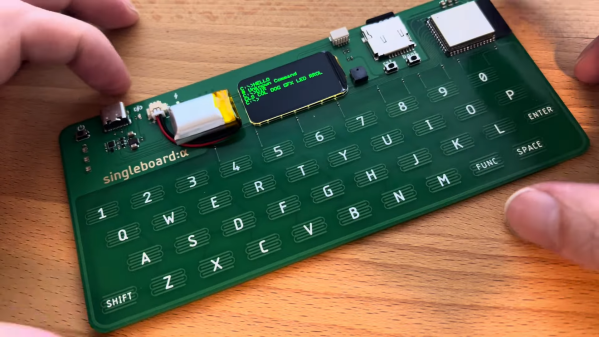
The little keyboard is probably not very practical, but it is compact. That would be another easy thing to modify. Currently, the keyboard uses I2C, but it would be straightforward to change things up. This would be a worthy base to build a bigger project on top. A 3D printed enclosure would be nice, too.

We’ve seen a number of projects built around commercial thin clients. Some from defunct businesses are good sources for obscure parts, too.

Continue reading “Tiny Thin Client Is Small But Compatible”

This ESP32 CAN!

Since modern cars use the CAN bus for so many of their functions, it’s unsurprising that it’s a frequent object of interest for those in our community. Some people go no further than commercial plug-in analysers, while others build their own CAN devices. This is what [Magnus Thomé] has done, with his RejsaCAN microcontroller board.

It’s a small PCB with an onboard CAN interface from an ESP32-S3 and a car-friendly power supply circuit, and perhaps most importantly, it has an auto-shutdown feature to prevent battery drain. Software-wise it’s a blank piece of paper for the user to roll their own application, but since the ESP32 is supported by the Arduino ecosystem, there are libraries that make talking CAN as easy as it can be.

[Magnus] has a list of potential applications for the board, many of which take advantage of the ESP’s wireless capabilities. So far, [Magnus] has hooked it up to an LCD display, but we can see so many other useful things coming out powered by something like this.

You haven’t tried playing with your car’s CAN bus yet? Maybe you should read this to whet your appetite.