If you’re looking to get started with the ESP8266, there’s no shortage of development boards out there to select from. But we don’t think you’ll find one with a more unique a backstory than the open source ME-ESP8266. That’s because Malouf, the company that makes the $20 USD board, is a home goods company better known for their pillows and bed frames.
So how do you go from mattress toppers to microcontrollers? Well, as unlikely as it might seem, the missing element is Toys R’ Us. Or more specifically, the liquidation of Toys R’ Us. A Texas distribution center Malouf purchased from the iconic toy retailer included an automated conveyor belt system to move product through the gargantuan building, but unfortunately, they couldn’t get it to work with their existing system. The company decided to use their in-house team of engineers to solve the problem, and the ME-ESP8266 was born.
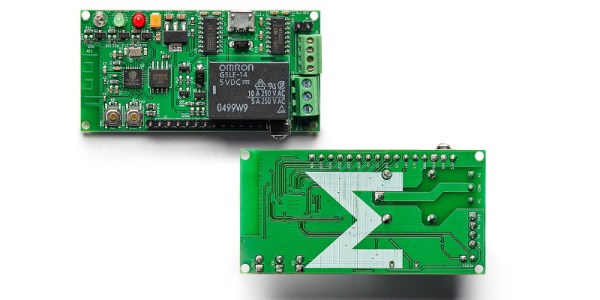
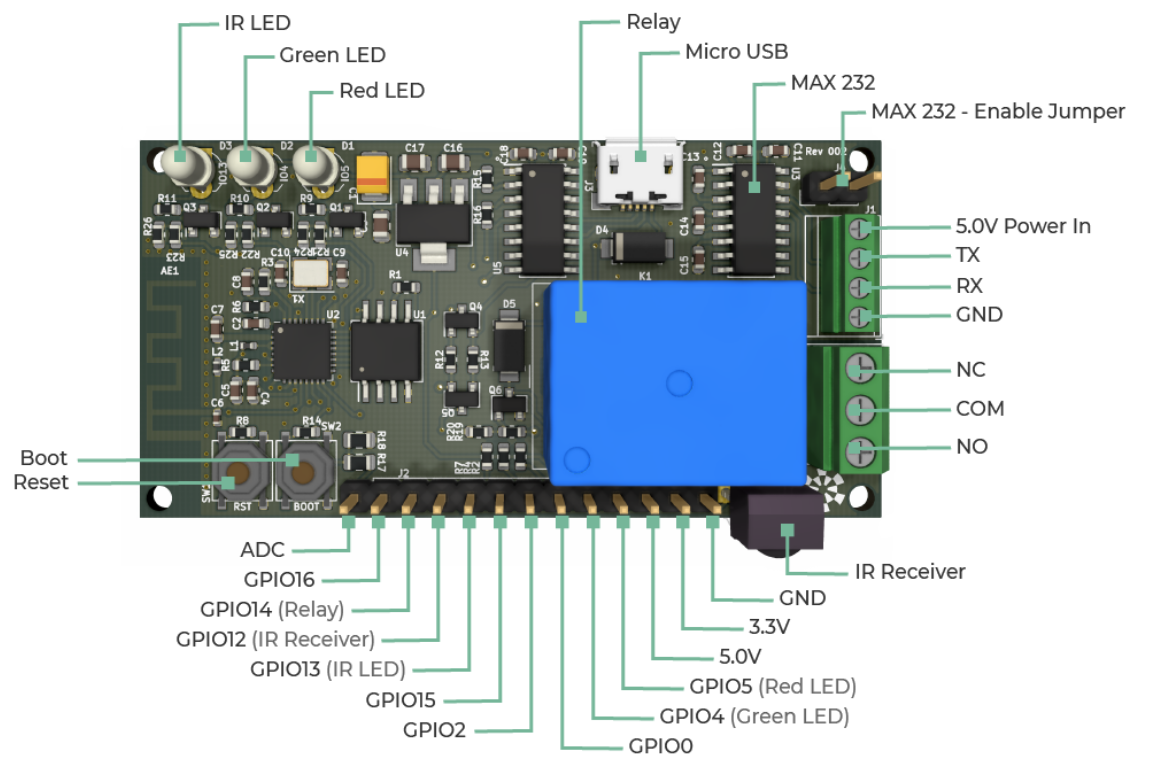
It turns out that an ESP8266 board developed to move bedding around an old Toys R’ Us warehouse has a lot of useful features for hackers and makers. It’s got an integrated relay, 16 MB of flash storage, an IR receiver, beefy screw terminals, and a 2.54mm-pitch GPIO pin header. There’s even a MAX232 on the board so it can talk to RS-232 devices. The hardware is compatible with the standard Arduino IDE as a “Generic ESP8266 Module”, so you’ll have no problem using existing libraries and example code.
Now under normal circumstances, the public would never know about this sort of behind the scenes engineering. But instead of keeping their new ESP board to themselves, the team at Malouf got the go ahead from the company’s Chief Technology Officer (CTO) to release it as an open source project. Even more impressive, they got the company to put the board into production so it could be sold to the public. So today we not only learned that bedding companies have CTOs, but that they can be exceptionally open-minded.
Our hats off to the engineers at Malouf and the forward thinking brass that green lit production of the ME-ESP8266. It’s not the first interesting development to come from the liquidation of Geoffrey’s kingdom, but it just might be the most useful.