Simple Clock From Tiny Chip

If you haven’t jumped on the ESP8266 bandwagon yet, it might be a good time to get started. If you can program an Arduino you have pretty much all of the skills you’ll need to get an ESP8266 up and running. And, if you need a good idea for a project to build with one of these WiFi miracle chips, look no further than [Ben Buxton]’s dated, but awesome, NTP clock.

Continue reading “Simple Clock From Tiny Chip”

Overhauling The ESP8266’s Flash Memory Handling

If you’ve ever corrupted a flash memory on a power failure, you’ll be glad to hear that the ESP8266 SDK implements a very secure and almost infallible read/write management for its flash memory. The catch: It’s also very wasteful. For a single memory block of stored data, three memory blocks of physical flash memory are occupied. [Peter Scargill] enlightens us with a better solution.

Continue reading “Overhauling The ESP8266’s Flash Memory Handling”

Reverse Engineering And Networking The A/C Remote Control

IoT has become such an polarizing, overused term. But here it is in its essence: [zeroflow] had a thing (his airconditioner) and he needed to put it on the Internet.

For his contribution to this modern vernacular atrocity, he first had to build an IR debugging tool and reverse engineer the signals coming from the air conditioner’s remote. He wrote up a really good summary of the process, and worth reading. He loads up an IR library onto an Arduino and dumps the resulting 32 bits of information to his computer. In a process much like filling in the blanks on a word puzzle, he eventually determines which blocks of the data correspond to the remote’s different buttons.

Next he throws an array of IR LEDS and an ESP8266 onto a bit of protoboard. After writing some code, available on GitHub, he could set the temperature of his room from anywhere on the planet. We take it on faith that [zeroflow] has a compelling reason for doing so.

Bolstered by this success, he didn’t stop there. [Zeroflow] admits to having more than one thing on the Internet. Boom! Internet of things.

Run A RepRap On An ESP8266

What can’t the little $5 WiFi module do? Now that [lhartmann] has got an ESP8266 controlling the motors of a 3D printer, that’s one more item to check off the list.

What’s coolest about this project is the way that [lhartmann] does it. The tiny ESP8266 has nowhere near the required number of GPIO pins, the primary SPI is connected to the onboard flash memory, and the secondary SPI is poorly documented and almost nobody uses it. So, [lhartmann] chose to use the I2S outputs.

I2S is most often an audio protocol, so this might at first seem like a strange choice. Although I2S sounds like I2C, it’s really essentially an SPI protocol with a fourth wire that alternates to designate the right or left channel. It’s actually just perfect for sending 16×2 bits of data at high data rates.

[lhartmann] takes these 32 bits and feeds them into four shift registers, producing 32 outputs from just the four I2S data lines. That’s more than enough signals to run the stepper motors. And since it updates at 192 kHz sample rate, it’s plenty fast enough to drive them.

The other side benefit of this technique is that it can work on single-board computers with just a little bit of software. Programming very complicated stepper movements then becomes just a matter of generating the right “audio” file and playing it out. [lhartmann] demonstrated this earlier with an Orange Pi. That’s pretty cool, too.

The code for turning the ESP8266 and a short handful of 74HC595s into a 3D printer controller are up on GitHub, so go check it out.

Thanks [CNLohr] for the tip!

Software USB On The ESP8266

A while back, [cnlohr] needed a USB keyboard and mouse. His box ‘o junk didn’t hold this particular treasure, and instead of hopping on Amazon like a normal geek or venturing into the outside realm on a mid-level ‘store’ quest like a normal person, [cnlohr] decided to turn an ESP8266 into a USB keyboard and mouse. How hard could it be? The ESP doesn’t support USB, but bitbanging hasn’t stopped him before. The end result is a USB stack running on the ESP8266 WiFI module.

[cnlohr] has been working for about a month on this USB implementation for the ESP, beginning with a logic analyzer, Wireshark, Xtensa assembly, and a lot of iteration. The end result of this hardware hacking is a board based on the ESP8285 – an 8286 with integrated Flash – that fits snugly inside a USB socket.

This tiny board emulates low-speed USB (1.5 Mbps), and isn’t really fast enough for storage, serial, or any of the fancier things USB does, but it is good enough for a keyboard and mouse. Right now, [cnlohr]’s ESP USB device is hosting a webpage, and by loading this webpage on his phone, he has a virtual keyboard and mouse on a handheld touchscreen.

If you’re keeping track, [cnlohr] has now brought Ethernet and USB to a tiny microcontroller that can be bought for a few bucks through the usual online outlets. If you’d like to build your own ESP USB stick, all the files are over on the Gits.

Thanks [lageos] for the tip.

Continue reading “Software USB On The ESP8266”

Hackaday Links: August 28, 2016

E-paper looks awesome, but it’s a pain to work with. You need only look at the homebrew implementations of e-paper drivers and the mess of SMD components for proof of that. [jarek] wanted to play around with e-paper and developed this tiny little driver for a Teensy. It’s a fun toy, and the simplest possible circuit necessary to drive this particular e-paper module.

I am once again asking if anyone knows where to buy this computer case. No, not a complete system – I just want the case, folding keyboard, and monitor integrated into an mATX enclosure.

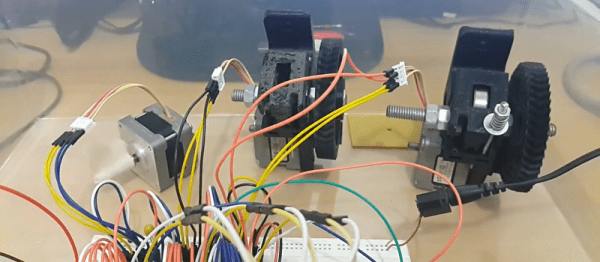
Back in 1985, a young [Matthias Wandel] built a remote control forklift out of a few windshield wiper motors, wood, and not much else. He’s rebuilt this toy recently, just to prove you can build anything with a stack of plywood and a wood gear template generator.

More Adafruit muppets they probably can’t call muppets. Yaaay. This time it’s J is for Joule. Watts that? A second.

The Raspberry Pi Project, one of our favorite projects in the Hackaday Prize that uses a Raspberry Pi, one of the most liked, viewed, and followed projects on Hackaday.io, and a technological tour de force the likes of which have not been seen since the invention of the steam engine got an update this week. [Arsenijs] and the rest of the Raspberry Pi Project team have released a version of their Raspberry Pi pinout helper. Previously, this tool was only used internally to the project, but since this pinout helper has such far-reaching utility they’ve decided to release a public version. Truly, they are kings among men.

This is possibly the coolest use of stacked plywood I’ve ever seen. It’s a spiral staircase, with each step made of 12 layers of plywood. The ‘spine’ of this staircase is a 3″ sch 40 steel pipe, with a proper foundation. The layer of ply are adhered to the pipe with construction adhesive, and each layer of ply is glued together with wood glue. No, it’s not up to code yet, but it was cheaper to build than just buying a spiral staircase.

[Brek] wrote a graphics library for the ubiquitous 128×64 monochromatic LCDs. It’s written for PICs, but damned if we can’t find a link to the library itself. Hopefully [Brek] will jump in the comments below.

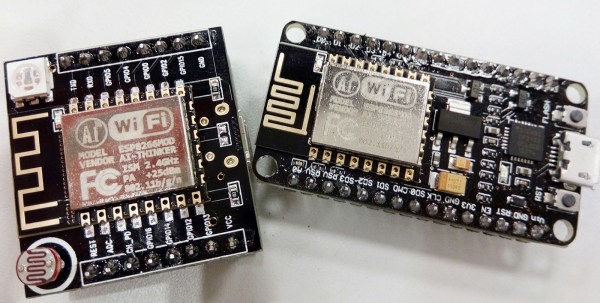
Those really, really cheap ESP8266 modules only have 512kB of Flash in them. Here’s how you upgrade those modules to 4MB. You can do it without a hot air gun, and all you need is a few cheap Flash chips.

Here’s a sound card for a Raspberry Pi. No, that’s not a completely dumb idea. This sound card uses quality op-amps, 24-bit ADCs and DACs, and has MIDI. If you’re experimenting with Pure Data or any other Linux audio toy, this could be a useful addition to your Pi stack.

Dirt Cheap VR Gun With Tracking For $15 Of Added Hardware

Virtual reality doesn’t feel very real if your head is the only thing receiving the virtual treatment. For truly immersive experiences you must be able to use your body, and even interact with virtual props, in an intuitive way. For instance, in a first-person shooter you want to be able to hold the gun and use it just as you would in real reality. That’s exactly what [matthewhallberg] managed to do for just a few bucks.

This project is an attempt to develop a VR shooting demo and the associated hardware on a budget, complete with tracking so that the gun can be aimed independent of the user’s view. [matthewhallberg] calls it The Oculus Cardboard Project, named for the combined approach of using a Google Cardboard headset for the VR part, and camera-based object tracking for the gun portion. The game was made in Unity 3D with the Vuforia augmented reality plugin. Not counting a smartphone and Google Cardboard headset, the added parts clocked in at only about $15.

ESP8266 on FiducialUsing corrugated cardboard and a printout, [matthewhallberg] created a handheld paddle-like device with buttons that acts as both controller and large fiducial marker for the smartphone camera. Inside the handle is a battery and an ESP8266 microcontroller. The buttons on the paddle allow for “walk forward” as well as “shoot” triggers. The paddle represents the gun, and when you move it around, the smartphone’s camera tracks the orientation so it’s possible to move and point the gun independent of your point of view. You can see it in action in the video below.

Tracking a handheld paddle with a fiducial marker isn’t a brand new idea; We were able to find this project for example which also very cleverly simulates a trigger input by making a trigger physically alter the paddle shape when you squeeze it. The fiducial is altered by the squeeze, and the camera sees the change and registers it as an input. However, [matthewhallberg]’s approach of using hardware buttons does allow for a wider variety of reliable inputs (move and shoot instead of just move, for example). If you’re interesting in trying it out, the project page has all the required details and source code.

This isn’t [matthewhallberg]’s first attempt and getting the most out of an economical Google Cardboard setup. He used some of the ideas and parts from his earlier DIY Virtual Reality Snowboard project.

Continue reading “Dirt Cheap VR Gun With Tracking For $15 Of Added Hardware”