Coandă Effect Makes A Better Hovercraft Than A Quadcopter

Leaving no stone unturned in his quest for alternative and improbable ways to generate lift, [Tom Stanton] has come up with some interesting aircraft over the years. But this time he isn’t exactly flying, with this unusual Coandă effect hovercraft.

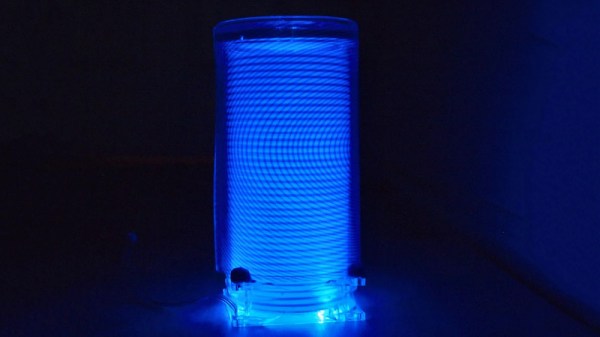
If you’re not familiar with the Coandă effect, neither were we until [Tom] tried to harness it for a quadcopter. The idea is that air moving at high speed across a curved surface will tend to follow it, meaning that lift can be generated. [Tom]’s original Coandă-copter was a bit of a bust – yes, there was lift, but it wasn’t much and wasn’t easy to control. He did notice that there was a strong ground effect, though, and that led him to design the hovercraft. Traditional hovercraft use fans to pressurize a plenum under the craft, lifting it on a low-friction cushion of air. The Coandă hovercraft uses the airflow over the curved hull to generate lift, which it does surprisingly well. The hovercraft proved to be pretty peppy once [Tom] got the hang of controlling it, although it seemed prone to lifting off as it maneuvered over bumps in his backyard. We wonder if a control algorithm could be devised to reduce the throttle if an accelerometer detects lift-off; that might make keeping the craft on the ground a bit easier.

As always, we appreciate [Tom]’s builds as well as his high-quality presentation. But if oddball quadcopters or hovercraft aren’t quite your thing, you can always put the Coandă effect to use levitating screwdrivers and the like.

Continue reading “Coandă Effect Makes A Better Hovercraft Than A Quadcopter”

Particle Mesh Powers The Internet Of Fans

With the winter months not far off, [Ben Brooks] was looking for a way to help circulate the heat from his wood-burning fireplace throughout his home. Rather than go with a commercial solution, he decided to come up with his own automated air circulation system powered by the mesh networking capabilities of one of his favorite pieces of tech, the Particle Photon.

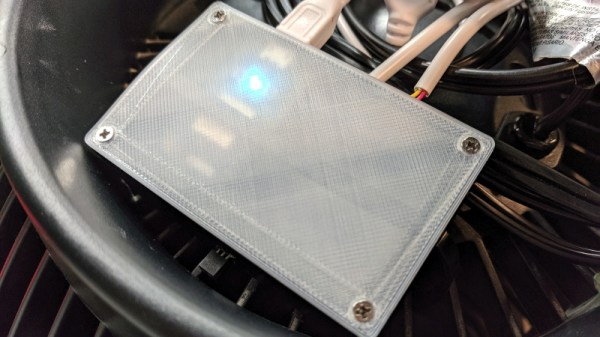
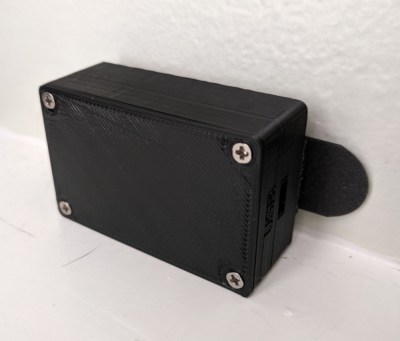
Particle Xeon remote sensor

The idea here is pretty simple: use a remote temperature sensor to tell a fan located behind the fireplace when it’s time to kick on and start sharing some of that warmth with the rest of the house. But as usual, it ended up being a bit trickier than anticipated. For one, when [Ben] took a close look at the Vornado 660 fan he planned on using, he realized that its speed controller was “smart” enough that simply putting a relay on the AC line wouldn’t allow him to turn it on and off.

So he had to do some reverse engineering to figure out how the Sonix SN8P2501B microcontroller on the board was controlling the fan, and then wire the Photon directly to the pins on the chip that corresponded with the various physical controls. This allows the Photon to not only “push” the buttons to trigger the different speeds, but also read the controls to see if a human is trying to override the current setting.

For the remote side [Ben] is using a Particle Xenon, which is specifically designed for Internet of Things endpoints and sensor applications. Combined with a TMP36 temperature sensor and 3.7 V 500 mAh battery, this allowed him to easily put together a wireless remote thermometer that will publish the current temperature to the Photon’s mesh network at regular intervals.

This isn’t the first time we’ve seen the Particle Photon used to augment an unassuming piece of hardware. We’ve previously seen one get grafted into a coffee maker, and if you can believe it, somebody even stuck one inside an umbrella to create a mobile weather station.

Put A Smoke Detector To Some Use

While we’re certainly not denying that smoke detectors are useful, there’s a certain kind of tragedy to the fact that most of them will never realize their true purpose of detecting smoke, and alerting us to a dangerous fire. On the other hand, [Ben] really unlocks the potential hidden deep in every smoke detector with his latest project which uses the smoke-detecting parts of a smoke detector to turn on the exhaust fan over his stove.

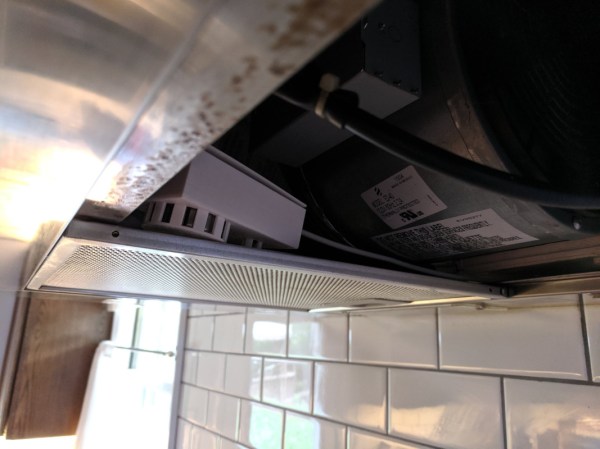
The project didn’t start with the noble aim of realizing the hidden and underutilized quiescent nature of a smoke alarm, though. He wanted his range exhaust fan to turn on automatically when it was needed during his (and his family’s) cooking activities. The particular range has four speeds so he wired up four relays to each of the switches in the range and programmed a Particle Photon to turn them on based on readings from an MQ-2 gas-detecting sensor.

The sensor didn’t work as well as he had hoped. It was overly sensitive to some gasses like LPG which would turn the range on full blast any time he used his cooking spray. Meanwhile, it would drift and not work properly during normal cooking. He tried disabling it and using only a temperature sensor, which didn’t work well either. Finally, he got the idea to tear apart a smoke detector and use its sensor’s analog output to inform the microcontroller of the current need for an exhaust fan. Now that that’s done, [Ben] might want to add some additional safety features to his stovetop too.

Fan-Based Parts Tumbler Is A Breeze To Build

A parts tumbler is a great tool to have around. But if you don’t use it all the time, it’s hard to justify dropping hundreds of dollars on one. Fortunately, there are many ways to make your own tumbler while tailoring it to meet the need. Because really, as long as you get the medium moving enough to abrade the parts, you’re good.

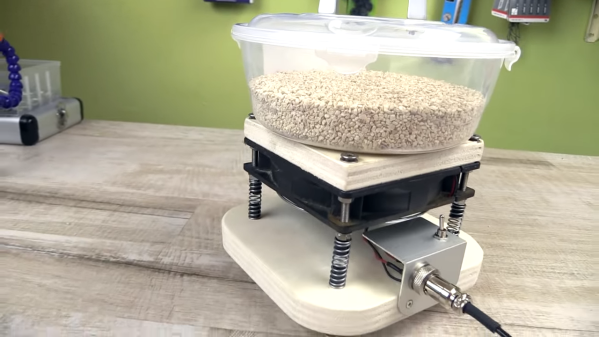
[Daniele]’s parts tumbler is cool because it’s fairly easy to make, it’s really quiet, and it does the job quickly. This tumbler moves the medium by using an imbalanced plastic fan, which [Daniele] created by drilling a hole through one of the blades and fastening a short bolt and nut through it. If you’ve ever tried to stop a washing machine from walking away, you may be thinking this is a strange idea, because now he’s got a 4500 RPM vibration machine scuttling about the shop. So really, the true genius of this build lies in the great pains [Daniele] took to absorb all that vibration.

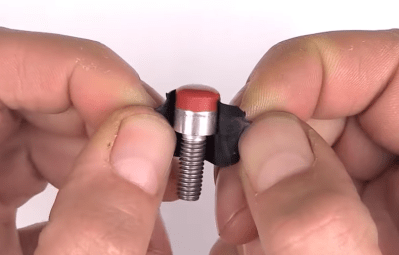
He’s got the fan float-mounted on rubber-lined springs and rubber mats under the washers involved in connecting the latching plastic box to the fan. Our favorite anti-vibration features are the twist-lock power connector and the custom silicone feet made from Motorsil D and cap bolts. We don’t know what the medium is here, but it’s got us thinking Grape-Nuts might work. Blow past the break to chew on the build video.

The only problem with this build is that this type of fan isn’t cheap, and using it this way will definitely shorten its life.

Not a fan of this type of tumbling? Here’s one that takes your drill for a spin.

Continue reading “Fan-Based Parts Tumbler Is A Breeze To Build”

Faux Aircon Units, Made Entirely From 2D Cuts

2D design and part fabrication doesn’t limit one to a 2D finished product, and that’s well-demonstrated in these Faux Aircon Units [Martin Raynsford] created to help flesh out the cyberpunk-themed Null Sector at the recent 2018 Electromagnetic Field hacker camp in the UK. Null Sector is composed primarily of shipping containers and creative lighting and props, and these fake air conditioner units helped add to the utilitarian ambiance while also having the pleasant side effect of covering up the occasional shipping container logo. Adding to the effect was that the fan blades can spin freely in stray air currents; that plus a convincing rust effect made them a success.

Fan hubs, showing spots for fan blades to be glued. With the exception of embedded bearings, the entire hub (like the rest of the unit) is made from laser-cut MDF.

The units are made almost entirely from laser-cut MDF. The fan blades are cut from the waste pieces left over from the tri-pronged holes, and really showing off the “making 3D assemblies out of 2D materials” aspect are the fan hubs which are (with the exception of bearings) made from laser-cut pieces; a close-up of the hubs is shown here.

Capping off the project is some paint and the rusted appearance. How did [Martin] get such a convincing rust effect? By using real rust, as it turns out. Some cyanoacrylate glue force-cured with misted water for texture, followed by iron powder, then vinegar and hydrogen peroxide with a dash of salt provided the convincing effect. He was kind enough to document the fake rust process on his blog, complete with photos of each stage.

Null Sector showcased a range of creativity; it’s where this unusual headdress was spotted, a device that also showed off the benefits of careful assembly and design.

Temperature Controlled Fan Keeps Printer Cool

There are many annoying issues associated with desktop 3D printers, but perhaps none are trickier than keeping the machine at the proper temperature. Too cold, and printed parts can warp or fail to adhere to the bed. Too hot, and the filament can get soft and jam, or the motors will start clanking and missing steps. High-end industrial 3D printers have temperature-controlled enclosures for precisely this reason, but the best you can hope for with a printer that’s little more than some aluminum extrusion and an Arduino is a heated bed that helps but is no substitute for the real thing.

Like many 3D printer owners chasing perfect prints, [Steve Thone] ended up putting his machine into a DIY enclosure to help keep it warm. Unfortunately, there gets to be a point when things get a little too hot inside the insulating cube. To address this issue, he put together a simple but very elegant temperature controlled fan to vent the enclosure when the internal conditions go above the optimal temperature.

[Steve] picked up the digital temperature controller on Amazon for about $4 USD, and found a 60 mm fan in the parts bin. He then came up with a clever two-part printed enclosure that slides together to make the fan and controller one unit which he can place in a hole he cut in the enclosure.

A lot of attention was paid to the front panel of the device, including mid-print filament swaps to create highlighted text and separate buttons printed in different colors. The end result is a very professional looking interface that involved relatively little manual labor; often a problem when trying to come up with nice looking panels.

Whether it’s to keep from breathing ABS fumes, or to quiet the thing down enough so you can get some sleep, it looks like an enclosure of some type is becoming the latest must-have 3D printer accessory.

Junk Bin Spin Coater Uses Modded Case Fan

We’ve all been there: you need a specific tool or gadget to complete a project, but it’s not the kind of thing you necessarily want to fork over normal retail price for. It could be something you’re only going to use once or twice, or maybe you’re not even sure the idea is going to work and don’t want to invest too much money into it. You cast a skeptical towards the ever-growing pile of salvaged parts and wonder…

Inspiration and a dig through the junk bin is precisely how [Nixie] built this very impressive spin coater for use in his ongoing homemade semiconductor project. If you’ve never had first hand experience with a spin coater, don’t worry, not many people have. Put simply, it’s a machine that allows the user to deposit a thin layer of material on a disc by way of centrifugal force. Just place a few drops in the center of the disc, then spin it up fast enough and let physics do the rest.

[Nixie] only needs to spin up a fairly tiny disc, and realized the hub of a 40x40mm brushless case fan was just about the perfect size. A quick pass through the lathe stripped the hub of its blades and faced off the front. Once he found a tube that was the exact same diameter of the fan’s axle, he realized he could even use a small vacuum pump to hold his disc in place. A proper seal is provided by 10 and 16 mm OD o-rings, installed into concentric grooves he machined into the face of the hub.

With a way to draw a vacuum through the hub of the spinner he just needed the pump. As luck would have it, he didn’t have to wait for one to make the journey from China, as he had one of those kicking around his junk bin from a previous project. The only thing he ended up having to buy was the cheap PWM fan controller which he mounted along with the modified fan to a piece of black acrylic; producing a fairly professional looking little piece of lab equipment. Check out the video after the break for a brief demonstration of it in action.

This isn’t the first specialized piece of gear [Nixie] has produced in his quest for DIY chips. We’ve previously covered his DIY tube oven as well as his vacuum chamber complete with magnetically controlled manipulator arm.

Continue reading “Junk Bin Spin Coater Uses Modded Case Fan”