“Superfan” Gaming Peripheral Lets You Feel Your Speed

Virtual reality has come a long way but some senses are still neglected. Until Smell-O-Vision happens, the next step might be feeling the wind in your hair. Perhaps dad racing a sportbike or kids giggling on a rollercoaster. Not as hard to build as you might think, you probably have the parts already.

HAD - Superfan4Off-the-shelf devices serve up the seeing and hearing part of your imaginary environment, but they stop there. [Jared] wanted to take the immersion farther by being able to feel the speed, which meant building his own high power wind generator and tying it into the VR system. The failed crowdfunding effort of the “Petal” meant that something new would have to be constructed. Obviously, to move air without actually going on a rollercoaster requires a motor controller and some fans. Powerful fans.

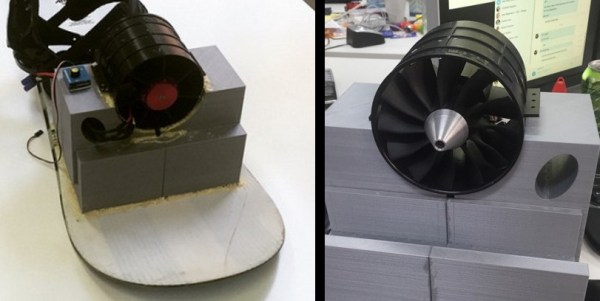
A proponent of going big or going home, [Jared] picked up a pair of fans and modified them so heavily that they will launch themselves off of the table if not anchored down. Who overdrives fans so hard they need custom heatsinks for the motors? He does. He admits he went overboard and sensibly way overbudget for most people but he built it for himself and does not care.

Continue reading ““Superfan” Gaming Peripheral Lets You Feel Your Speed”

Repurposing A Ceiling Fan Into A Pottery Wheel

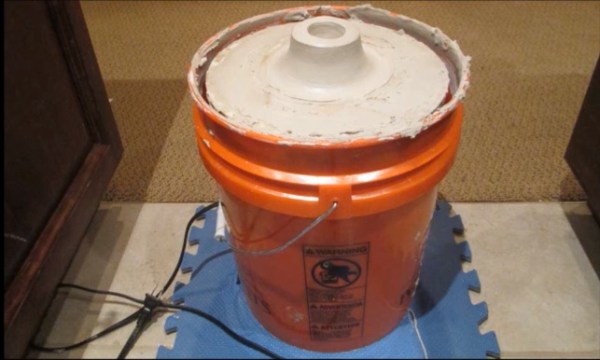
The wheel goes round and round as does [Lou Wozniak]. He’s come back to us, this time hacking together a pottery wheel from a cheap ceiling fan. This is a great use for a discarded or inexpensive fan and the build should cost less than $50. As you watch the video you learn that repurposing the ceiling fan was no simple feat. Lucky for us [Lou] spins through detailed construction procedures and doesn’t fail to cover every tip and trick. He really does think outside the box or should we say inside the bucket and peanut butter jar. The fan gets dismantled as well as rewired inside a 5 gallon bucket which is used as the pottery wheel housing and stand. A plastic peanut butter jar was used as a makeshift electrical junction box inside the bucket. He remounted the motor’s string operated speed switch on the side of the jar and routed the pull string out the side of the bucket. The fan motor should have three or four switch speed settings which might be enough control. If continuous variable speed control is desired he could add in a controller similar to [Ben Krasnow’s] AC controller using one pin on a microcontrollerUPDATE: [AKA the A] tells us in a comment below that this controller won’t work with a ceiling fan, but we still really like [Ben’s] project so we’re leaving this link here.

Most potters use significant amounts of water to wet the clay while they throw, so we have reservations about having the high voltages and open motor design directly under the wheel with no shielding. We know [Lou] could easily hack in a splash pan and of course always plug into a ground fault protected receptacle when using electrical appliances around water.

We do get to see the wheel in operation at the end of the video, which you can watch after the break. However, [Lou] makes no claims at being a pottery artisan.

Continue reading “Repurposing A Ceiling Fan Into A Pottery Wheel”

Cooling Fan Speed Controllers Do It By Generating Heat

cooling-fan-speed-controllers

We’ve never torn one apart ourselves, but it boggles the mind just a little bit to learn that these cooling fan controllers generate heat to do their job. We’d bet we’ll get shouted down in the comments, but doesn’t this seem counter-productive?

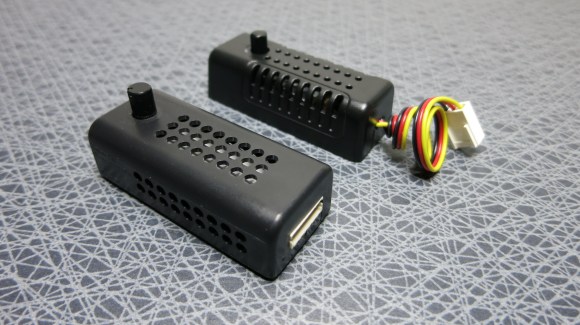
At any rate, we enjoyed reading two posts on this topic. [Göran’s] first adventure with the hardware started when he was trying to design his own speed controller. He saw a reference design in the LM7805 linear regulator datasheet which allows the adjustment of the output by changing the ground reference. When fed with 12V this ends up putting off some heat but it is a simple and reliable solution. He was a bit surprised to crack open a Zalman module and find the exact same circuit inside.

The controller in the background is an eBay purchase. He cracked that one open as well (that’s the link at the top) and found a circuit with a linear regulator in it, but this time it was a TL431 adjustable regulator. So here are our questions: Which one of these two is better and why. And can you do it relatively inexpensively without generating as much heat?

USB Fume Extractor Takes Stink Out Of Soldering Sessions

usb-powered-fume-extractor

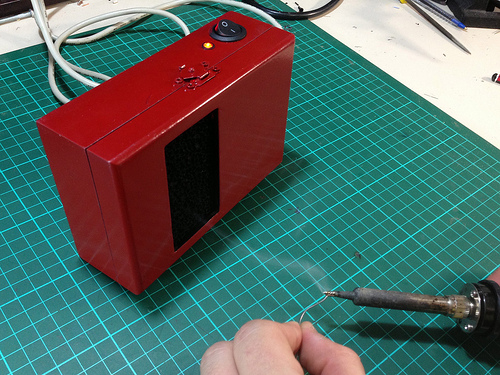
Our homemade shop tools rarely reach this level of finished quality. We probably would have stopped with assembly of this USB powered fume extractor. But [X2jiggy] went for style points by adding a coat of paint.

There are several nice features included in his build. He wanted it to be very easy to power the device so he settled on the 5V USB standard. But a PC fan running at 5V won’t pull much air. He used a boost converter board to ramp that up to 12V. The enclosure is a wooden hobby box. He drilled mounting holes and an airflow opening in the bottom of the box for the fan. The lid of the box has a rectangular opening which accepts a carbon filter meant for aquariums. The rocker switch and LED seen above are also nice touches, but not strictly necessary if you build this for yourself.

We’re still in the habit of gently blowing the fumes away from us as we solder. So the question is, will this device save us from a gruesome disease down the road, or is it mostly to capture the odor of the solder fumes?

Looking for a more permanent setup? You should build a solder hood for your workbench.

Continue reading “USB Fume Extractor Takes Stink Out Of Soldering Sessions”

Laser Spirograph

laser-spirograph

Here’s a weekend junk bin project if we’ve ever seen one. [Pat] used a quartet of computer fans to make his laser Spirograph. Deciding to try this simple build for yourself will run you through a lot of basics when it comes to interfacing hardware with a microcontroller. In this case it’s the Arduino Nano.

The Spirograph works by bouncing a laser off of mirrors which are attached to the PC fans. When the fans spin the slight alignment changes cause the laser dot to bob and weave in visually pleasing ways. You can catch twenty minutes of the light show in the clip after the break.

Three of the fans have mirrors attached, the housing of the fourth is used to host the laser diode and make assembly easier. A TC4469 motor driver is used to connect the fans to the Arduino. The light show can be manually controlled by turning the trio of potentiometers which are read using the Arduino’s ADC.

If you manage your way through this build perhaps you’ll move on to a setup that throws laser light all over the room.

Continue reading “Laser Spirograph”

Quick And Easy Personal Evaporative Cooler

This quick and easy evaporative cooler might be just the thing the next time the air conditioning goes on the fritz. [Stephen] saw an eBay listing for a personal air conditioner that used a moist sponge and fan to send some cool relief your way. But he wanted to run his own test to see if it really did anything before laying down the cash.

The idea is to run air past a moisture source. Some of the heat energy in the air is reduced through evaporation resulting in the exhaust air feeling a bit cooler. It’s the same concept used in swamp coolers (an evaporative type of air conditioning). To build his device [Stephen] grabbed a refrigerator deodorizer which uses a hinged plastic cage to hold a packet of baking soda. He attached a small PC fan to the cage, then inserted a damp sponge. This is so easy to put together you could hit the dollar store on your lunch break and have some relief for the second half of the work day.

If you’re looking for a technique that cools just a bit better consider leveraging a beer fridge as a personal cooler.

Continue reading “Quick And Easy Personal Evaporative Cooler”

Bathroom Fan That Switches Itself On When It Gets Steamy Or Smelly

At first we thought that [Brandon Dunson] was writing in to tell us he’s too lazy to fix his bathroom fan. What he really meant is that simply replacing the unit isn’t nearly enough fun. Instead, he developed his own bathroom fan trigger based on stinky or humid air conditions. He didn’t publish a post about the project but we’ve got his entire gallery of build images after the break.

The initial inspiration for the project came from a twitter-connected fart sensing office chair. Hiding behind the character display you can see the MQ-4 methane gas sensor which he picked up for the project. But since there’s also a shower in the bathroom he included a humidity sensor with the project. Both are monitored by an ATmega328 which averages 10 readings from each sensor before comparing the data with a set threshold. If the sensors read above this level a relay turns on the bathroom fan.

Don’t be confused by the small DC fans seen above; [Brandon] is still using a proper exhaust fan. These are just used to help circulate the air around the sensors so that low-hanging smells will still trigger the system. This has got to be the perfect thing for a heavily used restroom.

Continue reading “Bathroom Fan That Switches Itself On When It Gets Steamy Or Smelly”