Hackaday Prize Entry: Arduino Splash Resistant Toilet Foamer

There are some universal human experiences we don’t talk about much, at least not in public. One of them you’ll have in your own house, and such is our reluctance to talk about it, we’ve surrounded it in a fog of euphemisms and slang words. Your toilet, lavatory, john, dunny, khazi, bog, or whatever you call it, is part of your everyday life.

For his Hackaday Prize entry, [VijeMiller] tackles his smallest room head-on. You see, for him, the chief horror of the experience lies with the dreaded splashback. Yes, a bit of projectile power dumping leaves the old rump a little on the damp side. So he’s tackled the problem with some maker ingenuity and installed an Arduino-controlled foam generator that injects a mixture of soap and glycerin to fill the bowl with a splash-damping load of foam. Rearward inundation avoided.

The parts list reveals that the foam is generated by a fish tank aerator, triggered by a relay which is driven by an Arduino Uno through a power transistor. A solenoid valve controls the flow, and a lot of vinyl tubing hooks it all together. There is an HC/06 Bluetooth module with an app to control the device from a phone, though while he’s posted some Arduino code there is no link to the app. There are several pictures, including a cheeky placement of a Jolly Wrencher, and a shot of what we can only surmise is a text, as foam overflows all over the bathroom. And he’s put up the video we’ve placed below the break, for a humorous demonstration of the device in action.

Continue reading “Hackaday Prize Entry: Arduino Splash Resistant Toilet Foamer”

Metal Casting With Single Shelled PLA Masters

[3DTOPO] does a lot of metal casting (video link, embedded below). That’s obvious by the full and appropriate set of safety gear, a rarity on YouTube.

They had all the equipment to do it the normal way: craft or CNC out a master, produce a drag and a copy, make any necessary cores, and finally; pour the mold. This is a long and tedious process. It has a high rate of error, and there is a parting line.

Another set of methods are the lost ones. With these methods the master is produced out of a material like foam or wax. The master is surrounded by refractory and then melted, burned, or baked out of the mold. Finally the metal is poured in. Theoretically, a perfect reproduction is made without ever having to open the mold.
Continue reading “Metal Casting With Single Shelled PLA Masters”

Sony VTR with replacement foam brushes

Resurrecting A 1960’s VTR With Foam

Nearly fifty years back, Sony launched the DVC-2400, their first consumer grade video camera. This unit weighed in at 10 pounds, and recorded only 20 minutes of footage per reel. It left something to be desired for $1250, or nearly $9000 in today’s dollars.

[NeXT] got his hands on one of these camera kits, and began bringing it back to life. While all the pieces were included, the Video Tape Recorder (VTR), which is used to play back the footage, didn’t power up. A little poking found a dead transistor. After determining a modern replacement part, the voltages checked out. However, the drum still wasn’t spinning.

Further disassembly found that the drum’s DC motor was made on the cheap, using a foam instead of springs to apply pressure on the brushes. This foam had worn out and lost its springy qualities, so no electrical contact was made. New foam was cut out as a replacement. Once reassembled, the drum spun successfully. After some adjustment, the VTR was running at the correct speed once again.

With this working, the VTR should be ready to go. However, camera still isn’t working, so we’re awaiting a part 2.

A Robotic Wheatley Replica created by Evie Bee

Robotic Wheatley From Portal 2

It’s been over 4 years since Portal 2 launched, but Wheatley, the AI character with a British accent, remains a captivating character. [Evie Bee] built a Wheatley replica complete with sound, movement, and one glowing eye.

The body of Wheatley is made out of blue insulation foam, also called XPS foam, laminated together with UHU Polyurethane glue. This formed a sphere, which was then cut into a detailed body. Papier mache clay was used to strengthen the thin foam.

The electronics for this build provide light, motion, and sound. The eye is moved by a total of 3 Arduino controlled servos: two for the movement of the eye, and one to allow it to open and close. Movement is controlled by two joysticks. Sound is provided by the Adafruit Sound Board, which connects to a speaker and a Velleman Sound to Light Kit. This kit controls the LEDs that light the eye, making it react to the voice of Wheatley.

You can watch this Wheatley rant at you after the break. Of course if you’re going to have a Wheatley you need a GLaDOS potato as well.

Continue reading “Robotic Wheatley From Portal 2”

ROBOCHOP! It Slices, Dices, But Wait! There’s More…

You’re gunna love my cuts. 

KUKA robots are cool. They’re both elegant and terrifying to watch in action as they move unyieldingly to preform tasks. Not many of us get to use industrial tools like this because they aren’t exactly trivial to wield (or cheap!). Artists [Clemens Weisshaar] and [Reed Kram] however created an installation that allows anyone to potentially control one of these orange beauties to do their bidding… all from the safety and comfort of a computer chair.

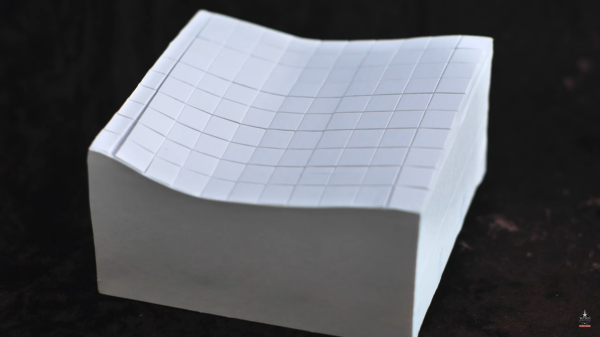
For their piece, “ROBOCHOP”, the artists developed a web app that allows you to easily manipulate the surface of a virtual cube. You can rotate for positioning and then use a straight or curved line tool to draw vectors through its surface and subtract material. Once you’re finished sculpting your desired masterpiece, one of the four KUKA robots in the installation will retrieve a 40 x 40 x 40 cm block of foam and shape it into a real-life version of whatever you created in the app.

Screen Shot 2015-03-06 at 1.03.39 PMStarting today you can visit the project’s website and upload your own mutilated cube designs. If your design is selected by the artists, it will be among the 2000 pieces carved by the robots throughout their installation during CeBit in Hanover. After the show, your cube spawn will then be mailed to you free of charge! The only way I could see this being cooler, is if they filmed the process so you could watch your shape being born.

Anyhow, I personally couldn’t resist the invitation to sculpt Styrofoam remotely with an industrial grade robot arm and came up with this gem.

You can go to their page if you want to give the app a go, and really… why wouldn’t you?

Continue reading “ROBOCHOP! It Slices, Dices, But Wait! There’s More…”

Cheap, Dirty And Perfect V-Groove Foam Cutter

If the only tool you have is a hammer, everything looks like a nail. Conversely, if you have the right tool for every job, it makes the difference between pro and amateur. [ftregan] needs to cut perfect V-grooves in foam for many of his projects, especially building RC planes. He wasn’t too satisfied with the results using his Xacto knife. And a proper tool was going to set him back by almost $25, but following that example he built his own version of the tool for much less.

Two pieces of wood cut at a 45 degree angle are held between two flat support pieces. A pair of regular shaving blades form the cutting elements. While it looks simple, it’s important to get the angles and blade directions correct. A central wooden wedge holds the two blades in place. He also added a small guide marker that let’s you cut precise straight grooves. [ftregan] built the tool to allow cutting 6mm thick foam but given that it’s so quick and cheap to build, we guess it’s easy to make a few of these to allow cutting different thicknesses of foam. We’re sure that many of you will find different or better ways of doing this, but considering [ftregan] spent just 15 minutes cooking this up, it’s not too bad, especially since the results are mighty good.

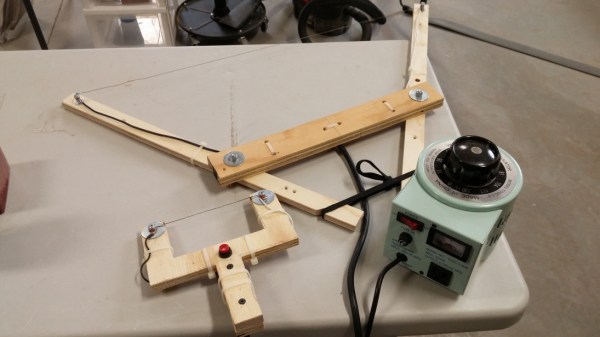
Another method of cutting foam is with hot wire. Check out this DIY Foam Cutter that we featured earlier.

Drone-enium Falcon

If you own a quadcopter chances are you own more than one. It’s kind of an addictive thing in that way. So dig out that dinged up model and build something awesome around it. We’d suggest making it look exactly like a Millenium Falcon. Okay, to be fair this is built around a custom quadcopter originally designed to carry a camera and GPS but removed for this project. We’re not sure if stock models have enough extra umph to lift a fancy fuselage like this (maybe you’ll weigh in on that in the comments?).

As with any great build this started with a scale drawing. The drawing was printed for use as a cutting template for the expanded polystyrene. Part of what makes it look so fantastic is that the fuselage isn’t 2-dimensional. There is depth in the places that matter and that’s all because of near-mythical foam cutting/shaping skills on [Olivier’s] part.

Final touches are LEDs on front and to simulate the curved engine on the tail. You can almost see this thing picking up a handless [Luke] below Bespin’s floating city. This Falcon flies like… a quadcopter (what did you expect? The Kessel Run in 12 parsecs?), which you can see in the videos after the break. The second clip shows how easy it is to remove the foam body from the quad frame, yet another nice touch!

Of course if Star Wars isn’t your thing you can give trolling the skies as a flying body a shot.

Continue reading “Drone-enium Falcon”