An FPGA Based 6502 Computer

A diagram of the CHOCHI Board

It’s no secret that people love the 6502 processor. This historic processor powered some of our favorite devices, including the Apple II, the Commodore 64, and the NES. If you want to play with the 6502, but don’t want to bother with obtaining legacy chips, the CHOCHI board is for you.

While many people have built modern homebrew 6502 computers, the CHOCHI will be much easier for those looking to play with the architecture. It’s based on a Xilinx XC3S50 FPGA which comes preconfigured as a 6502 processor.

After powering on the board, you can load a variety of provided binaries onto it. This collection includes a BASIC interpreter and a Forth interpreter. Of course, you’re free to write your own applications in 6502 assembly, or compile C code for the device using the cc65 compiler.

If you get bored with the 6502 core, you can always grab Xilinx’s ISE WebPACK for free and use the board as a generic FPGA development tool. It comes with 128K of SRAM and 31 I/O pins. Not bad for a $30 board.

Sprite Graphics Accelerator On An FPGA

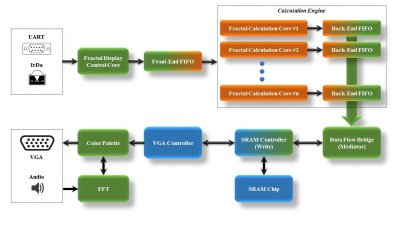
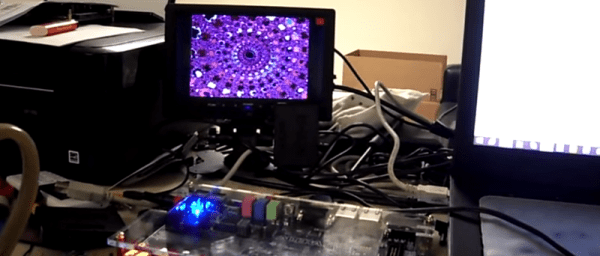
A demo running on a FPGA sprite accelerator

Graphics accelerators move operations to hardware, where they can be executed much faster. This is what allows your Raspberry Pi to display high definition video decently. [Andy]’s latest build is a 2D sprite engine, featuring hardware accelerated graphics on an FPGA.

In the simplest mode, the sprite engine just passes commands through to the LCD. This allows for basic control. The fun part sprite mode, which allows for sprites to be loaded onto the FPGA. At that point, you can show, hide, and move the sprite. By overlapping many sprites, you something like the demo shown above.

The FPGA is from Xilinx, and uses their Block RAM IP to store the state of the sprites. The actual sprite data is contained on a 128 Mb external flash chip, since they require significant space.

The game logic runs on a STM32 Cortex M4 microcontroller which communicates with the FPGA and orders the sprites around. The FPGA then deals with generating frames and sending them to the LCD screen, freeing up the microcontroller.

If you’re wondering about the LCD itself, it’s 3.2″, 640 x 360, and taken from a Ericsson U5 Vivaz cellphone. [Andy] has a detailed writeup on reverse engineering it. After the break, he gives us a video overview of the whole system.

Continue reading “Sprite Graphics Accelerator On An FPGA”

Parallax Propeller 1 Goes Open Source

OpenPropellerProjectOpenSourceProp1Banner

Parallax has embraced open source hardware by releasing the source code to its Propeller 1 processor (P8X32A). Designed by [Chip Gracey] and released in 2006, the 32-bit octal core Propeller has built up a loyal fan base. Many of those fans have created development tools for the Propeller, from libraries to language ports. [Ken, Chip], and the entire Parallax team have decided to pay it forward by releasing the entire source to the Propeller.

The source code is in Verilog and released under GNU General Public License v3.0. Parallax has done much more than drop 8-year-old files out in the wild.  All the configuration files necessary to implement the design on an Altera Cyclone IV using either of two different target boards have also been included. The DE0-Nano is the low-cost option. The Altera DE2-115 dev board is more expensive, but it also can run the upcoming Propeller 2 design.

The release also includes sources for the mask ROM used for booting, running cogs, and the SPIN interpreter. [Chip] originally released this code in  2008. The files contain references to PNut, the Propeller’s original code name.

We’re excited to see Parallax taking this step, and can’t wait to see what sort of modifications the community comes up with. Not an Altera fan? No problem – just grab the source code, your favorite FPGA tools, and go for it! Starved for memory? Just add some more. 8 cogs not enough? Bump it up to 16.  The only limits are the your imagination and the resources of your target device.

Interested in hacking on a real Propeller? If you’re in Las Vegas, you’re in luck. A Propeller is included on each of the nearly 14,000 badges going to DEFCON 22 attendees. While you’re there, keep an eye out for Mike and The Hackaday Hat!

THP Entry: A CPLD Video Card With VGA And NTSC

NTSC

[PK] is working on a very simple video card, meant to output 640×480 VGA with a cheap CPLD. The interface will be 5 Volt SPI, meaning there’s a ton of potential here for anyone wanting put a reasonable (and cheap) display in a microcontroller project. The project has come a long way, and his latest update showcases something that has only been done once before: color NTSC with programmable logic

The brains of the outfit is a $5, 100-pin CPLD from Xilinx. Apart from that, the rest of the components are a crystal, PLL, and an almost hilarious number of resistors for the R2R ladder. The one especially unique component is the 25.056815 MHz crystal – multiply by that by two, and it’s fast enough to drive a VGA monitor. Divide the crystal by seven, it’s the 3.579545 MHz you need for an NTSC colorburst frequency. That’s VGA and NTSC in a single programmable logic project, something the one FPGA project we could find that did color NTSC couldn’t manage.

The next step in the project is designing a PCB and figuring out the code for the framebuffer. [PK] put up a demo showing off both VGA and NTSC; you can check that out below.


SpaceWrencherThe project featured in this post is an entry in The Hackaday Prize. Build something awesome and win a trip to space or hundreds of other prizes.

Continue reading “THP Entry: A CPLD Video Card With VGA And NTSC”

An Automated Flappy Bird Player

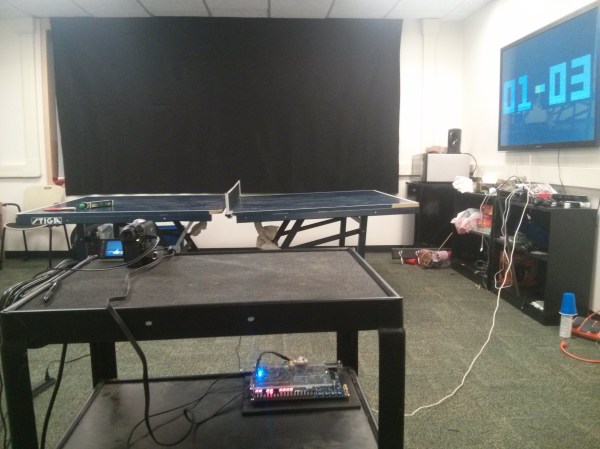
game Flappy Bird has been ported to just about every system imaginable, including but not limited to the Apple II, Commodores, pretty much every version of the Atari, and serves as a really great demonstration of the TI-99’s graphics capabilities. Porting is one thing, but having a computer automate Flappy Bird is another thing entirely. [Ankur], [Sai], and [Ackerly] in [Dr. Bruce Land]’s advanced microcontroller design class at Cornell have done just that. They’re playing Flappy Bird with a camera, FPGA, and a penny wired up to a GPIO pin to guide the little 8-bit-bird through Mario pipes.

The setup the team is using consists of a webcam that records the screen of a smartphone, an FPGA, and a little bit of circuitry to emulate screen taps. Inside the FPGA, the team is looking at the video stream from the phone to detect the bird, pipes, and gaps. The ‘tapper’ unit is a US penny, placed right above the ‘tap’ button, wired to a GPIO port. This was found to be the ideal contact for a capacitive touch screen – taps that were too small weren’t registered, and taps that were too big registered as two taps.

For spending an entire semester on automating Flappy Bird, the team has a lot of knowledge to show for it, but not the high score: the bird only makes it through the first pipe 10% of the time, and the second pipe 1% of the time. The high score is three. That’s alright – getting the algorithm right to play the game correctly was very, very difficult, and to nail that problem down, they estimate it would take at least another semester.

Hackaday Links: July 13, 2014

hackaday-links-chain

Don’t like sunglasses? Deal with it. They’re the pixeley, retro sunglasses from your favorite animated .GIFs, made real in laser cut acrylic. Points of interest include heat-bent frames made out of a single piece of acrylic.

Remember this really small FPGA board? The kickstarter is ending really soon and they’re upgrading it (for an additional $30) with a much better FPGA.

Sparkfun is now hosting the Internet of Things. They’re giving people a tiny bit of space to push data to, and you can also deploy your own server. That’s interesting, and you can expect us doing a full post on this soon.

Need waveforms? [Datanoise] is building a wavetable synthesizer, and he’s put all his waveforms online. Now if we could just get a look at the synth…

If you only have $20 to spend on a board, you’ll want to pick up at Teensy 3.1. [Karl] wrote some bare metal libraries for this awesome board, and while it’s not as extensive as the standard Arduino libs, it’s more than enough to get most projects off the ground. Included are UARTs, string manipulation tools, support for the periodic interval timers on the chip, and FAT and SD card support.

Counting Really, Really Fast With An FPGA

fast

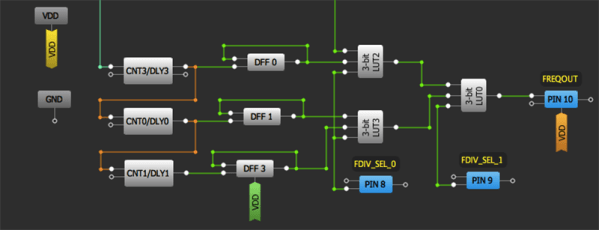
During one of [Michael]’s many forum lurking sessions, he came across a discussion about frequency counting on a CPLD. He wondered if he could do the same on an FPGA, and how hard it would be to count high clock rates. As it turns out, it’s pretty hard with a naive solution. Being a bit more clever turns the task into a cakewalk, with a low-end FPGA being able to count clocks over 500 MHz.

The simplest solution for counting a clock would be to count a clock for a second with a huge, 30-bit counter. This is a terrible idea: long counters have a lot of propagation delays. Also, any sampling would have to run at least twice as fast as the input signal – not a great idea if you’re counting really fast clocks.

The solution is to have the input signal drive a very small counter – only five bits – and sample the counter using a slower clock on board the FPGA. [Michael] used a 5-bit Gray code, getting rid of the problem of the ‘11111’ to ‘00000’ rollover of a normal binary counter.

Because [Michael] is using a 5 bit clock with 31 edges sampled at 32 MHz, he can theoretically sample a 992 MHz clock. There isn’t a chance in hell of the Spartan 6 on his Papilio Pro board ever being able to measure that, but he is able to measure a 500 MHz clock, something that would be impossible without his clever bit of code.