A Laser Cut Arcade Cabinet For Ants

Most of us would probably like to have an arcade cabinet at home, but it’s hard to justify the space they take up. Sure it’s an awesome conversation starter when friends are over, and you might even play it regularly, but at some point you’ll look over at the corner and realize there’s probably something more practical you could be doing with that particular section of the room.

Perhaps the solution is to just make a smaller one. You could do one at half scale, or even desktop sized. But why stop there? Why not make one so small that you could put the thing in a drawer when you don’t need it? While it might be more of an academic experiment than a practical entertainment device, [RedPixel] has managed to create just such an easily concealable arcade cabinet out of a Pi Zero and laser cut wood. At only 83 mm high, this may well be the smallest functional arcade cabinet ever made (at least for now).

All of the cabinet parts were drawn in Inkscape and cut out of 3 mm plywood. The buttons and joystick are wired directly to the Pi Zero’s GPIO pins and configured with Adafruit-retrogame. The display is a SPI ILI9163, which [RedPixel] previously documented on his site.

The Pi is running the ever-popular RetroPie, which allows this tiny arcade cabinet to emulate 1000’s of console and arcade games, assuming you can deal with the controls anyway. While [RedPixel] has uploaded a video of his lilliputian cabinet running an emulator, there’s no video of him actually playing the thing. While we don’t doubt that it functions as advertised, gameplay on such a tiny array of inputs must be very difficult.

This may be the smallest functional arcade cabinet to date, but it isn’t without challengers. We’ve covered a number of very impressive builds that manage to invoke the look and feel of a hulking coin-up despite fitting neatly on your desk.

Continue reading “A Laser Cut Arcade Cabinet For Ants”

Raspberry Pi Compute Module 3 In A GameBoy Original

[Kite] has been making custom PCBs for GameBoys for a long time. Long enough, in fact, that other people have used his work to build even more feature-rich GameBoy platforms. Unfortunately some of their work had stagnated, so [Kite] picked it up and completed a new project: a GameBoy that uses a Raspberry Pi running on his upgraded GameBoy PCB.

At its core the build uses a Raspberry Pi 3, but one that has been shrunk down to the shape of a memory module, known as the Compute Module 3. (We featured the original build by [inches] before, but [Kite] has taken it over since then.) The upgrade frees up precious space in the GameBoy case to fit the custom PCB that was originally built by [Kite], and also eliminates the need to cut up a Raspberry Pi and solder it to the old version of his PCB. The build is very clean, and runs RetroPie like a champ. It has some additional features as well, such as having an HDMI output.

For anyone looking for that retro GameBoy feel but who wants important upgrades like a backlit color screen, or the ability to play PSP games, this might be the build for you. The video below goes into details about how it all fits together. If you’re looking for more of a challenge in your GameBoy hacks, though, there’s an ongoing challenge to build the tiniest GameBoy possible as well.

Continue reading “Raspberry Pi Compute Module 3 In A GameBoy Original”

An Old Video Game Controller On Even Older Computer

For those of us not old enough to remember, and also probably living in the States, there was a relatively obscure computer built by Microsoft in the early 80s that had the strong Commodore/Atari vibe of computers that were produced before PCs took over. It was known as the MSX and only saw limited release in the US, although was popular in Japan and elsewhere. If you happen to have one of these and you’d like to play some video games on it, though, there’s now a driver (of sorts) for SNES controllers.

While the usefulness of this hack for others may not help too many people, the simplicity of the project is elegant for such “ancient” technology. The project takes advantage of some quirks in BASIC for reading a touch-pad digitizer connected to the joystick port using the SPI protocol. This is similar enough to the protocol used by NES/SNES controllers that it’s about as plug-and-play as 80s and 90s hardware can get. From there, the old game pad can be used for anything that the MSX joystick could be used for.

We’ve seen a handful of projects involving the MSX, so while it’s not as popular as Apple or Commodore, it’s not entirely forgotten, either. In fact, this isn’t even the first time someone has retrofitted a newer gaming controller to an MSX: the Wii Nunchuck already works for these machines.

Pac Man On The Colour Computer 3

The 1980s were the heyday of the venerable Z80, a processor that found its way into innumerable home computers, industrial systems, and yes — arcade machines. However, not everyone had a Z80 based machine at home, and so sometimes porting is required. [Glen] is tackling this with a port of Pac Man to the Radio Shack Colour Computer 3.

The key to any good arcade port is authenticity – the game should feel as identical to the real thing as possible. The Atari 2600 port got this famously wrong. Porting to the Colour Computer 3 is easier in theory – with more RAM, a Motorola 6809 CPU running at a higher clock rate, and a more powerful graphics subsystem, fewer compromises need to be made to get the game to run at a playable speed.

The way [Glen] tackled the port is quite handy. [Glen] built a utility that would scrape a disassembled version of the original Pac Man Z80 code, look up the equivalent 6809 CPU instruction, and replace it, while placing the original Z80 code to the side as a comment. Having the original code sitting next to the ported instructions makes debugging much easier.

Level 256 as seen in [Glen]’s port.
There was plenty of hand tweaking to be done, and special effort was made to make sure all the data the original code was looking for was accessible at the same addresses as before. There was also a lot of work involved in creating a sprite engine that would reliably display the game video at a playable frame rate.

Overall, the port is highly faithful to the original, with the game code being identical at the CPU level. [Glen] reports that the same patterns used on the arcade machine can be used to complete the mazes on the Colour Computer 3 version, and it faithfully recreates the Level 256 bug as well. It’s an impressive piece of work to create such an authentic port on a home computer from 1986.

For another classic port, but with the temporal vectors flipped, check out Portal 2 on the Apple II.


Fabricate Your Own Tabletop Gaming Props

Delve into the mysterious world of tabletop roleplaying games. Warhammer Fantasy Roleplay, Shadowrun, Pathfinder, Ars Magica, Vampire, whatever gets your dice rollin’ — metaphorically in the case of a diceless system. This might very well be your daddy’s D&D. If you’re not a gamer, you’re certainly familiar with the concept. People sit around a table pretending to have an epic adventure, often adding a random element with the help of dice. A map is often displayed on the table, sized for figures that show the various heroes and villains.

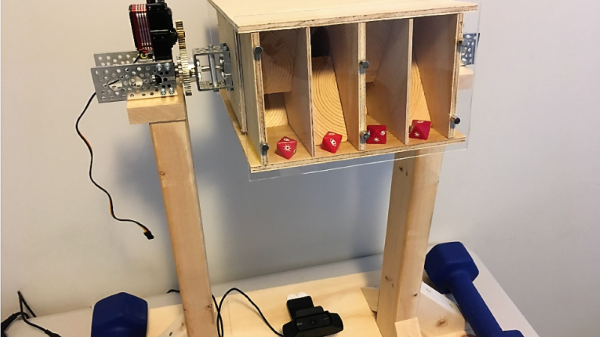
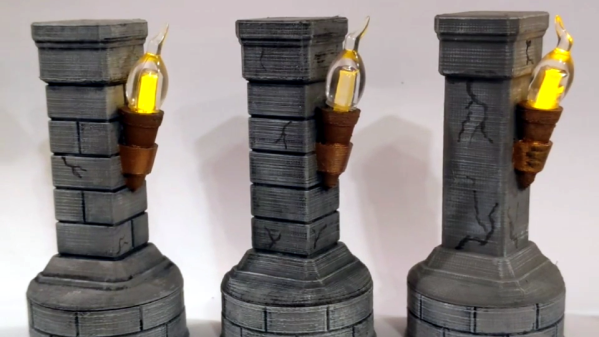
As a person with access to a variety of CNC machines I find myself wanting to create things to make gameplay more fun. I want to build a scale castle and have a siege. I want to conduct a ship-to-ship battle with wooden ships built to scale. But I also think smaller. What is something I could make that would help us every day? Say, a box for dice. Not every project needs to be the dragon’s lair.

It turns out a lot of other folks have been thinking about the same thing.

Continue reading “Fabricate Your Own Tabletop Gaming Props”

Hackaday Prize Entry: Gaming Done Tiny With Keymu

The world’s tiniest Game Boy Color, introduced at the 2016 Hackaday SuperConference, is a work of art. This microscopic game console inspired [c.invent] to create how own gaming handheld. His Keymu project on hackaday.io describes an open source, keychain-sized gaming handheld that its builder claims is really the world’s tiniest. How did he make it smaller? It’s a miniature Game Boy Advance SP, and it folds up in a handy clamshell case.

While he’s a Pi fan, [c.invent] felt the Pi Zero was too big and clunky for what he had in mind–a keychain-sized handheld. Only the Intel Edison was compact enough. He began with a custom PCB with a connector for the Edison’s fragile ribbon cable, then added an 1.5″ OLED display and an 11.7mm speaker, all powered by a 220 mAh lithium battery. [c.invent] also created inside a custom folding 3D-printed case that protects the Keymu’s electronics from keys and pocket lint.

Unlike the mini Game Boy Color, [c.invent] aims to create a fully fledged emulation console. The Edison incorporates a Linux distribution that allowing it to install emulators for GameBoy Color, GBA, NES, and SNES.

Nintoaster: The Next Generation

The original Nintendo Entertainment System is affectionately called “the toaster” due to the way the cartridge is inserted. [MrBananaHump] decided to take things a bit literally and installed a NES inside an actual toaster. This isn’t [MrBananaHump’s] design, the Nintoaster comes to us from [vomitsaw], who also built the SuperNintoaster. Since [vomitsaw] was kind enough to document his original build, [MrBananaHump] was able to build upon it.

The target toaster for this build was a plastic Sunbeam model found at a thrift store for $5. [MrBananaHump] gutted the toaster and cleaned out years of toast crumbs. The Nintendo mainboard would fit perfectly inside a toaster, except for two things – the RF Modulator and the expansion port. The expansion port was never used in the US version of the NES so it can be desoldered and removed. The RF also needs to be desoldered and relocated.

By far the biggest job in this casemod is hand-wiring each of the 72 pins for the cartridge port. It’s a tedious job, and it probably won’t look pretty. Keep your wires short, and things will probably work thanks to the relatively low clock speed of the NES.

The cartridge goes in one toast slot. [MrBananaHump] mounted his controller ports, power and reset buttons in the second slot. A bit of expanded metal grid completes the slot. Sure, it’s not exactly pretty inside, but with the case on, this becomes a rather nice looking build.

We’ve seen numerous Nintendo casemods over the years, just one other example is this N64 in an N64 controller.