Fusing Plastic Sheets With A 3D Printer (Sort Of)

If you want to experiment with pneumatic devices, you’ll likely find yourself in need of custom inflatable bladders eventually. These can be made in arbitrary 2D shapes by using a soldering iron to fuse the edges of two plastic sheets together, but it’s obviously a pretty tedious and finicky process. Now, if only there was some widely available machine that had the ability to accurately apply heat and pressure over a large surface…

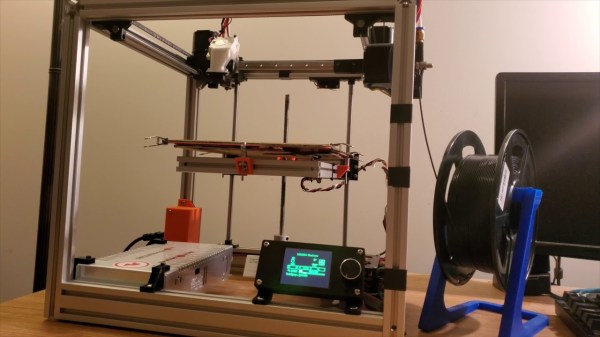
Realizing his 3D printer had all the makings of an ideal bladder fusing machine, [Koppany Horvath] recently performed some fascinating experiments to test this concept out in the real-world. Ultimately he considers the attempt to be a failure, but we think he might be being a bit too hard on himself. While he didn’t get the sheets to fuse hard enough to resist being pulled apart by hand, we think he’s definitely on the right track and would love to see more research into this approach.

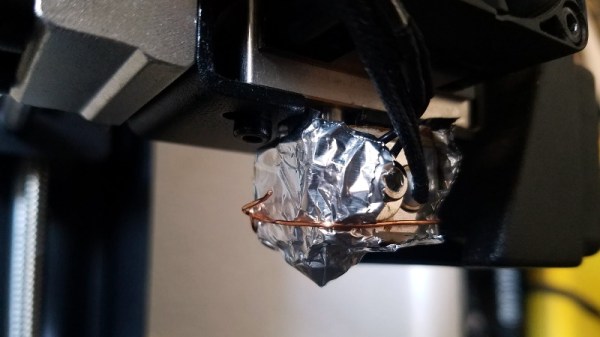
For these early tests, [Koppany] wrapped the hotend of his Monoprice Maker Select Plus with some aluminum foil, and covered the bed with a piece of cardboard. Stretched over this were two sheets of plastic, approximately 0.5 mil in thickness. Specifically, he used pieces cut from the bags that his favorite sandwiches come in; but we imagine you could swap it out for whatever bag your takeout of choice is conveyed in, assuming it’s of a similar thickness anyway.

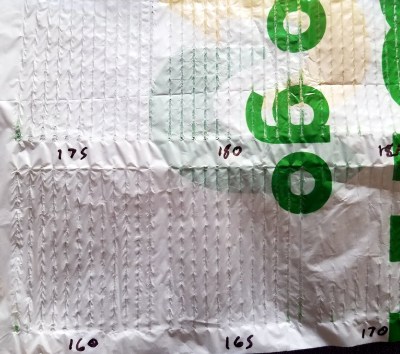
There were problems getting the plastic pulled tight enough, but that was mostly solved with the strategic placement of binder clips and a cardboard frame. Once everything was in place, [Koppany] wrote a Python script that commanded the printer to drag the hotend over the plastic at various speeds while simultaneously adjusting the temperature. The goal was to identify the precise combination of these variables that would fuse the sheets of plastic together without damaging them.

In the end, his biggest takeaway (no pun intended) was that the plastic he was using probably isn’t the ideal material for this kind of process. While he got some decent seams at around 180 °C , the thin plastic had a strong tendency towards bunching up. Though he also thinks that a convex brass probe inserted into the hotend could help, as it would smooth the plastic while applying heat.

We’ve already seen some very promising results when using LDPE film in a CO2 laser cutter, but if a entry-level 3D printer could be modified to produce similar results, it could be a real game changer for folks experimenting with soft robotics.

Signal The End Of A Print With MIDI Of Your Choice

The end of every 3D print should be a triumphant moment, and deserves a theme song. [FuseBox2R] decided to make it a reality, and wrote tool for converting MIDI tracks to G-code that uses the buzzer on your 3D printer.

The tool is up on GitHub, and uses the M300 speaker command that is available in Marlin and some other 3D printer firmware packages. It takes the form of a static HTML page with in-line JavaScript that converts a midi track to series of speaker commands with the appropriate frequency and duration parameters, using the Tone.js framework. Simply add to your slicer G-code to add a bit of spice to your prints. You can also build a MIDI jukebox using the RAMPS board and LCD you probably have gathering dust somewhere. See the video after the break for a demonstration, including a rendition of the DOOM theme song, and off course Mario Bros.

For more quarantine projects, you can also play MIDI using the stepper motors on your printer, or build a day clock if time is becoming too much of a blur.

Continue reading “Signal The End Of A Print With MIDI Of Your Choice”

Gradient Infill Puts More Plastic Where You Want It

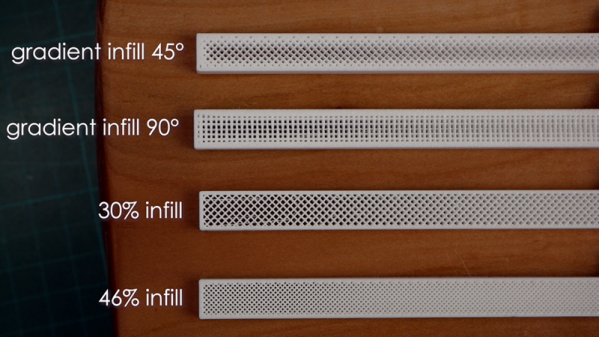
It is always tricky setting the infill for a 3D printed part. High infill parts are strong but take longer to print, while low infill prints take less time, but are weaker internally and in danger of surface layer droop between the infill pattern. [Stephan] has a better answer: gradient infill. You can see a video below and find his Python code on GitHub.

The idea is simple enough. In most cases, parts under stress see higher stress near the surface. Putting more material there will make the part stronger than adding plastic in places where the stress is lower. [Stephan] has done finite element analysis to determine an optimal infill pattern before, but this is somewhat difficult to do. Since the majority of parts can follow the more at the edges and less at the center rule, gradient infill makes sense except for a few special cases.

Continue reading “Gradient Infill Puts More Plastic Where You Want It”

Relive The Dot Matrix Glory Days With Your 3D Printer

With the cost of 3D printers dropping rapidly, we’ve started to see a trend of hackers re-purposing them for various tasks. It makes perfect sense; with the hotend and extruder turned off (or removed entirely), you’ve got a machine that can move a tool around in two or three dimensions with exceptional accuracy. Printers modified to carry lasers, markers, and even the occasional rotary tool, are becoming a common sight in our tip line.

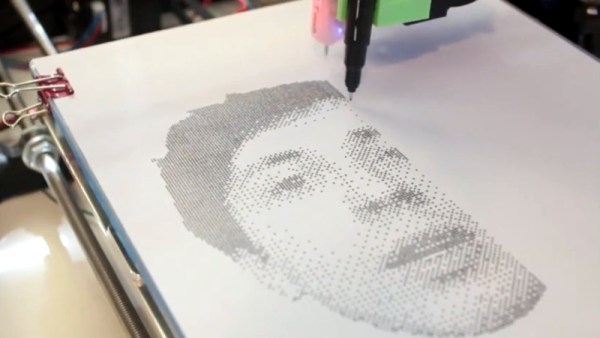
Last year [Matthew Rayfield] attached a marker to his 3D printer and had it sketch out some pictures, but recently he decided to revisit the idea and try to put a unique spin on it. The end result is a throwback to the classic dot matrix printers of yore utilizing decidedly modern hardware and software. There’s something undeniably appealing about the low-fi nature of dot matrix printing, and when fed the appropriate images this setup is capable of producing something which we’ve got to admit is dangerously close to being art.

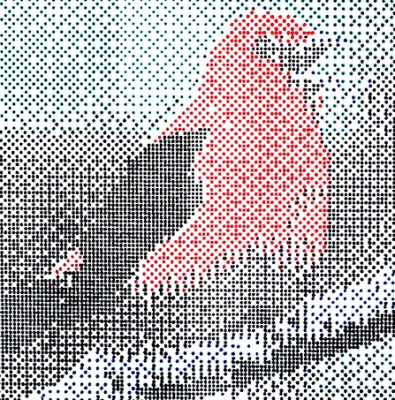
To create these images, [Matthew] has created “Pixels-to-Gcode”, an online service that anyone can use to turn an arbitrary image into GCode they can feed their 3D printer. There’s a number of options available for you to play with so you can dial in the specific effect you’re looking for. Pointillist images can be created using a tight spacing of dots, but widen them up, and your final image becomes increasingly abstract.

The hardware side of this project is left largely as an exercise for the reader. [Matthew] has attached a fine-point pen to his printer’s head using a rubber band, but admits that it’s far from ideal. A more robust approach would be some kind of 3D printed device that allows you to quickly attach your pen or marker so the printer can be easily switched between 2D and 3D modes. We’d also be interested in seeing what this would look like if you used a laser mounted on the printer to burn the dots.

Back in the ancient days of 2012, we saw somebody put together a very similar project using parts from floppy and optical drives. The differences between these two projects, not only in relative difficulty level but end result, is an excellent example of how the hacker community is benefiting from the widespread availability of cheap 3D motion platforms.

Continue reading “Relive The Dot Matrix Glory Days With Your 3D Printer”

3D Print Springs With Hacked GCode

If you’ve used a desktop 3D printer in the past, you’re almost certainly done battle with “strings”. These are the wispy bits of filament that harden in the air, usually as the printer’s nozzle moves quickly between points in open air. Depending on the severity and the material you’re printing with, these stringy interlopers can range from being an unsightly annoyance to triggering a heartbreaking failed print. But where most see an annoying reality of pushing melted plastic around, [Adam Kumpf] of Makefast Workshop sees inspiration.

Noticing that the nozzle of their printer left strings behind, [Adam] wondered if it would be possible to induce these mid-air printing artifacts on demand. Even better, would it be possible to tame them into producing a useful object? As it turns out it is, and now we’ve got the web-based tool to prove it.

As [Adam] explains, you can’t just load up a 3D model of a spring in your normal slicer and expect your printer to churn out a useful object. The software will, as it’s designed to do, recognize the object can’t be printed without extensive support material. Now you could in theory go ahead and print such a spring, but good luck getting the support material out.

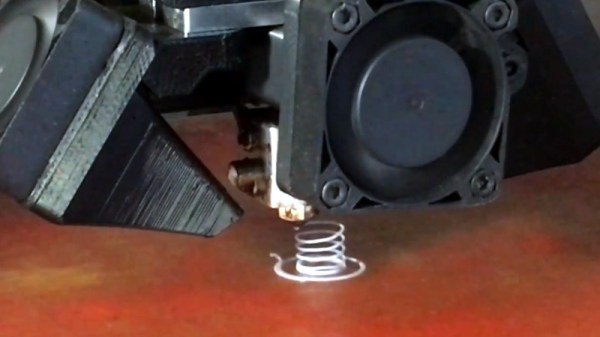
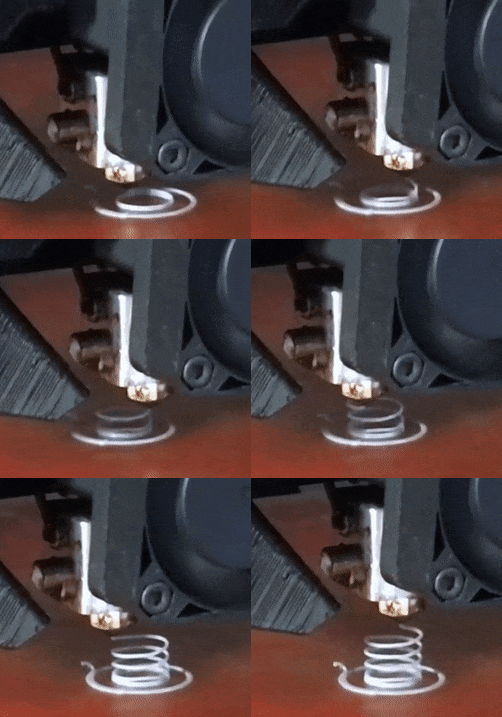
The trick is to throw away the traditional slicer entirely, as the layer-by-layer approach simply won’t work here. By manually creating GCode using carefully tuned parameters, [Adam] found it was possible to get the printer to extrude plastic at the precise rate at which the part cooling fan would instantly solidify it. Then it was just a matter of taking that concept and applying it to a slow spiral motion. The end result are functional, albeit not very strong, helical compression springs.

But you don’t have to take their word for it. This research has lead to the creation of an online tool that allows you to plug in the variables for your desired spring (pitch, radius, revolutions, etc), as well as details about your printer such as nozzle diameter and temperature. The result is a custom GCode that (hopefully) will produce the desired spring when loaded up on your printer. We’d love to hear if any readers manage to replicate the effect on their own printers, but we should mention fiddling with your printer’s GCode directly isn’t without its risks: from skipping steps to stripped filament to head crashes.

The results remind us somewhat of the 3D lattice printer we featured a couple of years back, but even that machine didn’t use standard FDM technology. It will be interesting to see what other applications could be found for this particular technique.

Continue reading “3D Print Springs With Hacked GCode”

Failed 3D Print Saved With Manual Coding

Toast falls face down. Your car always breaks after the warranty period. A 3D print only fails after it is has been printing for 12 hours. Those things might not always be true, but they are true often enough. Another pessimistic adage is “no good deed goes unpunished.” [Shippey123] did a good deed. He agreed to make a 3D printed mask for his friend to give as a gift. It was his first print he attempted for someone else after about four months’ experience printing at all. After 20 hours of printing, he noticed the head was moving around in the air doing nothing — a feeling most of us are all too familiar with. But he decided not to give up, but to recover the print.

Luckily, he’s a CNC machinist and is perfectly capable of reading G-code. The first thing he did was to shut everything down and clear the head. Then he rehomed the printer and used the head to determine what layer the printer had been working on when it failed. He did that by moving over a hidden part of the print and lowering the head by 100 microns. Then he’d move the head a few millimeters in the X direction to see if the head was touching.

Continue reading “Failed 3D Print Saved With Manual Coding”

Neat 3D Printer Hack Makes Printing Multiples Possible

One of the promises of 3D printing is that you can mass produce objects at home, printing out multiple copies of whatever you want. Unfortunately, the reality is a bit different: once you have printed something out, you usually need to remove it manually from the print bed. Unless you are [Replayreb], that is: he’s come up with a neat hack to remove a print from the print bed by using a custom bit of G-code to move the print head to knock the print off, into a waiting box.

Continue reading “Neat 3D Printer Hack Makes Printing Multiples Possible”