Drones, Clever Hacks, And CG Come Together For Star Wars Fan Film

We weren’t certain if this Star Wars fan film was out kind of thing until we saw the making of video afterwards. They wanted to film a traditional scene in a new way. The idea was to take some really good quadcopter pilots, give them some custom quadcopters, have them re-enact a battle in a scenic location, and then use some movie magic to bring it all together.

The quadcopters themselves are some of those high performance racing quadcopters with 4K video cameras attached. The kind of thing that has the power to weight ratio of a rocket ship. Despite what the video implies, they are unfortunately not TIE Fighter shaped. After a day of flying and a few long hikes to retrieve the expensive devices after inevitable crashes (which, fortunately, provided some nice footage), the next step was compositing.

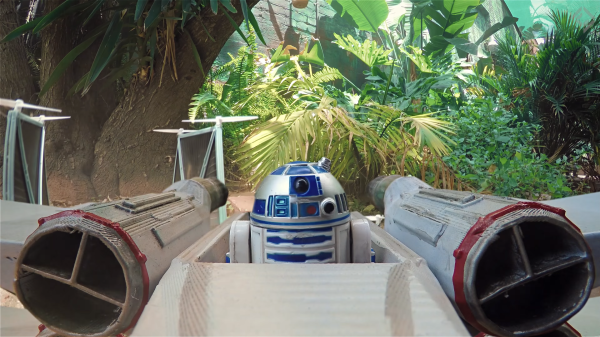
However, how to trick the viewer into believing they were in a X-Wing quadcopter? A cheap way to do it would be to spend endless hours motion tracking and rendering a cockpit in place. It won’t look quite real. The solution they came up with is kind of dumb and kind-of brilliant. Mount a 3D printed cockpit on a 2×4 with a GoPro. Play the flight footage on a smartphone while holding the contraption. Try to move the cockpit in the same direction as the flight. We’re not certain if it was a requirement to also make whooshing and pew pew laser noises while doing so, but it couldn’t hurt.

In the end it all came together to make a goofy, yet convincingly good fan film. Nice work! Videos after the break.

Continue reading “Drones, Clever Hacks, And CG Come Together For Star Wars Fan Film”

Where (Almost) No GoPro Has Gone Before

What would it be like to ride a six foot rocket to nearly 400,000 feet at Mach 5.5? Thanks to UP Areospace and some GoPro cameras, you can find out.

The rocket was a test for the Maraia Capsule project. Mach 5.5, for reference, is 3,800MPH. It appears several different GoPro cameras took the footage. You can see the upward travel, some great views of Earth, and the return on the video below.

Continue reading “Where (Almost) No GoPro Has Gone Before”

Line Following Robot Trains Runners

Can your line following robot move faster than [Usain Bolt] who has been described as “The World’s Fastest Timed Human”? Puma, the athletic footwear, apparel and accessories company, created such a robot to help train their company sponsored athletes.

The shoebox-sized robot exceeds [Bolt]’s top speed of 44-km/hour. At that speed, following a line gets tricky. It took the development team 8 prototypes to attain that capability. Inside the BeatBot an Arduino reads 9 infrared sensors for line detection at 100 samples a second. A digital servo controls the Ackerman steering mechanism to follow the line on the track or floor. Wheel encoders provide the data for speed and distance measurement.

The user can set the distance of the run and the time to beat. Run pacing can also be adjusted. LEDs on the robot provide the starting ‘gun’ and help the runner see the BeatBot using peripheral vision. Two GoPro cameras, front and rear, provide a visual record of the run.

Puma believes that actually running against a competitor, even a robot, improves performance more than just running against the clock. They’re betting a grown-up line follower will help Olympic class athletes improve their performance. Continue reading “Line Following Robot Trains Runners”

ESP8266 GoPro Remote Adds Buttons, Screen

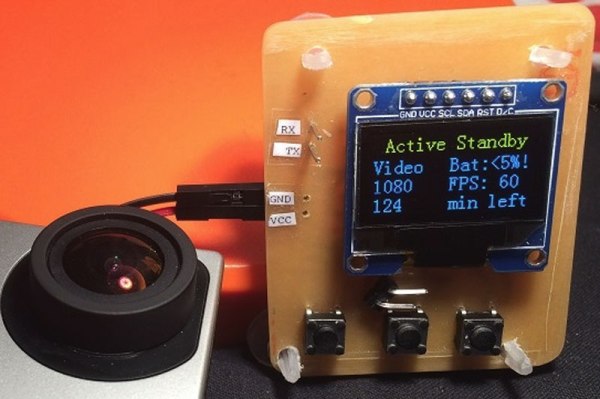
Last year we featured a GoPro camera remote by [Robert Stefanowicz] that was built around an ESP8266. [Robert] has been working hard on improving this project, and has just released version 2, which adds a screen and multiple buttons. These additions allow the remote to become a two-way device: you can use it to monitor the status of the GoPro, keeping an eye on things like the battery level and the current video mode.

[Robert] decided to make his own PCB to do this, so it’s also a good intro into the stinky art of PCB etching. He isn’t finished yet, though: he is looking to expand the project further by controlling more features on the camera using the third button on the remote.

Make A Cheap GoPro Remote From An ESP8266

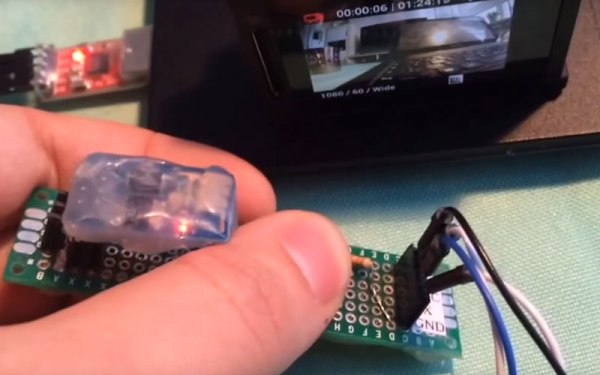
GoPro cameras are getting pretty sophisticated, but they can’t yet read minds: you have to tell them when to start recording. Fortunately, they can be remote controlled very easily over a WiFi connection, and this neat tutorial from [euerdesign] shows how you can use an ESP8266 to build a very cheap GoPro remote. The idea is simple: you press a button connected to the ESP8266, which is programmed with the details of the ad hoc WiFi network that the GoPro creates. It then posts a simple URL request to the GoPro, which starts recording. Total cost? A few bucks for the ESP8266, a button and a few bits of wire.

What the remote does is defined by the URL you set it to request: pretty much all of the features of a GoPro can be controlled this way. If you wanted to get fancy, you could expand this to create a multiple button remote that could do other things, such as change frame rate or start streaming to the interwebs in a situation where you don’t want to risk a smartphone or something equally expensive.

Continue reading “Make A Cheap GoPro Remote From An ESP8266”

Extracting Lightning Strikes From HD Video

Lightning photography is a fine art. It requires a lot of patience, and until recently required some fancy gear. [Saulius Lukse] has always been fascinated by lightning storms. When he was a kid he used to shoot lightning with his dad’s old Zenit camera — It was rather challenging. Now he’s figured out a way to do it using a GoPro.

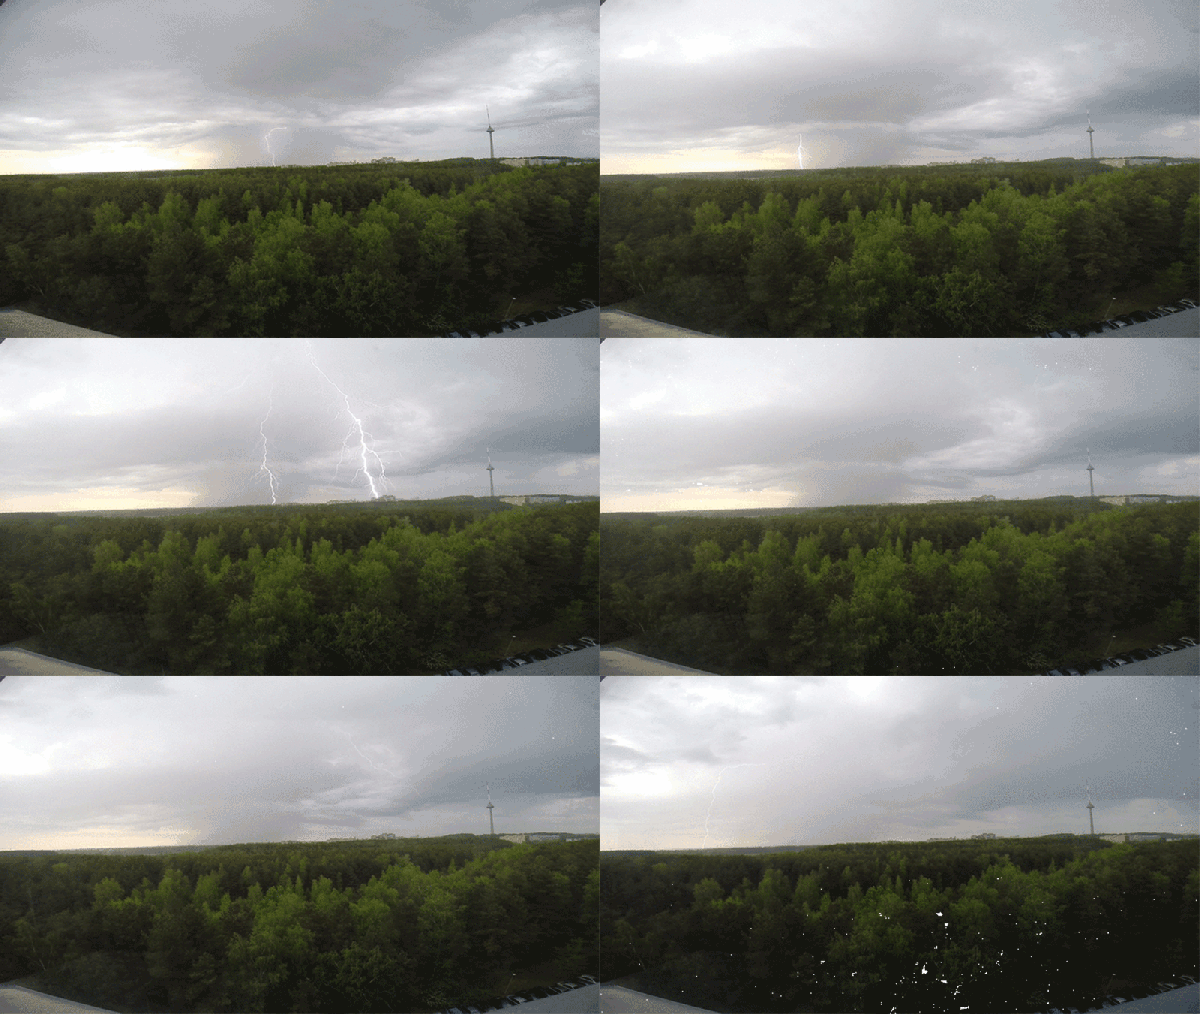
He films at 1080@60, which we admit, isn’t the greatest resolution, but we’re sure the next GoPro will be filming 4K60 next. This means you can just set up your GoPro outside during the storm, and let it do it what it does best — film video. Normally, you’d then have to edit the footage and extract each lightning frame. That could be a lot of work.

[Saulius] wrote a Python script using OpenCV instead. Basically, the OpenCV script spots the lightning and saves motion data to a CSV file by detecting fast changes in the image.

graph of lightning

The result? All the lightning frames plucked out from the footage — and it only took an i7 processor about 8 minutes to analyze 15 minutes of HD footage. Not bad.

Now if you feel like this is still cheating, you could build a fancy automatic trigger for your DSLR instead…

The Raspberry Pi Action Camera

Action cameras like the GoPro, and the Sony Action Cam are invaluable tools for cyclists and anyone else venturing into the great outdoors. These cameras are not really modifiable or usable in any way except for what they were designed for. [Connor] wanted a cheaper, open-source action camera and decided to build one with the Raspberry Pi.

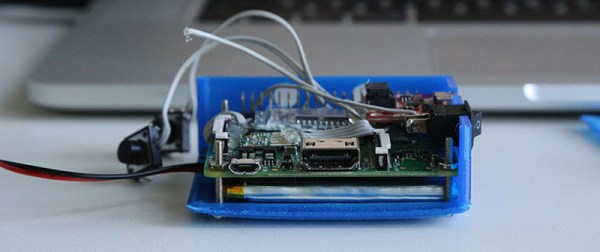
[Connor]’s Pi action cam is built around the Raspberry Pi Model A+ and the Pi camera. This isn’t a complete solution, so [Connor] added a bluetooth module, a 2000 mAh battery, and a LiPo charger.

To keep the Pi Action Cam out of the elements, [Connor] printed an enclosure. It took a few tries, but eventually he was able to mount everything inside a small plastic box with buttons to start and stop recording, a power switch, and a USB micro jack for charging the battery. The software is a script by [Alex Eames], and the few changes necessary to make this script work with the hardware are also documented.

This was the most intensive 3D printing project [Connor] has ever come up with, and judging by the number of prints that don’t work quite right, he put a lot of work into it. Right now, the Pi action cam works, but there’s still a lot of work to turn this little plastic box into a completed project.