Roll Your Own Rotary Encoders

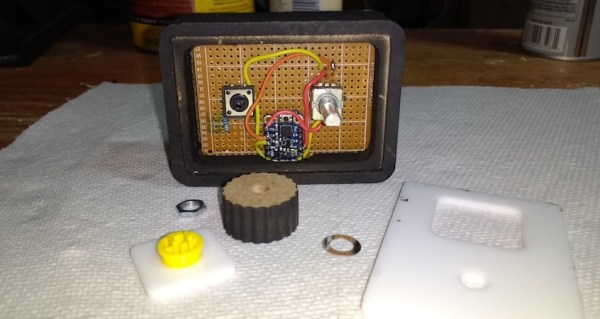
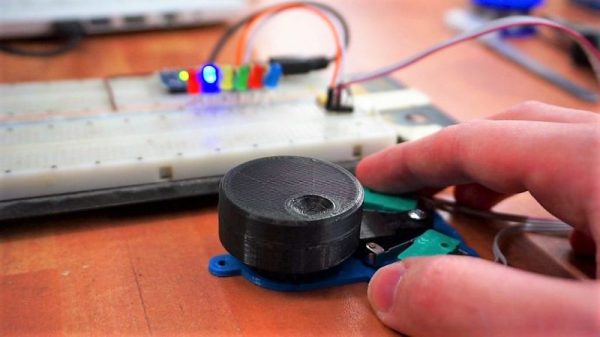
[miroslavus] hasn’t had much luck with rotary encoders. The parts he has tested from the usual sources have all been problematic either mechanically or electrically, resulting in poor performance in his projects. Even attempts to deal with the deficiencies in software didn’t help, so he did what any red-blooded hacker would do — he built his own rotary encoder from microswitches and 3D-printed parts.

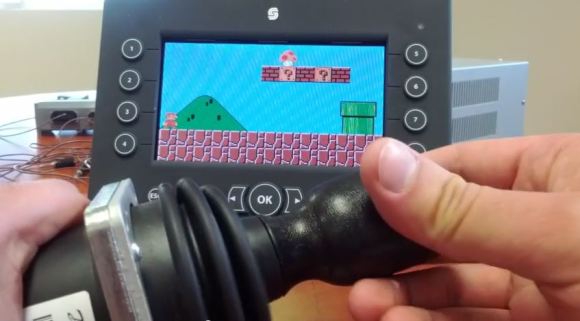
[miroslavus]’s “encoder” isn’t a quadrature encoder in the classic sense. It has two switches and only one of them fires when it turns a given direction, one for clockwise and one for counterclockwise. The knob has a ratchet wheel on the underside that engages with a small trip lever, and carefully located microswitches are actuated repeatedly as the ratchet wheel moves the trip lever. The action is smooth but satisfyingly clicky. Personally, we’d forsake the 3D-printed baseplate in favor of a custom PCB with debouncing circuitry, and perhaps relocate the switches so they’re under the knob for a more compact form factor. That and the addition of another switch on the shaft’s axis to register knob pushes, and you’ve got a perfectly respectable input device for navigating menus.

We think this is great, but perhaps your project really needs a legitimate rotary encoder. In that case, you’ll want to catch up on basics like Gray codes.

Continue reading “Roll Your Own Rotary Encoders”

Control The Volume

For anyone who has owned a boombox or an old(er) cassette player, the digital age volume controls feel incredibly awkward. Keep pressing buttons to get the volume just right can get tiresome real quick. The volume knob just makes sense and in a simple project, [Jeremy S Cook] brings us the Custom Computer Volume Control Knob.

The build employs an Adafruit Trinket board coupled with a rotary encoder and a push button as described by the designers themselves. We reached out to [Jeremy S Cook] to enquire about the build and it turns out his version uses an MDF enclosure as well as an MDF knob. A larger PCB has the encoder and button solder on with the Trinket board connecting to them via multi strand wires. An Acrylic sheet cut to the size serves as the top cover and completes the build.

The button serves as a play/pause button and can come in handy. Since the device enumerates as an HMI device, it should work with almost any OS. It could easily be extended to work with Android Tablets or even iPads. Check out the video below for a demonstration and if you like the idea of custom input devices, check out this DIY shortcut Keyboard. Continue reading “Control The Volume”

Modular Portable Conveyor Belt

When teaching Industrial Automation to students, you need to give them access to the things they will encounter in industry. Most subjects can be taught using computer programs or simulators — for example topics covering PLC, DCS, SCADA or HMI. But to teach many other concepts, you  need to have the actual hardware on hand to be able to understand the basics. For example, machine vision, conveyor belts, motor speed control, safety and interlock systems, sensors and peripherals all interface with the mentioned control systems and can be better understood by having hardware to play with. The team at [Absolutelyautomation] have published several projects that aim to help with this. One of these is the DIY conveyor belt with a motor speed control and display.

This is more of an initial, proof of concept project, and there is a lot of room for improvement. The build itself is straightforward. All the parts are standard, off the shelf items — stuff you can find in any store selling 3D printer parts. A few simple tools is all that’s required to put it together. The only tricky part of the build would likely be the conveyor belt itself. [Absolutelyautomation] offers a few suggestions, mentioning old car or truck tyres and elastic resistance bands used for therapy / exercise as options.

If you plan to replicate this, a few changes would be recommended. The 8 mm rollers could do with larger “drums” over them — about an inch or two in diameter. That helps prevent belt slippage and improves tension adjustment. It ought to be easy to 3D print the add-on drums. The belt might also need support plates between the rollers to prevent sag. The speed display needs to be in linear units — feet per minute or meters per minute, rather than motor rpm. And while the electronics includes a RS-485 interface, it would help to add RS-232, RS-422 and Ethernet in the mix.

While this is a simple build, it can form the basis for a series of add-ons and extensions to help students learn more about automation and control systems. Or maybe you want a conveyor belt in your basement, for some reason.

Continue reading “Modular Portable Conveyor Belt”

Simplest Electricity Monitoring Solution Yet

Monitoring your home’s energy use is the best way to get a handle on your utility bills. After all, you can’t manage what you can’t measure! The only problem is that most home energy monitoring systems are cumbersome, complicated, or expensive. At least, until now. [Kevin] has created a new electricity meter based on Particle Photons which should alleviate all of these problems.

The Particle Photon (we get confused on the naming scheme but believe this the new version of what used to be called the Spark Core) is a WiFi-enabled development board. [Kevin] is using two, one to drive the display and one to monitor the electricity usage. This part is simple enough, each watt-hour is accompanied by a pulse of an LED on the meter which is picked up by a TLS257 light-to-voltage sensor. The display is a Nextion TFT HMI (touch screen) which is pretty well suited for this application. The data is corralled by emoncms, part of the OpenEnergyMonitor platform, which ties everything together.

For a project that has been done more than a few times, this one does a great job of keeping the price down while maintaining a great aesthetic. Make sure to check out the video below to see it in action.

Continue reading “Simplest Electricity Monitoring Solution Yet”

Custom PLCs For Automation Industries

For many years, factories have used PLCs for automated control over industrial equipment. These systems are usually expensive, proprietary, and generally incapable of being reprogrammed. [Oliver], an engineering student in Ireland created a system for factories to develop their own application-specific PLCs as a final project for Automation Engineering.

In-house PLC creation has many benefits for manufacturers, not the least of which is the opportunity for customization. Making your own PLCs also means no licensing fees and total control over equipment automation. This system is a complete setup including an HMI interface with touchscreen input and a SCADA system for remotely controlling various pieces equipment of equipment from a laptop.

[Oliver] built a metal frame out of industrial-grade strut channel to house an XP machine, two monitors, and the beautifully breadboarded PLC design station. It’s based around a PIC16F887 and includes rugged features expected of a system that never goes into sleep mode, like eight channels of opto-isolation. [Oliver] also developed an environment for engineers to easily program their custom PLCs through a simple HMI interface and ladder logic.

Super Mario On A Human-Machine-Interface!

super mario

Getting Super Mario to work on your TI-83 calculator is almost a rite of passage for young geeks, so we really liked this project where [Chad Boughton] managed to get it running on a PLC’s HMI screen instead!

He’s using a Danfoss DP600LX microcontroller with an HMI display along with a CAN bus joystick. This kind of equipment is typically used to control hydraulic systems, as well as display sensor data — [Chad] was curious to see if he could do animation with it as well — it looks like he’s succeeded! The funny thing is we’ve seen those “joysticks” before and it’s cool to see them used for something like this — like [Chad] said, they’re normally used for actuating hydraulic and pneumatic cylinders.

Stick around after the break to see Mario eat some mushrooms.

Continue reading “Super Mario On A Human-Machine-Interface!”