IBM Home Director: Home Automation In 1996

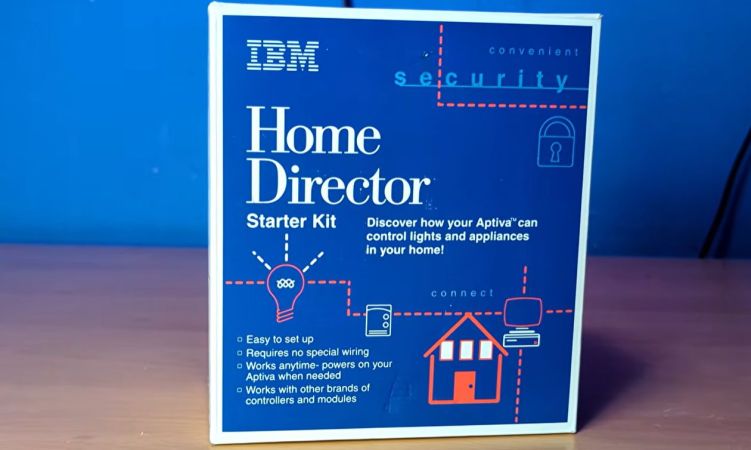
Back in the 1990s IBM had a pretty sizeable presence in the PC market, including its rather spiffy Aptiva series of PCs. Naturally their PCs had to feature heavily in another consumer-related thing that was popular in the 1990s, being smart home automation in the form of IBM Home Director. Recently [Ionic1k] took a look at this blast from the past, starting with one of the original IBM commercials.

At its core it used the same X10 protocol that similar solutions from RadioShack and others used, with many modules and packages you could get to use with it. You could also get a more bespoke installation performed at your home to move beyond mere X10, which some people are still finding when they’re buying a house.

Since this uses powerline communication, it required no wires to be run, just the requisite modules to be plugged into a power outlet, with the video demonstrating the basic setup and installation. The PC itself is plugged into the control module via the serial port, from which the Home Director control software can be used to create a configuration and control the state of connected modules.

Although X10 has the same issues as any kind of powerline communication, overall it seems like a very nice system, with a wide range of modules and absolutely easy to set up even for a casual Windows user.

Continue reading “IBM Home Director: Home Automation In 1996”

Reverse Engineering And Self-Hosting The OBI Smart Energy Tracker

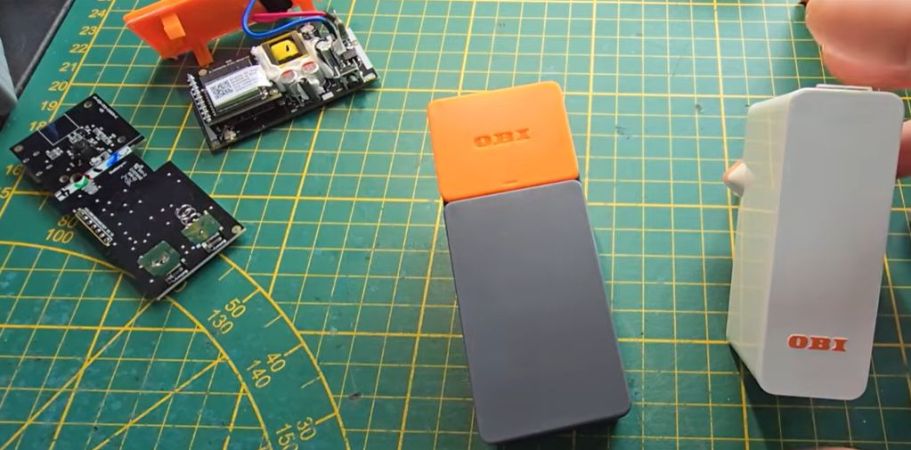
Sold by German DIY store OBI, the OBI Energy Tracker is a €15 set of two devices, one of which you essentially stick on top of your existing electricity meter. This then allows for electricity usage to be measured and tracked, with the data sent to the second, gateway device. This latter cloud-bound device is linked to an OBI account via the heyOBI app. This correspondingly called for the gateway device to be reverse-engineered and freed from its cloud-based shackles, a task that [Aaron Christophel] happily took upon himself.

The whole process is also covered in two videos, with the first providing all the essentials on reprovisioning the original firmware for a local MQTT server in English, while the second, German-language video focuses on custom firmware for the ESP32-C3 inside of the gateway device.

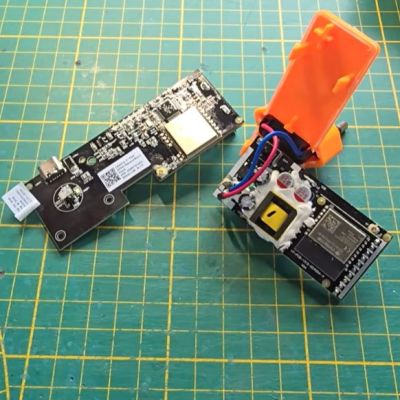
Inside the reader device is a Cortex-M0+-based BAT32G135 MCU that communicates with the meter via its IR protocol. This is then communicated via 868 MHz LoRa to the gateway device that will be placed somewhere within Wi-Fi reach by the user. Inside this latter device is as mentioned the ESP32-C3, which by default runs firmware that communicates via secure MQTT with an AWS cloud instance for the typical cloud-based shenanigans.

The aforementioned reprovisioning option doesn’t require firmware flashing, just a handful of steps to follow. This involves fetching the 32-bit TEA key, generating your own PKI, running your own MQTTS-capable broker and having the provided Python script handle the rest from there.

Flashing custom firmware is the other option, with straightforward UART/JTAG reflashing sadly disabled by the manufacturer. With the effort required here you could perhaps argue that simply connecting the reader device to a custom gateway device might be a lot easier, especially if you already have a LoRa transceiver and associated hardware.

Continue reading “Reverse Engineering And Self-Hosting The OBI Smart Energy Tracker”

Home Automation: Simple Vs Easy

We’ve been talking a bunch of home automation on the Podcast lately, and this week, in the Mailbag segment, a reader asked us about our setups. Neither Kristina nor I are poster children for the home automation movement: she has absolutely no smart anything because she didn’t want her data up in “the cloud”, and I have an entirely local system that’s really nothing more than a bunch of ad-hoc scripts that talk to an MQTT broker, everything fully DIY but held together with metaphorical duct tape. Neither of us are doing it right, but we’re doing it wrong in interestingly different ways.

Kristina thought, probably because of the range of commercial devices out there that tie you into using their remote data storage services, that giving up control of her data was necessary to use it. And it might be, if you insist that setting up the system be as easy as possible. But the tradeoff for this ease is a drastic reduction in simplicity. You shouldn’t need a remote server in some foreign country to turn your lights on and off. Adding “the cloud” into the mix brings a lot of complexity, mostly in the form of servers that have to be paid for somehow by whatever company is providing the service. It needs to be secure. You might even have to create accounts, remember passwords, and manage that whole deal. Sure, that’s easy enough, but it’s a lot of moving parts, and you can’t blame her for rejecting that complexity.

My system is hosted on a now-ancient OrangePi in the corner, and the network in question is an old WiFi router that it sits on. Nothing needs to leave my four walls, but actually some of it does – I bridge some of the MQTT topics out to an external server for my own amusement. There is no protocol, and no real “system” frankly. Each device in the network has its own topic, and I’m responsible for knowing what it means. The thermometer in the basement has an ESP8266 that transmits on the home/basement/temperature topic, and it puts out its temperature in degrees Celsius. It was the simplest system I could think of, but I have to write whatever software I want to log, display, or act on the data. Of course, that’s simple if you can write some four-liner scripts on the OrangePi broker, but it’s not easy enough that my wife wants to hack on it.

So if the full-buy-in commercial systems are easy but overly complex, and my DIY network is transparently simple but requires a level of hands-on that isn’t easy for “normies”, is there a middle ground? I know half of you are already screaming Home Assistant or Domoticz, and you’re also thinking of which client device libraries you like the most for all your DIY applications: ESPHome vs Tasmota, for instance. And you’re all right!

We are living the in the golden age of the home automation projects. Open-source software and firmware, combined with an abundance of online tutorials and worked examples, have made huge strides toward bridging the gap between simplicity and ease of use. You can set up a hub for everything on a single-board computer, upload the software of your choice, and you don’t need the complexity or loss-of-support liability of a cloud provider. At the same time, setup is easy enough if you’re willing to roll up your sleeves a little bit, and when it’s not, chances are good that someone else has already figured it out for you. These days, interoperability with popular commercial products is shockingly easy to boot.

I need to spend some time and rationalize my system: given the state of the art, it’s simply too simple, and taking a step into an open-source solution would make it easier to use for the rest of the family, without overly complexifying things, adding sketchy dependencies, or losing our data sovereignty. I haven’t finished exploring my options yet, but from what I can see, the community has converged on some goldilocks setups: not too simple or too easy, but rather just right. Thanks, y’all!

Connecting Your Car To Home Assistant

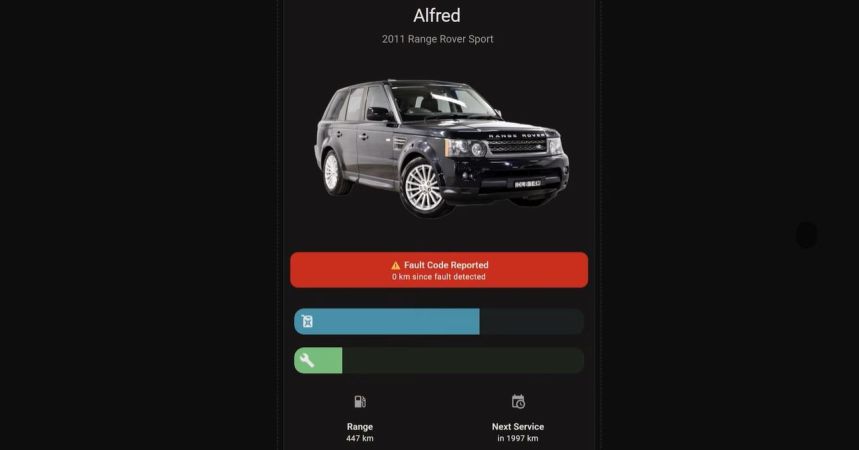
With how much time many of us spend in our cars, it makes perfect sense to consider them a second home. Yet even if that’s not the case, there are still good reasons to connect a car to one’s smart home solution like Home Assistant, such as to keep track of certain parameters for easy monitoring and reminders. This is what [The Stock Pot] channel recently demonstrated using a widget that connects to the OBD-II port inside the car, as not every car comes with its own app yet.

The used dongle is the ESP32-S3-based WiCAN from Australian company MeatPi. This device runs the open source WiCAN firmware. After plugging the dongle into the OBD-II port of the car, the device powers on and can be configured via Wi-Fi like any other smart device these days. After that it’s just another Wi-Fi device on the network.

Since each car’s ECU will represent data differently, you need a car-specific configuration, which can take some tweaking. The idea of integrating with Home Assistant is directly supported by MeatPi, with a handy documentation page. Of course [The Stock Pot] shared their configuration if you want to feel inspired. Among the parameters monitored you get things like fuel level, days to service and coolant temperature.

Although you could make the argument that it mostly saves you from having to waddle over to the car to check the data there, being able to remotely access the OBD-II port of a car does seem rather practical even outside of home automation concepts, such as gathering performance statistics and early failure warnings, especially for aspects like tire pressure and unhappy engine or BEV battery conditions that can quickly go from an inconvenience to very expensive.

Continue reading “Connecting Your Car To Home Assistant”

Why The Smart Home Bubble Popped

Circa 2015 or so, it seemed like you couldn’t move a finger without being bombarded with ads and articles about ‘smart homes’ and the ‘internet of things’ — all of which would make our lives so much easier and more automated. Fast-forward a decade and this dream has mostly evaporated along with many of the players in the space. Why this happened is the topic of a recent video by [Caya].

An interesting bit of context that the video starts off with is that home automation really kicked off back in 1975, when the X10 protocol and related devices using power lines for signaling began being sold. These fully integrated solutions generally worked reasonably well, but what all changed when the IoT and ‘smart home’ craze kicked off and brought with it an explosion of new standards.

Over the past decade we have seen the concept of a ‘smart home’ collapse into a nightmare of abandoned IoT devices, subscription services, forced ads, privacy violations, and an increasingly more congested 2.4 GHz spectrum that everything from WiFi and Zigbee to Bluetooth and others ended up competing for, with a corresponding collapse in reliability of data transmissions.

As raised in the video, a big issue is that of the financial viability of running the remote services for a smart home solution, even if this is the part that should make it as plug-and-play as a 1990s-era smart home solution. To the average user setting up their own locally hosted smart home solution isn’t really a straightforward option.

Although at the end [Caya] demonstrates using Home Assistant (HA) as a locally hosted alternative, this is still not something that a non-techie will be able to set up or maintain. Even if you shell out a cool two-hundred clams for the Home Assistant Green plug-and-play hardware solution, the average person will be lost the second any of the prescribed steps in provided documentation do not work. Woe to whoever is the person who is ‘good with computers’ in those cases.

Ultimately another problem with ‘smart homes’ is that they’re really not that smart, as you can definitely set up all kinds of rules in HA and similar solutions, but this is more painstaking manual automation with all the excitement of programming PID controllers. Having an actual intelligence behind the system that could react to what’s happening would make it a far easier sell, yet which is where all the ‘smart assistants’ like Alexa keep falling flat.

Currently [Caya] has set up his HA-based lighting configuration to be used by OpenClaw ‘agentic AI’, as a way to add some actual ‘smarts’, but it’s telling that he hasn’t integrated the smart lock of his apartment into the system yet. Nobody wants to have the OpenClaw agent tell you that it ‘cannot open the front door’ for you, after all.

Continue reading “Why The Smart Home Bubble Popped”

Adding Capabilities To Inexpensive Solar Modules

Solar power has gotten cheap enough that putting up panels is among the cheapest ways of providing energy. This isn’t just the case for bulk electricity on a power grid, either; even small devices are easier and cheaper to power with solar than ever before. For example, landscape lighting which once relied on 12V or 24V DC wires all over one’s yard with a transformer and power supply hidden somewhere have partially been converted to simpler individual solar-powered lights now. These small devices can also be given additional capabilities as [Mauro] demonstrates.

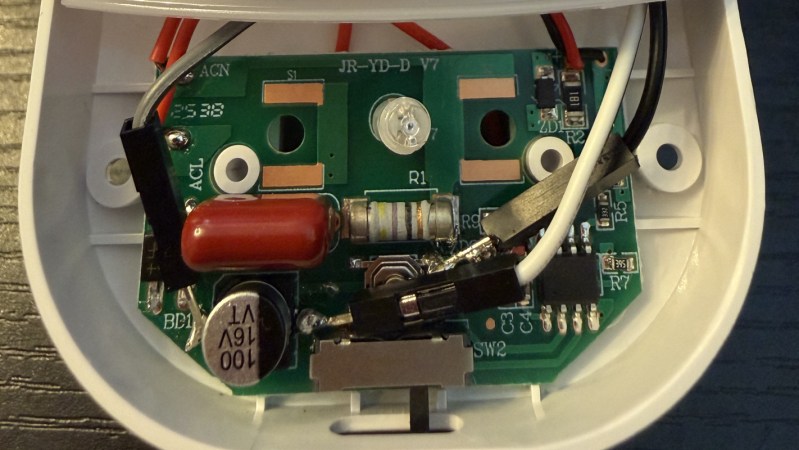
In this case, [Mauro]’s goal was to add on-demand lighting to a solar-powered light which was otherwise motion-activated only. To do this, they added a NRF24L01+ radio inside the light’s housing paired with an STM32 microcontroller. This secondary system is largely separated from the existing control circuitry with the exception of being able to switch the lights and receiving its power from the same solar panel. [Mauro] also created a small library to help with communicating with these new modules, whether that’s using a home automation system like Home Assistant or some other method.

Although adding in a few capabilities to inexpensive solar lighting might seem simple on the surface, a project like this is a gateway to adding in all kinds of interesting features to things with built-in solar panels and lots of free space in their cases. The best example here is the addition of a Meshtastic node to one of these lights, making it convenient and stealthy, but we could also see adding in other remote hardware to a landscape lighting module like a gate sensor or a plant health monitoring system.

RS-485 Sprinkler system

RS-485 Sprinkler Control: Scaling Irrigation Across The Farm

Building your own sprinkler system controller isn’t that difficult on the face of it, but what happens when your system starts to grow, adding more distant areas? To tackle this, [Vinnie] leveraged the tried-and-true RS-485 differential pairs to communicate reliably with ever-more-spread-out valves on his farm’s irrigation system.

The system uses a Raspberry Pi to control when each valve turns on and for how long. It does this via a custom RS-485 valve master board, whose code and design files are on GitHub. The master board communicates with the Pi over I2C and issues RS-485 commands while controlling the 12V line to the valves. Toggling the 12V supply is a smart move it lets [Vinnie] save power by not keeping the valves energized when idle.

At the valves themselves lives a valve node board (also on the GitHub repo). Each node has a unique address so it knows when its name is called to open or close a valve. The valves are latching solenoids, ideal because they don’t require constant current during the watering cycle. The Valve Nodes also support their own protocol to report state, firmware version, and allow in-situ configuration.

Be sure to head over to [Vinnie]’s project page and check out all the work that went into this great DIY irrigation control system, along with the thoughtful boards and tools he made to help others set it up. This is a welcome addition to the sprinkler-related projects we’ve seen.