Amazon Echo Becomes A Better Home Automation Appliance

There’s a bright future ahead of us, filled with intelligent computerized assistants that will listen to everything we say and do our bidding. It’ll be like HAL from 2001: A Space Odyssey, but without unverified mission-critical software and a bunch of killing. Until then, we have a few Amazon Echo hacks that tease out a reasonably capable home automation system without a proper API.

This build was inspired by an earlier project that polled the to do list looking for key phrases. Saying, “Alexa, to do, lights on” would turn on an Internet-connected light bulb. Saying, “Alexa, to do, call home” would call a phone number set up with the ‘home’ keyword.

[Glen] has improved that earlier setup somewhat, mostly by getting rid of the requirement to say, ‘to do.’ The Git for the project still shows it’s exploiting the Amazon to do list, but this is a much cleaner build that should end up having a lot more possibilities.

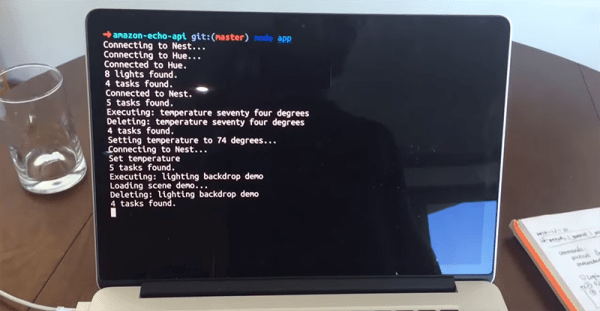
So far, [Glen], or rather, Alexa, can control the temperature of the house through a Nest thermostat, the lighting of a room with a Phillips Hue light bulb, and other random tasks like playing an audio file through the speakers. Not bad, and something that really demonstrates the potential of a smart, connected home.

Home Automation With The Amazon Echo

The Amazon Echo is the answer to Apple’s Siri, Microsoft’s Cortana, and [Orwell]’s Telescreen – a device that sits in your home, listens to everything you say, and will gladly oblige if you want to buy something on Amazon. Brilliant. Despite being a pretty cheap device, there’s not really a whole lot it can do; sure, Echo, or more accurately Alexa, the personality in the Echo, can tell you the weather, queue up a playlist, or read a Wikipedia entry, but there’s a definite lack of imagination when it comes to the Echo.

Now, thanks to some clever API hacks, you can do far more with the Echo. [Noel] is using the Echo to turn lights in his house on and off, ring his home phone, and basically everything else you can do with some wire and a bit of code.

[Noel] got his idea from [Owen Piette] who recently investigated the Echo API. It’s all unpublished by Amazon, but it is possible to poll the todo list for random key phrases. By polling this API and getting new results, it’s pretty easy to set up some logic to do arbitrary actions.

Right now [Noel] can turn a light on and off and call his phone, but the sky really is the limit here. If you have a web-enabled thermostat, Alexa can turn the heat on or off. Want to text yourself something? That’s easy too. Anything that can be put in a todo list can be done with the Echo, the only obstacle is doing all the programming and electronics.

Clap On! A Breadboard

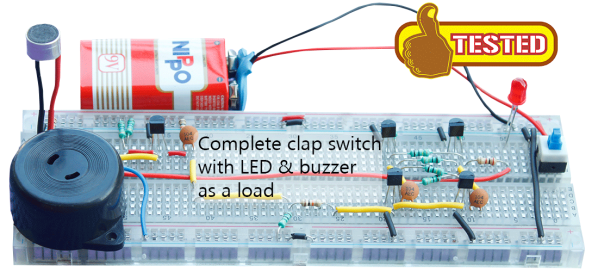
The Clapper™ is a miracle of the 1980s, turning lights and TVs on and off with the simple clap of the hands, and engraving itself into the collective human unconsciousness with a little jingle that implores – nay, commands – you to Clap On! and Clap Off! [Rutuvij] and [Ayush] bought a clap switch kit, but like so many kits, this one was impossible to understand; building the circuit was out of the question, let alone understanding the circuit. To help [Rutuvij] and [Ayush] out, [Rafale] made his own version of the circuit, and figured out a way to explain how the circuit works.

While not the most important component, the most obvious component inside a Clapper is a microphone. [Rafale] is using a small electret microphone connected to an amplifier block, in this case a single transistor.

The signal from the microphone is then sent to the part of the circuit that will turn a load on and off. For this, a bistable multivibrator was used, or as it’s called in the world of digital logic and Minecraft circuits, an S-R flip-flop. This flip-flop needs two inputs; one to store the value and another to erase the stored value. For that, it’s two more transistors. The first time the circuit senses a clap, it stores the value in the flip-flop. The next time a clap is sensed, the circuit is reset.

Output is as simple as a LED and a buzzer, but once you have that, connecting a relay is a piece of cake. That’s the complete circuit of a clapper using five transistors, something that just can’t be done with other builds centered around a 555 timer chip.

Home Automation Setup Keeps You Informed

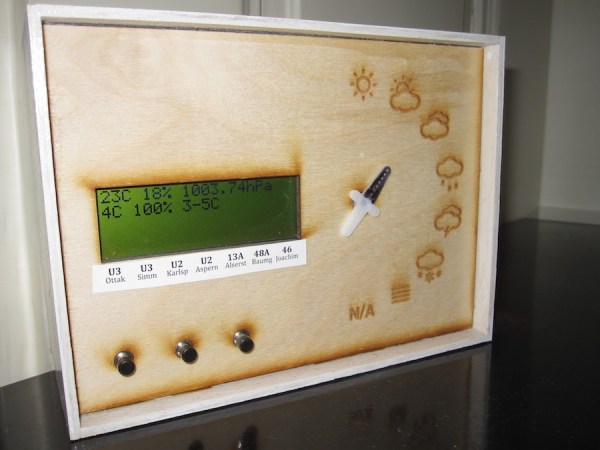
[johannes] wrote in to tell us about his latest project, a home automation setup he named Botman. While he calls it a home automation system, controlling lights and home appliances (which it does wirelessly on 433MHz) is just a small part of its functionality. The front panel of Botman includes a servo which points to laser-etched icons of the current weather. It also has a display which shows indoor and outdoor weather conditions along with the status of public transportation around [johannes]’s house.

Botman is built around an Arduino with an Ethernet shield. The Arduino has very little memory, so [johannes] used the Google Apps engine as a buffer between his Arduino and the JSON APIs of his data sources. This significantly reduces the amount of data the Arduino has to keep in memory and parse.

[johannes] also wrote an Android app that communicates with Botman. The app has buttons for controlling lights in his house and duplicates all the information shown on the front panel. [johannes] also built some logging features into Botman. The temperature readings and other information are uploaded from the Arduino to a Google Docs spreadsheet where he can view and graph them from anywhere. Check out the video after the break to see Botman in action.

Continue reading “Home Automation Setup Keeps You Informed”

Five Dollar RF Controlled Light Sockets

This is tens of thousands of dollars worth of market research I’m about to spill, so buckle up. I have a spreadsheet filled with hundreds of projects and products that are solutions to ‘home automation’ according to their creators. The only common theme? Relays. Home automation is just Internet connected relays tied to mains. You’re welcome.

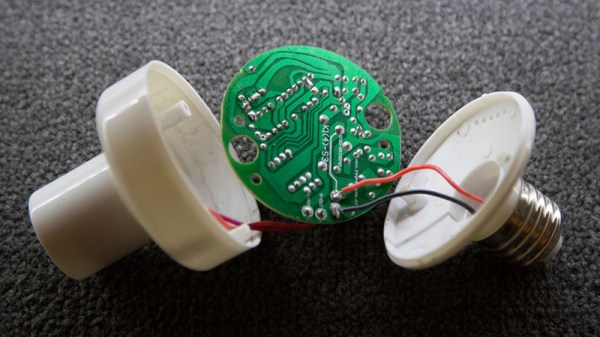
[Todd] over at Fabricate.io found an interesting home automation appliance on Amazon; a four-pack of remote control light sockets for $20, or what we would call a microcontroller, an RF receiver, and a relay. These lamp sockets are remote-controlled, but each package is limited to four channels. Terrible if you’re trying to outfit a home, but a wonderful exploration into the world of reverse engineering.

After cracking one of these sockets open, [Todd] found the usual suspects and a tiny little 8-pin DIP EEPROM. This chip stores a few thousand bits, several of which are tied to the remote control. After dumping the contents of the EEPROM from the entire four-pack of light sockets, [Todd] noticed only one specific value changed. Obviously, this was the channel tied to the remote. No CRC or ‘nothin. It doesn’t get easier than this.

With the new-found knowledge of what each lamp socket was looking for, [Todd] set out to clone the transmitter. Tearing this device apart, he found a chip with HS1527 stamped on it. A quick Googling revealed this to be an encoder transmitter, with the datasheet showing an output format of a 20-bit code and four data bits. This was a four-channel transmitter, right? That’s where you put each channel. The 20-bit code was interesting but not surprising; you don’t want one remote being able to turn of every other 4-pack of lamp sockets.

With all the relevant documentation, [Todd] set out to do the obvious thing – an Arduino transmitter. This was simply an Arduino and a transmitter in the right frequency, loaded up with bit of carefully crafted code. [Todd] also figured out how to expand his setup to more than four lamp sockets – by changing the 20-bit code, he could make his Arduino pretend to be more than one transmitter.

With Arduino-controlled lamp sockets, the world is [Todd]’s oyster. He can add Ethernet, WiFi, Bluetooth LE, and whatever trendy web front end he wants to have a perfect home automation setup. It’s actually a pretty impressive build with some great documentation, and is probably the cheapest way to add Arduino/Internet-enabled relays we’ve ever seen.


Dog Tracker Knows Where The Dirt Is

[Eric] is well on his way to making one of the less pleasant chores of pet ownership a bit easier with his dog tracking system. The dog tracker is actually a small part of [Eric’s] much larger OpenHAB system, which we featured back in July.

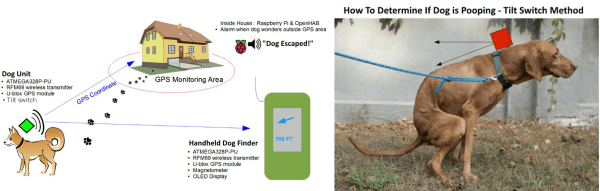
As a dog owner, [Eric] hates searching the yard for his pet’s droppings. He had been planning a system to make this easier, and a local hackerspace event provided just the opportunity to flesh his ideas out. The Dog Tracker’s primary sensor is a GPS. Most dogs remain motionless for a few seconds while they go about their business. [Eric’s] Arduino-frgbased system uses this fact, coupled with a tilt sensor to determine if the family pet has left any presents.

The tracker relays this information to the home base station using a HopeRF RFM69 transceiver. The RFM69 only has about a 900 foot range, so folks with larger properties will probably want to spring for a cellular network based tracking system. Once the droppings have been tracked, OpenHAB has an interface

[Eric] has also covered runaway dogs in his design. If Fido passes a geo-fence, OpenHAB will raise the alarm. A handheld dog tracker with its own RFM69 can be used to chase down dogs on the run. Future plans are to miniaturize the dog tracker such that it will be more comfortable for a dog to wear.

Continue reading “Dog Tracker Knows Where The Dirt Is”

What’s Next On The Raspberry Pi Front

Raspberry Pi founder [Eben Upton] recently sat in an uncomfortable chair in London to discuss all things Pi. Having sold about four million units over the last 2.5 years, he feels the future is bright for his original vision of inspiring and helping kids to learn programming.

[Eben] is quite pleased with the Pi-Top, a B+ based laptop kit that’s pulling in backers left and right while completely unaffiliated with the Pi foundation. The kit includes a 13.3″ HD LCD screen, keyboard, trackpad, and an injection molded case, though you can print your own with the included STL files. Kits start at $249 without a Pi and $285 with a B+ included. Robot and home automation HATs are also available separately or bundled with the Pi-Top kit.

The most exciting news is that the $600,000 spent on DSI connectors for those four million Raspis is about to pay off. [Eben] hopes that an official touchscreen will be available for purchase before the end of 2014 or in early 2015. He showed off a 7″ capacitive touch panel that will attach to a display board stacked on a Pi, effectively turning it into a tablet.

[Eben] said that they will not be making a Model C and instead are working on revision A+. He hopes to make an official announcement in the near future.

Finally, [Eben] discussed the importance of community, which played a large part in the birth and evolution of the Pi. He also spoke of Pi Academy, a sort of professional workshop for teachers in the UK who’ve recently been tasked with teaching computer science as demanded by changes in the mandatory UK school curriculum. He hopes that these 2-day seminars will help educators achieve the high expectations recently laid out for students to achieve by age ten.