A composite of a disassembled and reassembled Model F keyboard

Model F Keyboard Restoration Goes The Extra Mile

The IBM Model F keyboard should need no introduction. Famed for its buckling spring key mechanisms, the Model F is lusted over for its satisfying typing experience and Armageddon-proof build quality. First introduced in 1981, many of these keyboards will now naturally require basic maintenance. However, [Epictronics] recently went a step further and restored a Model F to like-new condition.

Missing keycaps were the least of his worries, as both new and old replacements are relatively easy to come by. [Epictronics] was more concerned about the forty-year-old foam sandwiched tight inside the keyboard, most likely having long since degraded. Apart from being plain gross, the decaying foam has the potential to foul the buckling spring switches. After taking apart the body and removing the ‘disgusting’ foam pad, a replacement was forged from neoprene and a handy-dandy hole punch.

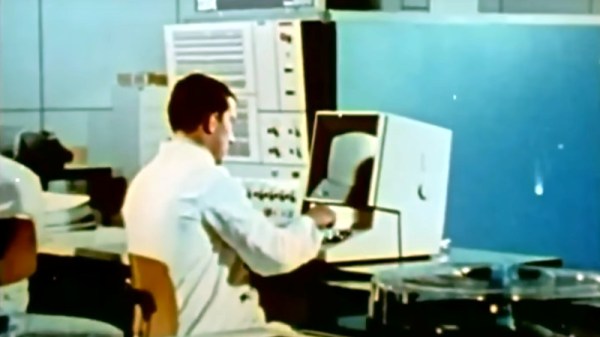
Disassembly of the keyboard case required the gentle touch of a mallet, and reassembly needed similarly inappropriate tools. As demonstrated in this vintage clip from IBM, keyboard assembly was (and still is) performed automatically by robots, driven by an IBM Series/1 minicomputer. These robots were equally impressive for their precision and strength. Without access to IBM’s aptly named ‘closing tool’ and various other robotic helpers, [Epictronics] had to settle for pool noodles and a comically large clamp during reassembly, mixed with sheer determination.

Other neat tricks in the video include applying heat to reform the coiled keyboard cable, and using car polish to clean the case plastics. The latter has the potential to make things worse, so a delicate hand is needed to maintain the textured plastic.

We recently covered another Model F restoration, and it’s exciting to see so many dedicated hackers keeping these keyboards clickety-clacking well into the 21st century.

Continue reading “Model F Keyboard Restoration Goes The Extra Mile”

Some Pleasing Experiments In 8-Bit Video Cards

These days, supply chain factors and high demand have made it incredibly difficult to lay one’s hands on a GPU. However, if you’re into older computers, you might find it hard to source old-school video cards too. Fear not, for [Dave’s Dev Lab] has been cooking up some experiments with a goal of eventually producing a new 8-bit ISA video card from scratch.

The long term goal is to recreate the original design of early IBM hardware, namely, the MDA and CGA video cards of decades past. The experiments center around the venerable Motorola 6845 which was widely used in computers in the 1980s. However, [Dave] intends to make them suitable for outputting to modern screens using typical VGA and DVI outputs, as well as those expected by modern TFT LCDs.

Thus far, [Dave] has achieved successful VGA output in a 40×35 text mode. With an 8×16 font, and the display running at 640×480 resolution at 60 Hz, everything hums along nicely. Similar experiments with a modern 480×272 LCD display have also worked well.

There’s a long way to go before [Dave’s] hardware is playing Commander Keen, but it’s great to see such effort being put into the platform. It could yet serve as a great upgrade for those wishing to use their vintage IBM metal without having to source a tired old CGA monitor.

We’ve seen similar work before too, with the Graphics Gremlin from [Tube Time] achieving a similar task. If you’ve been brewing up your own ISA hardware at home, do drop us a line.

Logic Chip Teardown From Early 1990s IBM ES/9000 Mainframe

The 1980s and early 1990s were a bit of an odd time for semiconductor technology, with the various transistor technologies that had been used over the decades slowly making way for CMOS technology. The 1991-vintage IBM ES/9000 mainframe was one of the last systems to be built around bipolar transistor technology, with [Ken Shirriff] tearing into one of the processor modules (TCM) that made up one of these mainframes.

A Thermal Conduction Module from an IBM ES/9000 mainframe.

Five of these Thermal Conduction Modules (127.5 mm a side) made up the processor in these old mainframes. Most of note are the use of the aforementioned bipolar transistors and the use of DCS-based (differential current switch) logic. With the already power-hungry bipolar transistors driven to their limit in the ES/9000, and the use of rather massive DCS gates, each TCM was not only fed many amperes of electricity, but also capable of dissipating up to 600 Watts of power.

Each TCM didn’t contain a single large die of bipolar transistors either, but instead many smaller dies were bonded on a specially prepared ceramic layer in which the wiring was added through a very precise process. While an absolute marvel of engineering, the ES/9000 was essentially a flop, and by 1997 IBM too would move fully to CMOS transistor technology.

Over the years we’ve featured a lot of [Ken]’s work, perhaps you’d like to know more about his techniques.

Retrotechtacular: Design For Assembly, 1980s-Style

To get its engineers thinking about design for assembly back in the 1980s, Westinghouse made a video about a product optimized for assembly: the IBM Proprinter. The technology may be dated, but the film presents a great look at how companies designed not only for manufacturing, but also for ease of assembly.

It’s not clear whether Westinghouse and IBM collaborated on the project, but given the inside knowledge of the dot-matrix printer’s assembly, it seems like they did. The first few minutes are occupied by an unidentified Westinghouse executive talking about design for assembly in general terms, and how it impacts the bottom line. Skip ahead to 3:41 if talking suits aren’t your thing.

Once the engineer gets going on the printer, though, things get really interesting. The printer’s guts are laid out before him, ready to be assembled. What’s notably absent from the table are tools — the Proprinter was so well designed that the only tool needed is a pair of human hands. And they don’t have to be particularly dexterous hands, either — the design favors motions that are straight down, letting gravity assist the assembly process and preventing assemblers from the need to contort their bodies. Almost everything is held in place by compliant mechanisms built into the plastic parts. There are a few gems in the film, like the plastic lead screw that drives the printhead, obviating the need to string a fussy timing belt, or the unique roller that twists to lock onto a long shaft, rather than having to be pushed to its center.

We found this film which we’ve placed below the break to be very instructive, and the fact that a device as complex as a printer can be assembled in just a few minutes without picking up a single tool is pretty illustrative of the power of designing for assembly. Slick designs that can’t be manufactured at scale are all too common in this age of powerful design tools and desktop manufacturing, so these lessons from the past might be worth relearning.

Continue reading “Retrotechtacular: Design For Assembly, 1980s-Style”

Booting A PC From Vinyl For A Warmer, Richer OS

If you’ve scrolled through the list of boot options offered on any PC’s BIOS, it reads like a history of storage technology. Up top we have the options to boot from disk, often a solid-state drive, then USB disk, optical drive, removable media, and down the bottom there’s usually an option to boot from the network. Practically no BIOS, however, has an option to boot a PC from a vinyl record — at least until now.

Clearly a project from the “Because why not?” school of hacking, [Jozef Bogin] came up with the twist to the normal booting process for an IBM-PC. As in the IBM-PC — a model 5150, with the putty-colored case, dual 5-1/4″ floppies, and one of those amazing monochrome displays with the green slow-decay phosphors. To pull off the trick, [Jozef] leverages the rarely used and little known cassette tape interface that PCs had back in the early days. This required building a new bootloader and burning it to ROM to make the PC listen to audio signals with its 8255 programmable peripheral interface chip.

Once the PC had the right bootloader, a 64k FreeDOS bootable disk image was recorded on vinyl. [Jozef] provides infuriatingly little detail about the process other than to mention that the audio was sent directly to the vinyl lathe; we’d have loved to learn more about that. Nonetheless, the resulting 10″ record, played back at 45 RPM with some equalization tweaks to adapt for the RIAA equalization curve of the preamp, boots the PC into FreeDOS just fine, probably in no more time than it would have taken to boot from floppy.

It’s may not be the first time we’ve seen software on vinyl, but it’s still a pretty cool hack. Want to try it yourself but lack a record-cutting lathe? Maybe laser-cutting your boot disc will work.

Continue reading “Booting A PC From Vinyl For A Warmer, Richer OS”

Bringing An IBM Model F Into 2020

We know that the Hackaday family includes many enthusiasts for quality keyboards, and thus mention of the fabled ‘boards of yore such as the IBM Model F is sure to set a few pulses racing. Few of us are as lucky as [Brennon], who received the familial IBM PC-XT complete with its sought-after keyboard.

This Model F has a manufacture date in March 1983, and as a testament to its sturdy design was still in one piece with working electronics. It was however in an extremely grimy condition that necessitated a teardown and deep clean. Thus we are lucky enough to get a peek inside, and see just how much heavy engineering went into the construction of an IBM keyboard before the days of the feather-light membrane devices that so many of us use today. There follows a tale of deep cleaning, with a Dremel and brush, and then a liberal application of Goo Gone. The keycaps had a long bath in soapy water to remove the grime, and we’re advised to more thoroughly dry them should we ever try this as some remaining water deep inside them caused corrosion on some of the springs.

The PC-XT interface is now so ancient as to have very little readily available in the way of adapters, so at first a PS/2 adapter was used along with a USB to PS/2 converter. Finally though a dedicated PC-XT to USB converter was procured, allowing easy typing on a modern computer.

This isn’t our first look at the Model F, but if you can’t afford a mechanical keyboard don’t worry. Simply download a piece of software that emulates the sound of one.

Hackaday Links Column Banner

Hackaday Links: October 11, 2020

If you’re interested in SDR and digital signal processing but don’t know where to start, you’re in luck. Ben Hillburn, president of the GNU Radio Project, recently tweeted about an online curriculum for learning SDR and DSP using Python. The course was developed by Dr. Mark Lichtman, who was a lead on GNU Radio, and from the look of it, this is the place to go to learn about putting SDRs to use doing cool things. The course is chock full of animations that make the concepts clear, and explain what all the equations mean in a way that’s sure to appeal to practical learners.

It’s not much of a secret that the Hackaday community loves clocks. We build clocks out of everything and anything, and any unique way of telling time is rightly applauded and celebrated on our pages. But does the clock motif make a good basis for a video game? Perhaps not, but that didn’t stop Clock Simulator from becoming a thing. To “play” Clock Simulator, you advance the hands of an on-screen clock by pressing a button once per second. Now, thanks to Michael Dwyer, you don’t even have to do that one simple thing. He developed a hardware cheat for Clock Simulator that takes the 1PPS output from a GPS module and wires it into a mouse. The pulse stream clicks the mouse once per second with atomic precision, rendering the player irrelevant and making the whole thing even more pointless. Or perhaps that is the point.

Maybe we were a little hard on Clock Simulator, though — we can see how it would help achieve a Zen-like state with its requirement for steady rhythm, at least when not cheating. Another source of Zen for some is watching precision machining, and more precise, the better. We ran into this mesmerizing video of a CNC micro-coil winder and found it fascinating to watch, despite the vertical format. The winder is built from a CNC lathe, to the carriage of which a wire dispenser and tensioning attachment have been added. The wire is hair-fine and passes through a ruby nozzle with a 0.6 mm bore, and LinuxCNC controls the tiny back and forth motion of the wire as it winds onto the form. We don’t know what the coil will be used for, but we respect the precision of winding something smaller than a matchhead.

Dave Jones over at EEVblog posted a teardown video this week that goes to a place few of us have ever seen: inside a processor module for an IBM System/390 server. These servers earned the name “Big Iron” for a reason, as everything about them was engineered to perform. The processor module Dave found in his mailbag was worth $250,000 in 1991, and from the look of it was worth every penny. From the 64-layer ceramic substrate supporting up to 121 individual dies to the stout oil-filled aluminum enclosure, everything about this module is impressive. We were particularly intrigued by the spring-loaded copper pistons used to transfer heat away from each die; the 2,772 pins on the other side were pretty neat too.

Here’s an interesting question: what happens if an earthquake occurs in the middle of a 3D printing run? It’s probably not something you’ve given much thought, but it’s something that regular reader Marius Taciuc experienced recently. As he relates, the magnitude 6.7 quake that struck near Kainatu in Papua New Guinea (later adjusted to a 6.3 magnitude) resulted in a solid 15 seconds of shaking at his location, where he was printing a part on his modified Mendel/Prusa i2. The shaking showed up clearly in the part as the machine started swaying with the room. It’s probably not a practical way to make a seismograph, but it’s still an interesting artifact.