Illustrated Kristina with an IBM Model M keyboard floating between her hands.

Keebin’ With Kristina: The One With The Curvy Centerfold

What do you get when you combine a Raspberry Pi 4B, a Kaypro keyboard, and a 9″ Apple ], you get the coolest AVR development workstation I’ve seen in a while.

A Raspberry Pi-based AVR workstation that uses a Kaypro keyboard and 9" monochrome Apple ][c display.
Image by [John Anderson] via Hackaday.IO
As you may have guessed, I really dig the looks of this thing. The paint job on the display is great, but the stripes on the keyboard and badging on are on another level. Be sure to check out the entire gallery on this one.

About that keyboard — [John] started this project with two incomplete keyboards that each had a couple of broken switches. Since the two keyboards were compliments of each other parts-wise, they made a great pair, and [John] only had to swap out three switches to get it up and clacking.

In order to make it work with the Pi, [John] wrote a user-mode serial driver that uses the uinput kernel module to inject key events to the kernel. But he didn’t stop there.

Although the Pi supports composite video out, the OS doesn’t provide any way to turn off the chroma color signal that’s modulated on top of the basic monochrome NTSC signal, which makes the picture look terrible. To fix that, he wrote a command-line app that sets up the video controller to properly display a monochrome NTSC signal. Happy AVRing on your amazing setup, [John]! Continue reading “Keebin’ With Kristina: The One With The Curvy Centerfold”

Inside An Arcade Joystick

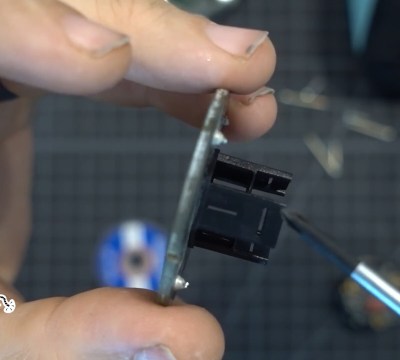
If you ever played an arcade game and wondered what was inside that joystick you were gripping, [Big Clive] can save you some trouble. He picked up a cheap replacement joystick, which, as you might expect, has a bunch of microswitches. However, as you can see in the video below, there are some surprising features that make sense when you think about it.

For one, there are plates you can put on the bottom to limit the joystick’s travel depending on the game. That is, some games only want the stick to move up and down or left and right. The knobs are quite nice, and [Clive] mentions the size and thread of the knob with the idea you could use them in different applications. You can also buy replacement knobs if you don’t want to get the whole assembly.

The mechanics are rugged but straightforward. The circuit board is surprisingly stylish but also simple. Still interesting to see what’s inside one of these, even though the schematic is extremely simple.

If you need an excuse to use one of these, how about an arcade table? If you aren’t a woodworker, grab a 3D printer instead.

Continue reading “Inside An Arcade Joystick”

2024 Tiny Games Contest: Realistic Steering Wheel Joystick In Miniature

For racing games, flight simulators, and a few other simulation-style games, a simple controller just won’t do. You want something that looks and feels closer to the real thing. The major downsides to these more elaborate input methods is that they take up a large amount of space, requiring extra time for setup, and can be quite expensive as well. To solve both of these problems [Rahel zahir Ali] created a miniature steering wheel controller for some of his favorite games.

While there are some commercial offerings of small steering wheels integrated into an otherwise standard video game controller and a few 3D printed homebrew options, nothing really felt like a true substitute. The main design goal with this controller was to maintain the 900-degree rotation of a standard car steering wheel in a smaller size. It uses a 600P/R rotary encoder attached to a knob inside of a printed case, with two spring-loaded levers to act as a throttle and brake, as well as a standard joystick to adjust camera angle and four additional buttons. Everything is wired together with an Arduino Leonardo that sends the inputs along to the computer.

Now he’s ready to play some of his favorite games and includes some gameplay footage using this controller in the video linked below. If you’re racing vehicles other than cars and trucks, though, you might want a different type of controller for your games instead.

Continue reading “2024 Tiny Games Contest: Realistic Steering Wheel Joystick In Miniature”

Screenshot of Microsoft Flight Simulator with the Dune expansion, and in the top right corner, the mod's author is shown using their phone with an attached gamepad for controlling a Dune ornithopter.

Take Control Of MS Flight Sim With Your Smartphone

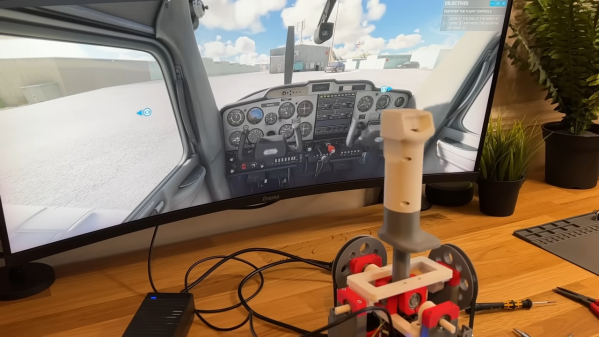
Anyone with more than a passing interest in flight simulators will eventually want to upgrade their experience with a HOTAS (Hands On Throttle-And-Stick) setup that has buttons and switches for controlling your virtual aircraft’s assorted systems, which are well supported by games such as Microsoft Flight Simulator (MSFS). But a traditional HOTAS system can be a bit of an investment, so you might want to thank [Vaibhav Sharma] for the virtualHOTAS project that brings a configurable HOTAS interface to your phone — just in time to try out that Dune expansion for MSFS.

The phone’s orientation sensors are used as a joystick, and on the screen, there’s both sliders and buttons you can use as in-game controls. On the back-end there’s a Python program on the computer which exposes a webserver that the phone connects to, translating sensor and press data without the need for an app. This works wonderfully in MSFS, as [Vaibhav] shows us in the video below. What’s more, if you get tired of the touchscreen-and-accelerometer controls, you can even connect a generic smartphone-designed game controller platform, to have its commands and movements be translated to your PC too!

All the code is open source, and with the way this project operates, it will likely work as a general-purpose interface for other projects of yours. Whether you might want to build an accessibility controller from its codebase, use it for your robot platform, maybe simply repurpose this project for any other game, [Vaibhav]’s creation is yet another reminder that we’re carrying a sensor-packed platform, and it might just help you build a peripheral you didn’t know you needed.

Don’t have a phone handy? Perhaps an Xbox controller could work with just a few 3D printed upgrades, or you could stock up on buttons and build your own joystick from scratch. Oh, and keeping HOTAS principles in mind can be pretty helpful — you might get to redesign the venerable computer mouse, for instance!

Continue reading “Take Control Of MS Flight Sim With Your Smartphone”

Wico Boss Joystick Modded To Use Cherry MX Keyboard Switches

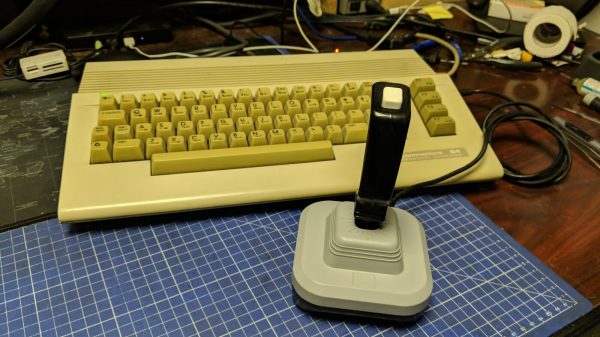
The Wico Boss joystick was one of the better designs of the 1980s. Yours truly had one, and put it through many brutal hours of Amiga-based gameplay. [Drygol] was recently asked if he could alter some of these sticks to be even clickier than stock, and jumped at the change to do some modding.

[Drygol]’s idea was to swap out the original microswitches in the sticks for keyboard switches instead. In particular, the idea was to use the Cherry MX Blues which have a particularly nice click to them. But this wasn’t just going to be a straight swap. Instead, since the hardware was retro and preservation was desired, the modification had to be reversible.

The result was a drop-in 3D-printed bracket that holds four Cherry switches around the joystick’s central bauble. Thus, when the stick is moved, it actuates the keyboard switches with a satisfying click. A 12mm tactile switch was also installed in the base to be activated by the fire button. Then, it was a simple matter of  tidying up some of the sticks during reassembly and wiring up the original cables to the new switches.

It’s a neat way to give an old-fashioned digital joystick a new lease on life. This would be a particularly great mod for tired sticks with worn out microswitches, too. Hilarious archaic marketing video after the break. They really are whacko for Wico.

Continue reading “Wico Boss Joystick Modded To Use Cherry MX Keyboard Switches”

Hall Sensors Offer Drop-In Replacement For Drifting Game Console Joysticks

No bananas were harmed in the making of this Hall effect drift-proof joystick replacement. OK, not really — two bananas were turned to mush. But it’s OK, they’re just bananas, after all.

Why bananas, you ask? Because [Marius Heier] uses them to demonstrate what we all intuitively know — that rubbing something over and over again tends to wear it away — but engineers seem to have forgotten. Wear such as this, with resistance material rather than fruits, is what causes the dreaded drift, a problem that the world collectively spends $20 billion a year dealing with, according to [Marius].

While numbers like that seem to be firmly in class-action lawsuit territory, sometimes it’s best to take matters into your own hands and not wait for the courts. The fix [Marius] shows here is to yank the potentiometers off a PS4 joystick and replace them with contactless Hall effect sensors. The end of the shaft for each axis gets a diametral neodymium magnet attached to it, while a 3D printed bracket holds a tiny custom PCB in close proximity. The PCB has an AS5600 Hall sensor, which translates the shaft angle to an analog voltage output. After programming the chip over its I2C bus, the sensor outputs a voltage proportional to the angle of each shaft, just like the original pots, but without all the wear and tear.

While [Marius] is selling these as drop-in replacements for PS4 controllers, he plans to release all the design files so you can build one yourself. He also has his sights set on replacements for PS5 and Xbox controllers, so watch for those. This isn’t his first foray into joystick hacking, having shared his 3D Hall effect and haptic feedback joysticks with us previously.

Continue reading “Hall Sensors Offer Drop-In Replacement For Drifting Game Console Joysticks”

A 4-Player Arcade Hidden Inside A Coffee Table

[Ed] from 50% Awesome on YouTube wanted to build a retro gaming system with a decent screen size, but doesn’t have a great deal of space to site it in, so a good compromise was to make a piece of useful furniture and hide all the fun parts inside.

Building an arcade machine usually involves a lot of wiring

This video two-part build log shows a lot of woodwork, with a lot of mistakes (happy accidents, that are totally fine) made along the way, so you do need to repeat them. Essentially it’s a simple maple-veneered plywood box, with a thick lid section hosting the display and some repositioned speakers. This display is taken from a standard LG TV with the control PCB ripped out. The power button/IR PCB was prised out of the bezel, to be relocated, as were the two downwards-facing speakers. The whole collection of parts was attached to a front panel, with copious hot glue, we just hope the heavy TV panel was firmly held in there by other means!

Continue reading “A 4-Player Arcade Hidden Inside A Coffee Table”