Hackaday Links: February 9th, 2013

Hobby electronics from 1982
links-twinkling-star

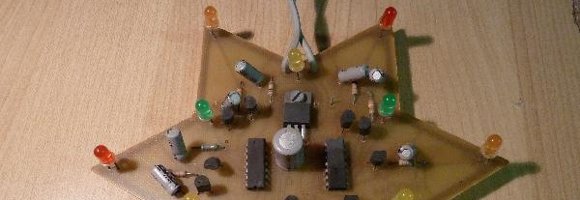
[Lennart] came across one of his projects from several decades ago. It’s a twinkling star which blinks LEDs at different rates using some 7400 logic chips and RC timers.

Solder fume extractor
links-fume-sucker

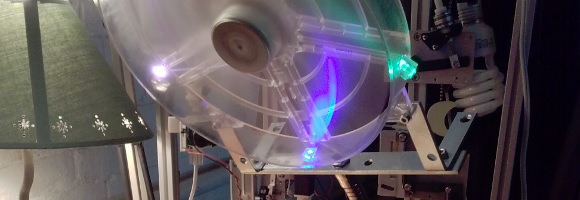
We’re still blowing the solder fumes away from us using our mouth, but this might inspire us to do otherwise. It’s a large PC fan mounted on a lamp goose neck. It clamps to the bench and is quite easy to position.

Ultrasonic liquid level measurement

links-dual-tank-level-sensors

Wanting a way to measure the liquid in these tanks without submerging a sensor, [JO3RI] turned to an Arduino and an ultrasonic rangefinder. His method even allows the level to be graphed as shown in his Instructible about the project.

Adding an ‘On’ light to save batteries

links-on-light-for-musical-toy

Dumpster diving yielded this electronic drum machine for [MS3FGX’s] daughter to play with. The problem is that pushing any of the buttons turns it on, it doesn’t have an auto-off, and there’s no way to know when it’s on. This is unacceptable since it runs on 5 AA batteries. His quick fix adds this green On LED. We wonder if he’ll improve upon this and add an auto-off feature?

CMOS Binary Clock
links-cmos-binary-clock

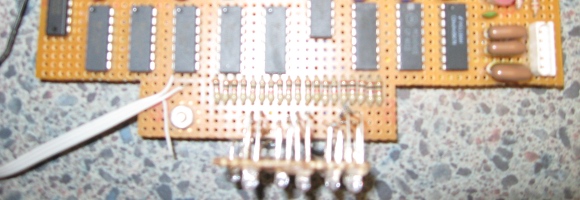
This is a portion of the guts of [Dennis’] CMOS Binary Clock project from the early 2000’s. He even built a nice case with a window for the LEDs which you can see are mounted perpendicular to the protoboard.
NASA Inspired Circadian Rhythm Lights

circadian-rhythm-light-rig

After reading about an initiative between NASA and Boeing to develop lights for the International Space Station [Rasathus] decided to give it a go at building his own. The project uses RGB pixels to build a circadian rhythm light installation. Without the normal rise and fall of the sun the sleep wake schedule for the astronauts can be pretty rough. This uses color and intensity of light in a well-defined schedule to help alleviate that. [Rasathus] is trying to bring his project in well under the $11.1 million mark which was established for the ISS.

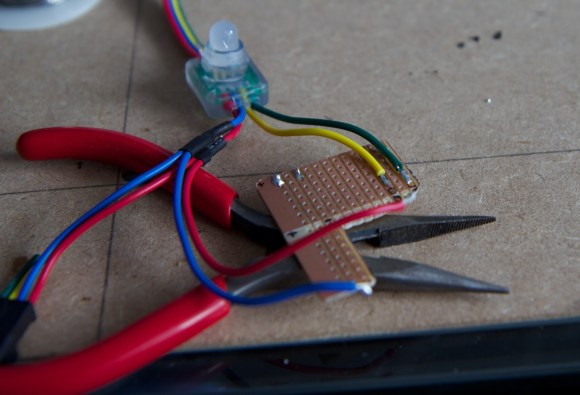
The light modules he’s using are from a strand of LEDs from Adafruit. Each is driven by a WS2801 controller, a common driver used for easy and complicated projects like this huge ball of light which our own [Jesse Congdon] tackled. The board above is the start of an adapter board for interfacing with the Raspberry Pi GPIO header. [Rasathus] wanted to make certain he didn’t fry the control electronics so he built some protection into this adapter. The control software is covered in the second portion of  the write up. We’ve embedded the video from that post after the break.

Continue reading “NASA Inspired Circadian Rhythm Lights”

Stellaris Launchpad Shield Shows Good Fabrication Technique

launchpad-shield-with-great-fabrication

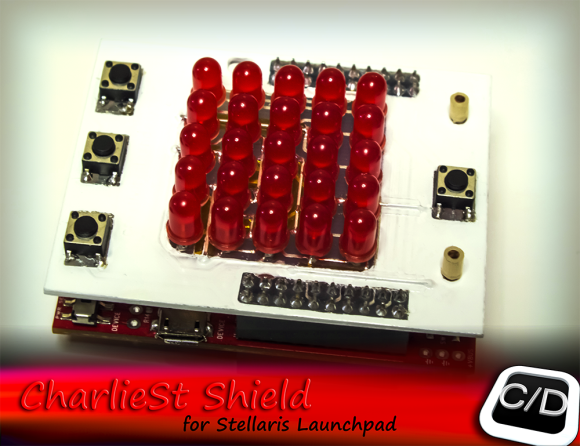
Here’s an LED and Button shield for the Stellaris Launchpad (translated) which you can fabricate at home. It gives you access to a 5×5 matrix of LEDs, and adds four more buttons. In order to cut down on the number of I/O pins required to operate the lights [Cosimo] is using the concept of Charlieplexing. This lets him get away with just six driver pins and four button pins.

It’s not just the finished product that interests us here. The fabrication itself is worth clicking through to his project post. What initially caught our eye is the use of Kapton tape as an insulator so that clipped off LEDs could be used as jumpers flat against the top side of the board before populating the LEDs themselves. After those are soldered in place he masks them off, as well as the button footprints, and uses spray paint to protect the top side of the board. The final look is more polished than most at-home project boards.

Elemental Display Is Also A LED Wall

elements

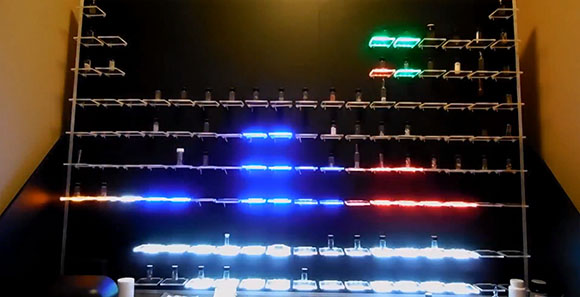
[Dan] is an element collector, someone who gets his socks knocked off by bismuth crystals and the orange vapor of bromine. Of course every element collector needs a proper display case, and since the periodic table table idea is cliché, [Dan] decided to build an elemental display that’s also a really awesome LED wall.

The build started off as most do with a few sheets of plywood and 120 acrylic shelves for each item in [Dan]’s collection. The real magic happened when [Dan]’s buddy [Bill] was called in to make the display a little more interesting.

Behind each acrylic shelf is a three-LED section of a LED strip, each part of the periodic table having a different color. The 120 individual shelving units are broken down into 16-shelf groups, each driven by a custom LED driver board. These driver boards are connected to a master Arduino with phone cables and make wonderful use of a very neat TCL5940 Arduino library.

The elemental display has a few options; all-on, twinkling, an Apple ‘breathing’ mode, and a graphic eq, as shown in the video after the break.

Continue reading “Elemental Display Is Also A LED Wall”

Infra Is A Television Made Of Infrared Pixels

ir-television-using-625-tv-remotes

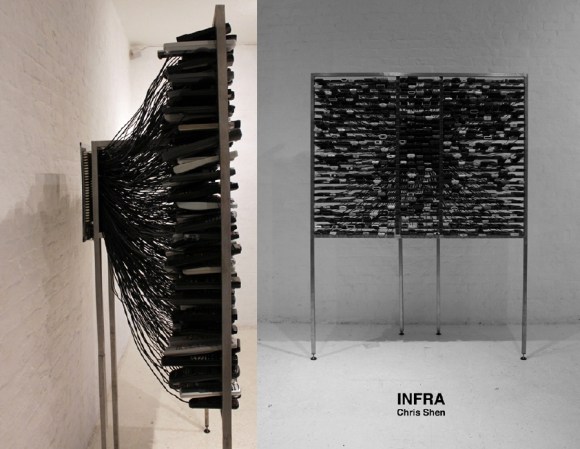
This television is perfect except for its low resolution and the fact that it can’t be seen by the naked eye. [Chris Shen’s] art installation, Infra, uses 625 television remotes as pixels for a TV screen. There’s a little bit of insight to be gained from the details which [Chris] shared with EMSL.

The remote controls were all throw-aways. Even if there are problems with the buttons, battery connectors, or cases, chances are the IR led in each was still functional. So [Chris] patched into them using about 500 meters of speaker wire.

Why 625 pixel? Because that’s how many LEDs the Peggy board can handle. We’ve seen this open source LED board driving video in other projects. Here it’s been connected to each remote using Molex connectors. Each of the headers has the same pitch as a through-hole 5mm LED. The entire board was filled with them, and a mating crimp connector terminates the end of the wire coming out of each remote. This makes setup quite easy as the remotes don’t have to be installed in any particular order as long as the physical location matches Peggy’s grid.

You can get a glimpse of the piece playing video in the clip after the break.

Continue reading “Infra Is A Television Made Of Infrared Pixels”

HDD POV Clock Takes The Best From Those That Came Before It

hdd-pov-clock

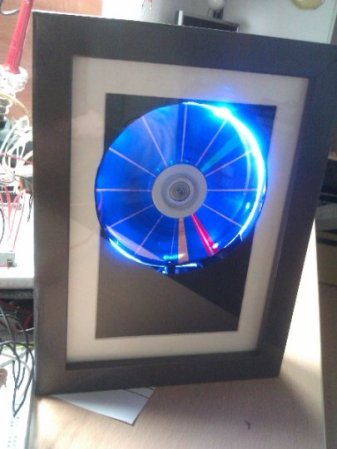
The concept behind this clock has been seen before, but [Dieter] tried to combine the best aspects of several projects into his HDD POV clock (translated). The basic principle of the design is to cut a slot into the top platter of the hard drive. This will let the light from some LEDs shine through. By carefully synchronizing the LED with the spinning platter a set of differently colored hands can be shown to mark time. We’ve been looking at the project for several minutes now and we’re not quite sure if the lines marking the 5-minute segments on the clock are generated in the same way as the hands, or if they’re marks on a faceplate on top of the platters. Check out the clip after the break and let us know what you think.

Past HDD clock project include this one, or this other one. Some of the design improvements include a better motor driver (which [Dieter] pulled from an old VCR) and the inclusion of an RTC chip to keep accurate time without the need to be connected to a computer. We also think it’s a nice touch to sandwich the hardware between two picture frames for a nice finished look.

Continue reading “HDD POV Clock Takes The Best From Those That Came Before It”

Messenger Bag LED Matrix Keeps Bikers Safe At Night

messenger-bag-led-matrix

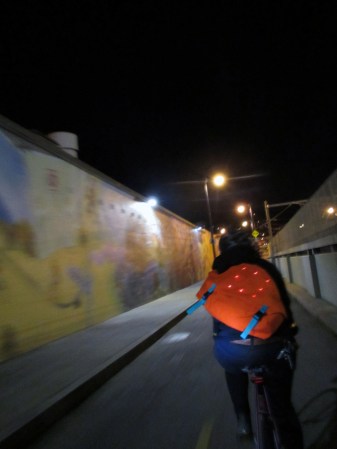
Get a little more exposure than one under-saddle bike light can provide by building your own LED enabled messenger bag. It looks like the bag itself was fabricated from scratch by [Andrew Maxwell-Parish] rather than altering an existing bag. He had a few goals for the project, the most interesting of which was to make the electronics removable. His reasoning for this is so he can get the bag past security at the airport.

The design is quite simple, there’s a large flap which is attached at the top of the bag and has a couple of clips at the bottom to keep ti closed. On the inside of the flap he sewed a snap system which holds one piece of material on which all of the electronics are attached. The Lilypad system is used (it looks like the original hardware and not the FLORA upgrade). The main unit is sewn to one side, while the Charlieplex LED matrix was attached in a grid centered on the flap. The lights shine through the orange fabric, keeping them fairly safe from the weather and giving them a reddish hue.

If you’re looking for a few more features check out this GPS enabled messenger bag.