The Champagne Of Light Bulbs

We’re all used to making our own lighting projects. Triac dimmers, LEDs, Neopixels, EL wire, there is a huge array of lighting components and technologies at our fingertips. But how many of us have made our own lighting rather than buying off-the-shelf? [Confined Maker] set out to do just that by creating an incandescent light bulb from scratch, and since he’s obviously a hacker with a bit of class he did it in an empty Dom Perignon champagne bottle.

It might seem a daunting project, but as he shows us in the video below the break, it turns out to be surprisingly straightforward with no exotic tooling required. He starts by winding a fine coil of thin tungsten wire round a dowel to act as his filament, before bringing a pair of enameled copper wires through holes drilled in the base of the bottle and out of the neck. The ends of these wires are then spliced to his filament and secured with conductive epoxy before the whole assembly is carefully slid back into the bottle. The holes are caulked with silicone, and the bottle is then carefully charged with argon. Argon is heavier-than-air, so he can do this on the bench with nothing more than a bicycle tube inflator and a drinking straw. The bottle is then sealed with a cork and more silicone, and his bulb is ready.

The first power-up with 120V mains power sees a puff of smoke inside the bottle as a coating on the tungsten is vapourised, but after that the bulb does its job well. He’s concerned about his epoxy melting, and the filament has moved to one side of the bottle so he’s not sure about the lifetime he can expect, but to make a working light bulb with such basic equipment is still an impressive accomplishment. His video below the break is eleven and a half minutes long, but well worth watching every minute.

Continue reading “The Champagne Of Light Bulbs”

Retrotechtacular: 100 Watts 120 Volts

If you read our recent feature about the Tal-y-Llyn Railway, the world’s first preserved line, you may have taken a while to watch the short film about the railway in the early 1950s. It was the work of an American film maker, [Carson “Kit” Davidson].

His other work includes some films that might be of interest to Hackaday readers, including one filmed in 1977: “100 Watts 120 Volts”. In it, he follows the manufacture of Duro-Test 100-watt light bulbs through all the stages of their assembly as neck, filament and envelope are brought together in strangely beautiful twentieth century production machinery.

Continue reading “Retrotechtacular: 100 Watts 120 Volts”

Building Triodes With Blinker Fluid

The triode is one of the simplest kinds of vacuum tubes. Inside its evacuated glass envelope, the triode really is just a few bits of wire and metal. Triodes are able to amplify signals simply by heating a cathode, and modulating the flow of electrons to the anode with a control grid. Triodes, and their semiconductor cousin the transistor, are the basis of everything we do with electricity.

Because triodes are so fantastically simple, they’re the parts most commonly crafted by the homebrew tube artisans of today. You don’t need a glass blowing lathe to make the most basic vacuum tube, though: [Marcel] built one from the light bulb used in a car’s tail light.

The light bulb in your car’s tail light has two filaments inside: one for the normal tail light, and a second one that comes on when you brake. By burning out the dimmer filament, [Marcel] created the simplest vacuum tube device possible. In his first experiment, he turned this broken light bulb into a diode by using the disconnected filament as the anode, and the burning filament as the cathode. [Marcel] attached a 1M resistor and measured 30mV across it. It was a diode, with 30μA flowing.

The triode is just a diode with a grid, but [Marcel] couldn’t open up the light bulb to install a piece of metal. Instead, he wrapped the bulb in aluminum foil. After many attempts, [Marcel] eventually got some amplification out of his light bulb triode.

The performance is terrible – this light bulb triode actually has an “amplification” of -108dB, making it a complete waste of energy and time. It does demonstrate the concept though, even though the grid isn’t between the anode and cathode, and this light bulb is probably filled with argon. It does work in the most perverse sense of the word,  and makes for a very interesting build.

Motion Light In Dark Stairwell Brightens Trips To The Basement

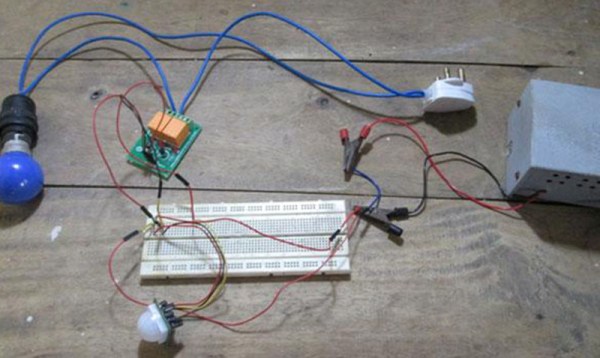
WARNNG: Walking around in the dark could be dangerous to your health! You may bump into something or worse, take a tumble down the stairs. Safety conscious [Ganesh] has come up with a solution for us folks too lazy to manually turn on a light. It’s a simple light controlled by a motion sensor that anyone can put together.

The meat and potatoes of the build is an off-the-shelf motion sensor, the same kind that is used in a home security system. We humans emit infrared energy and that is just what this sensor ‘sees’. The motion sensor is powered by 12 VDC and has a pair of DC output leads that are used to control a relay. [Ganesh] used an standard hobby relay board with built in power spike protection diode and transistor to supply the current required to trip the relay. Closing the relay sends mains power to the AC light bulb. Both the triggering threshold and the ‘on’ time are controlled by potentiometers integrated with the motion sensor.

Check the video out after the break of the device working its magic and lighting the way to [Ganesh’s] basement dungeon…

Continue reading “Motion Light In Dark Stairwell Brightens Trips To The Basement”

Raspberry Pi Used To Automate A Dimmable Light Bulb

raspberry-pi-controlled-dimmer

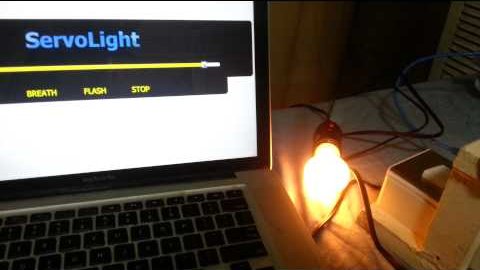
[Stephen] took the safe route when getting his Raspberry Pi to dim an AC light bulb. He didn’t roll his own outlet box with a mains-rated relay inside, going with a mechanical connection instead of electrical. By attaching a servo motor to the dimmer knob the RPi can adjust the light level without risk of electric shock.

He is using the ServoBlaster package to drive the servo motor with the Raspberry Pi GPIO pins. That’s all fine and good by itself, but he went the extra mile and designed a few different levels of functionality around the pairing. The motivation behind the hack was to build a sunrise clock that had a lot of power when it comes to luminosity. But he also plied the RPi’s networking features to serve up a web-based control. It has a slider to set the light level, as well as breath (like a slow fade) and flash features.

The servo is a bit noisy when moving quickly, but the sunrise alarm takes 30 minutes so the gears don’t really make any noise at all. Check it out in the clip after the break.

Continue reading “Raspberry Pi Used To Automate A Dimmable Light Bulb”

Light Bulb Efficiency Exhibit Updated With LED Bulb Option

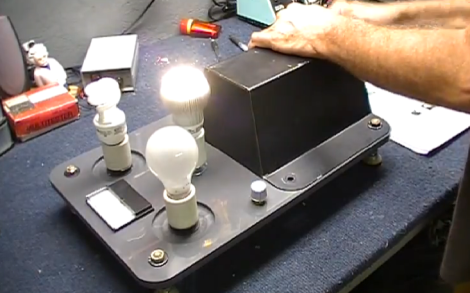
It seems like tinkerers are always being tapped to build or repair exhibit hardware. This time around it’s [Dino’s] turn. He’s been asked to alter a light bulb efficiency demo so that it includes an LED option.

The idea here is that you crank a generator to power different types of light bulbs. There’s an ammeter built in, but possibly the best feedback is knowing how hard you have to crank to illuminate the most inefficient choice. As it stands there is a toggle switch to choose between incandescent and CFL bulbs. [Dino’s] solution is to use a three-position rotary switch. He removes the toggle switch and replaces it with a socket for the LED bulb. A new location for the rotary switch is chosen and he does a bit of work to get it mounted securely. If you haven’t worked with this type of switch before he takes the time in the video after the break to explain how they work.

Continue reading “Light Bulb Efficiency Exhibit Updated With LED Bulb Option”

Light Bulb, Diode, And Capacitor Step Mains Down To 12V DC

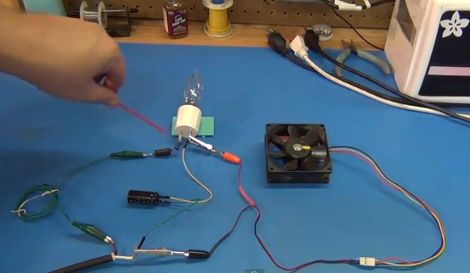
[Todd Harrison] needed a way to run a 12 volt PC fan from mains voltage. Well, we think he really just needed something to keep him occupied on a Sunday, but that’s beside the point. He shows us how he did this in a non-traditional way by using the resistive load of an incandescent light bulb, a diode, and a capacitor to convert voltage to what he needed. You can read his article, or settle in for the thirty-five minute video after the break where he explains his circuit.

The concept here is fairly simple. The diode acts as a half-wave rectifier by preventing the negative trough of the alternating current from passing into his circuit. The positive peaks of the electricity travel through the light bulb, which knocks down the voltage to a usable level. Finally, the capacitor fills the gaps where the negative current of the AC used to be, providing direct current to the fan. It’s easy to follow but the we needed some help with the math for calculating the correct lightbulb to use to get our desired output current.

Continue reading “Light Bulb, Diode, And Capacitor Step Mains Down To 12V DC”